
……..Some Simple Embellishment and Hack Ideas for the Love Notions Aria
The Aria Button Down is on sale today, Friday 4/4/2025 for just $6! If you purchase the Aria on-demand course for $25 today, you get the pattern for free. This is a great bargain as the course is regularly $30. My code LOVEMARY10LN, can be used if purchasing the course or just the pattern. This code will give you an additional 10% off. Yes, the Feature Friday patterns will now be $6 ~ I know it was a very hard decision for Tami and Tessa from Love Notions to make, but it was necessary. 🙂


I have a closet full of Aria button downs. It really is one of my favorite patterns to sew and wear. Almost all of them are long sleeved. Last summer, I realized that I wore my blue striped linen short sleeved Aria constantly. It went on EVERY vacation and getaway we went on. So~ when planning my Spring and Summer makes, I knew I needed a few more short sleeved versions.
The Aria is such a good classic shirt to have in your wardrobe, put it can also be played with to create some really custom looks! When I am out and about, I am always taking note of the classic shirts I see in all the boutiques. So many of them are simply a basic button down shirt with a little twist. Here are just a few ideas I tried.
Add Trims
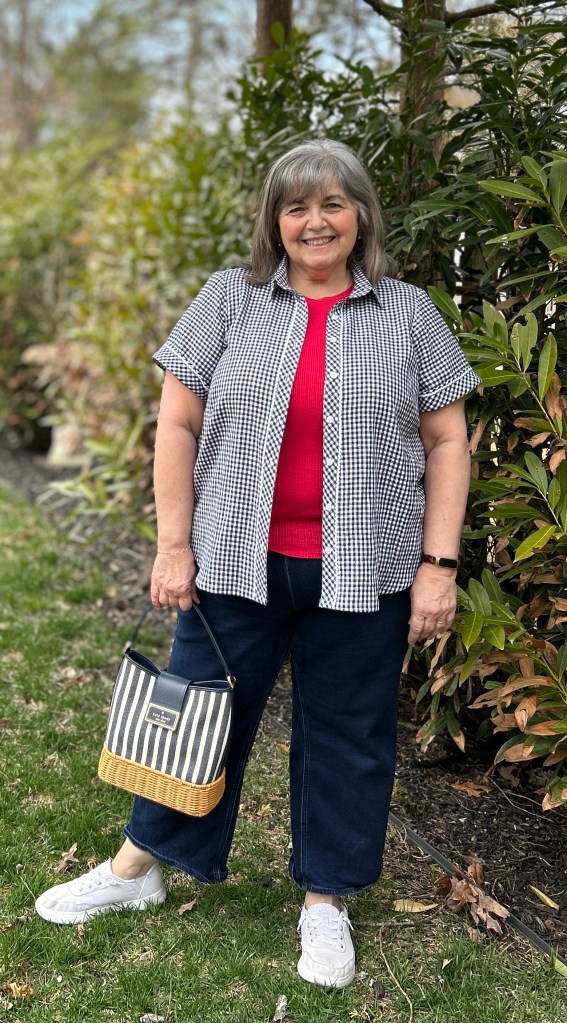
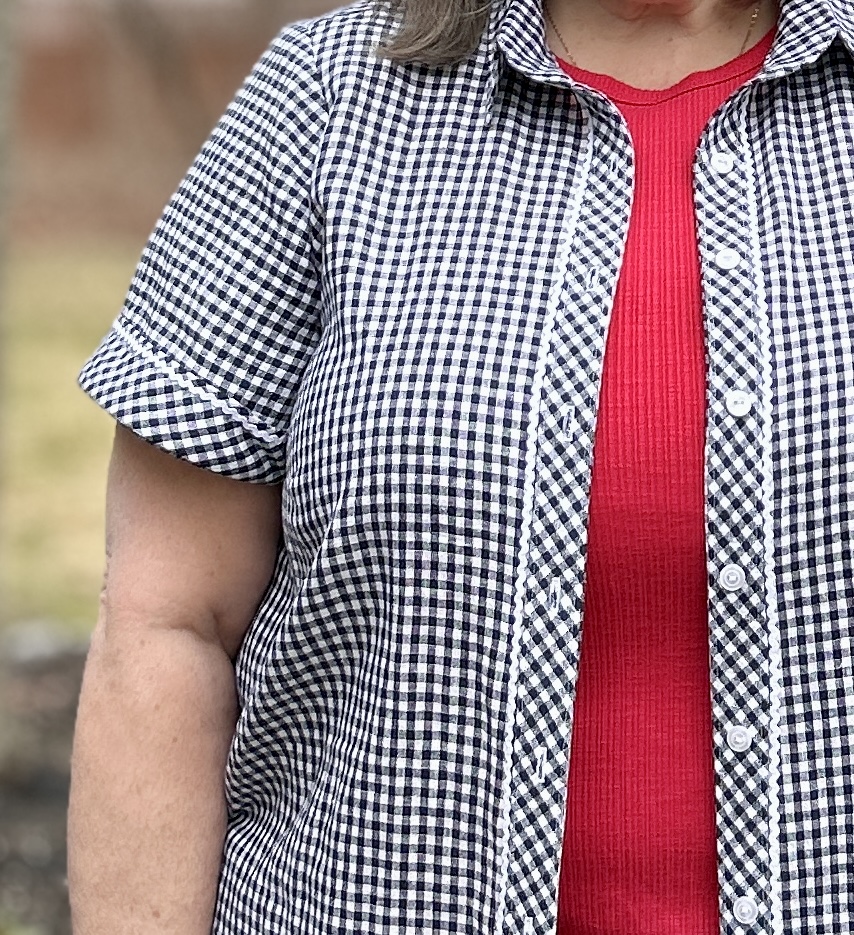
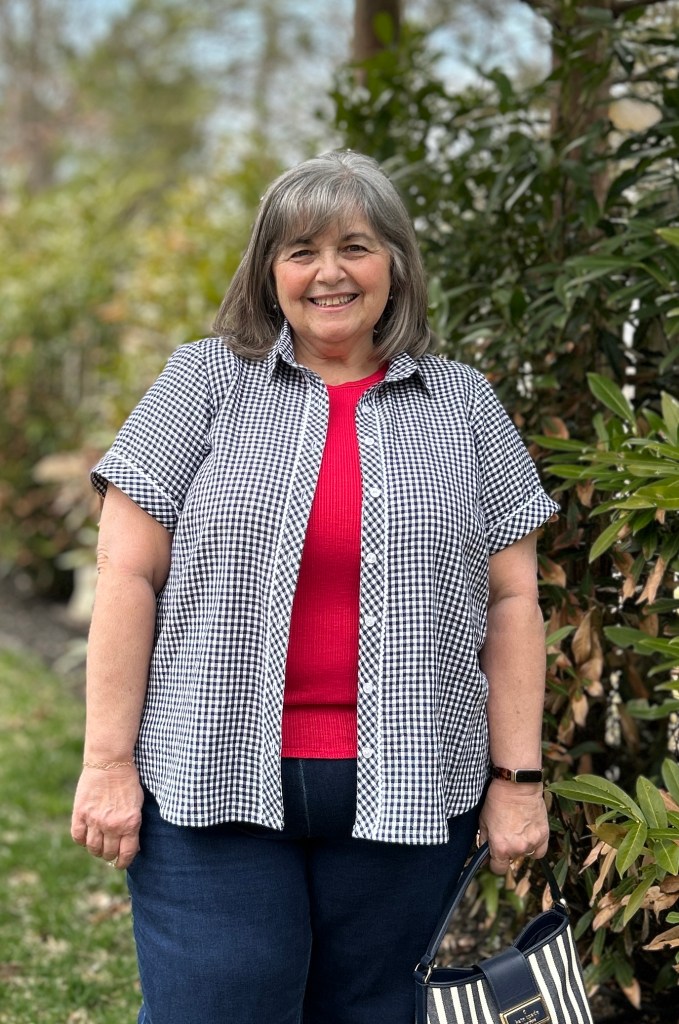
One of the easiest ways to elevate your Aria is to add trims. I LOVE Rick Rack~ I love putting it on anything that I can. (I guess it’s the Coastal Preppy in me.). For this navy 100% linen gingham Aria, I added baby rick rack next to the button plackets and along the edge of the sleeve cuff.
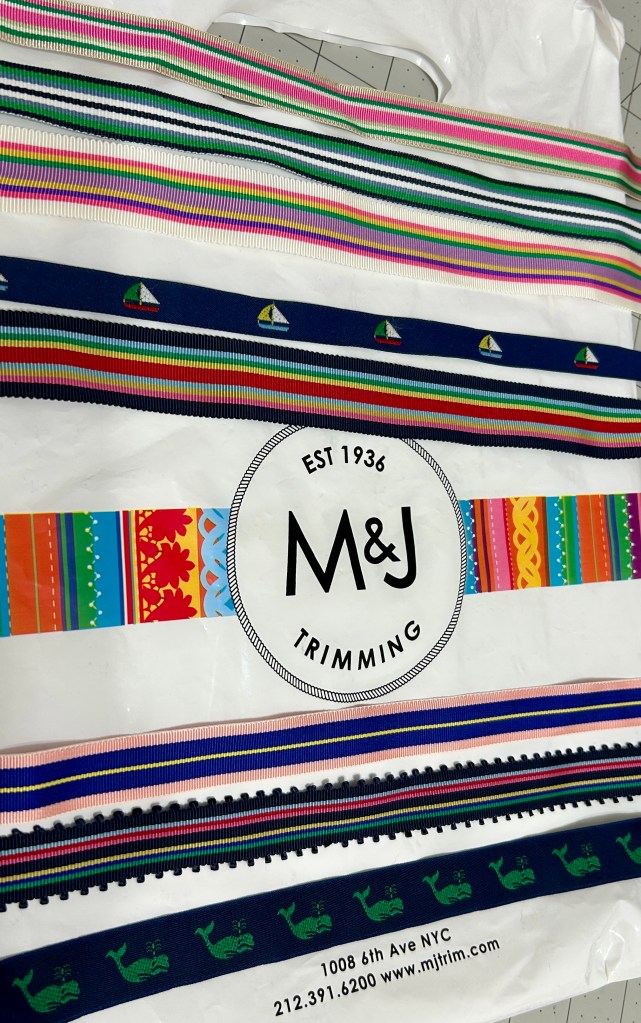
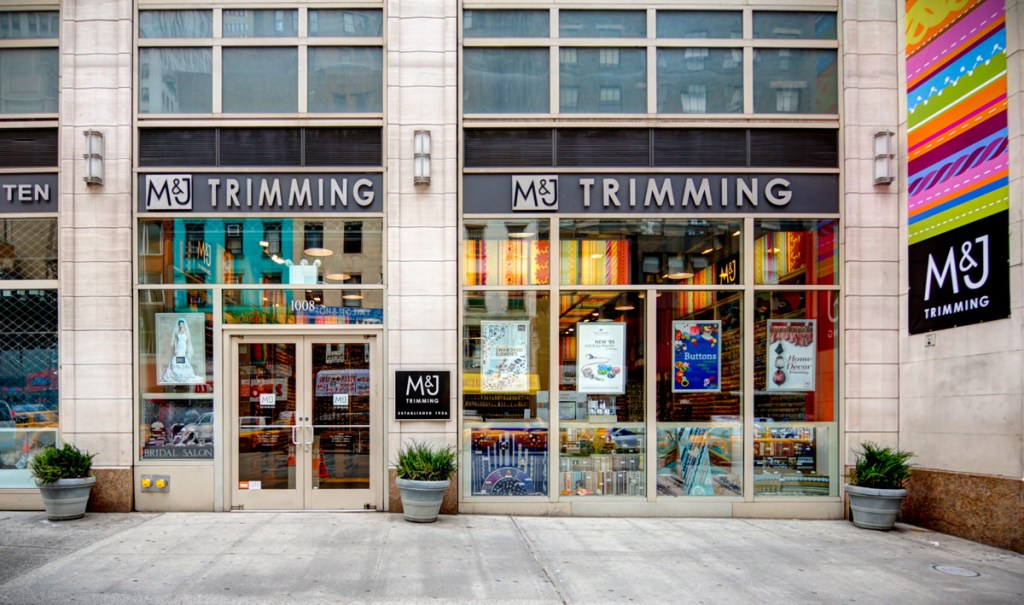
At the end of last summer, I visited the M & J Trimmings in the NYC garment district and bought yards and yards of ribbon to add to some Aria shirts. All summer long, I keep seeing basic button down shirt with ribbon embellishments selling for $100 a piece. I’m so glad I stocked up on these ribbons, because M & J sadly announced in the Fall that they would be closing after being open in the Garment District since 1936! I visited so often when I worked in the city in my early twenties and again in the early 2000’s when my daughter was in college just a few blocks away. Below is a photo of some of the trims you will be seeing added to future Aria blouses! If you want to read a little about M & J Trimmings visit this Vogue article. 😦
Play With Stripes (and Plaids)
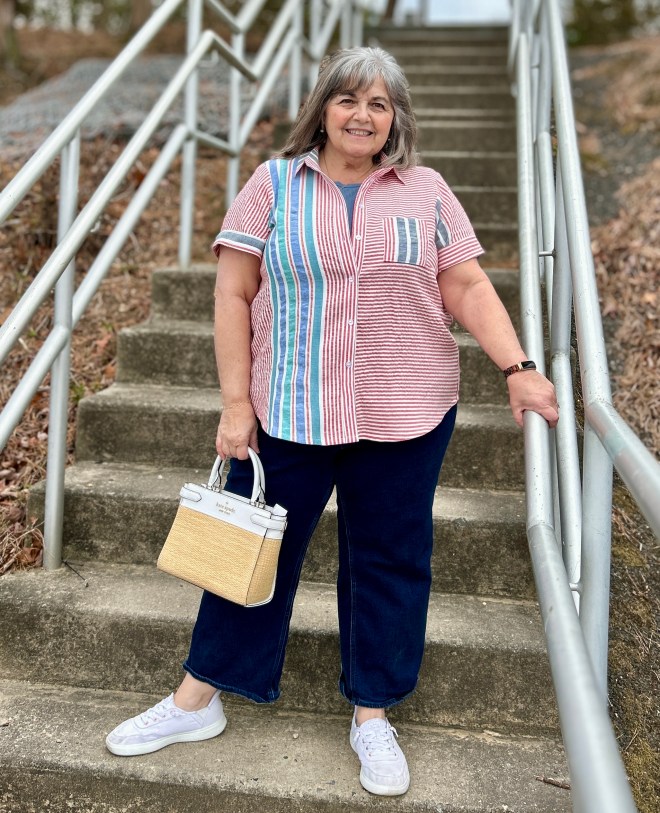


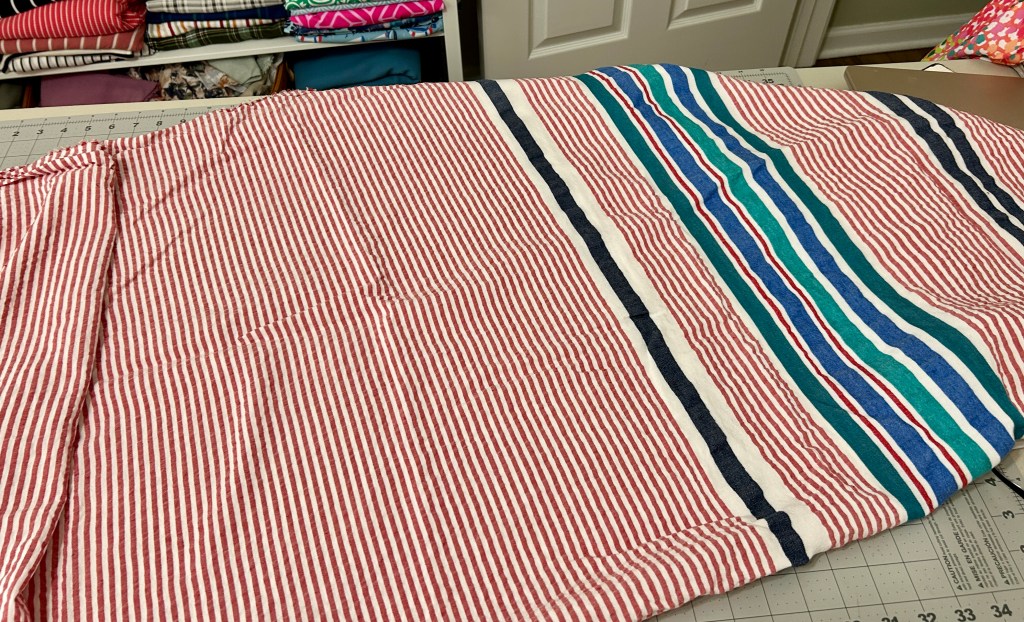
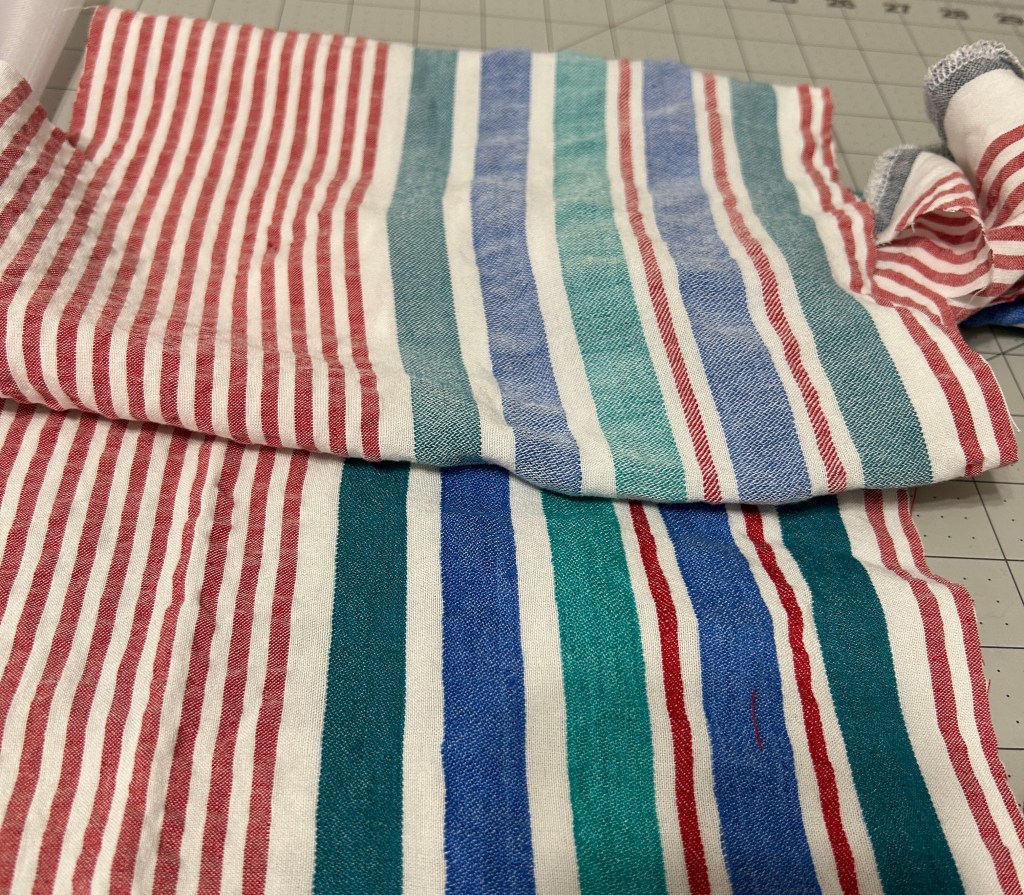
I am a sucker for stripes AND seersucker!!! There are a lot of reasons to love seersucker. One of the best things about the preppy puckered fabric is that it doesn’t wrinkle. It doesn’t need to be ironed, which makes it great for traveling. An added bonus is that it is also very cool to wear. I found this seersucker at Mood Fabrics last summer and I knew it was destined to be an Aria. It had so many different sized and color stripes I knew it would be fun to play around with. Below is a photo of the fabric before I cut into it! Technically, a seersucker doesn’t have a right or wrong side. You can these that the blue and green stripes looked different on each side. I made the personal decision to use the more. muted side. The red and white stripes were identical on both sides.
Want to know more about seersucker? Yes, I am a fabric nerd and love reading about origins of different fabrics. Visit this blog post for some interesting facts about seersucker!
Here are the 3 Arias that were on constant rotation last summer. The light blue striped linen version that was worn soooo often! I’ve also included the color blocked linen version I made along with a cotton plaid version~ notice I used the plaid on the bias for the pocket and placket.


Create A Casual Jacket
Last Fall, I used a piece of 100% mid weight linen that I have been holding on to for so long. I wanted an Aria that I could wear that’s loose and casual that I could wear as a jacket. So I made a few VERY simple adjustments and wound up with the loose casual overshirt/jacket of my dreams. I wore that rust plaid version so much last fall I couldn’t wait to make another one.
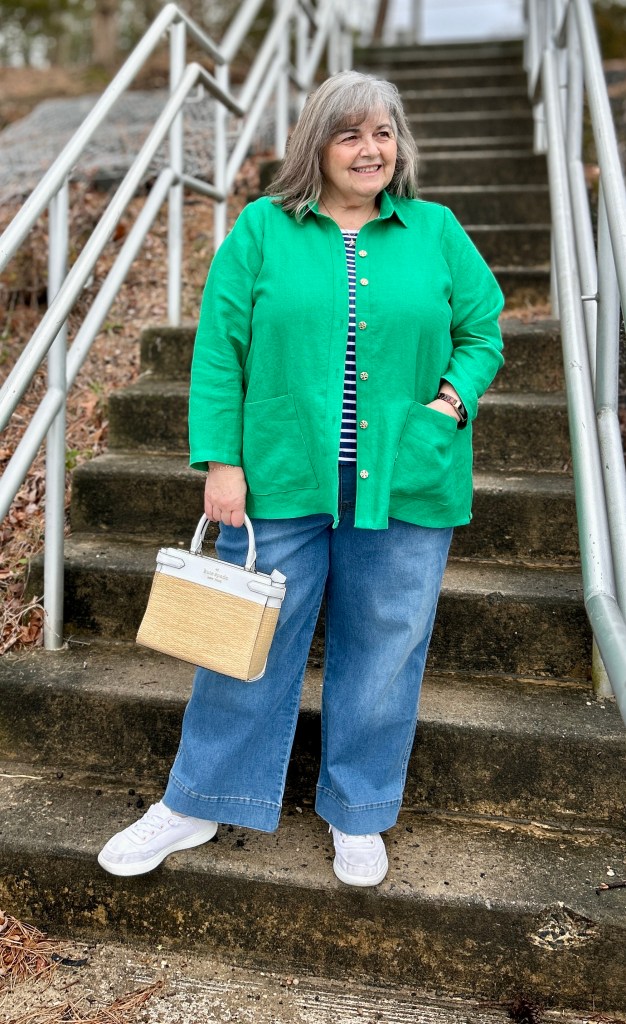


I am in LOVE with my newest version. This Kelly green 100% linen made the perfect “jacket” for my coastal preppy wardrobe. I can’t even really call this a hack because it was soooo simple.
- Added lower patch pockets (see Vest directions below)
- Omitted the cuff and simply added 1″ to the length of the sleeve. Note I have short arms so you may need to add more length than tat.
- Hemmed the sleeve with a 1″ hem.
- Used the tunic length version of the Aria and simply straighten the hem.
Create A Vest
Last year, I purchased this floral linen because I loved the floral print and color. My intention was to make an Aria, however this linen was just a tad too thick for what I had in mind. Last Fall I made a wool vest using the Aria and I wore it so often. I decided that this linen would make a perfect vest for Spring and Summer! You can see my wool version HERE. This vest is a very simple hack and one more way you can use your Aria pattern.
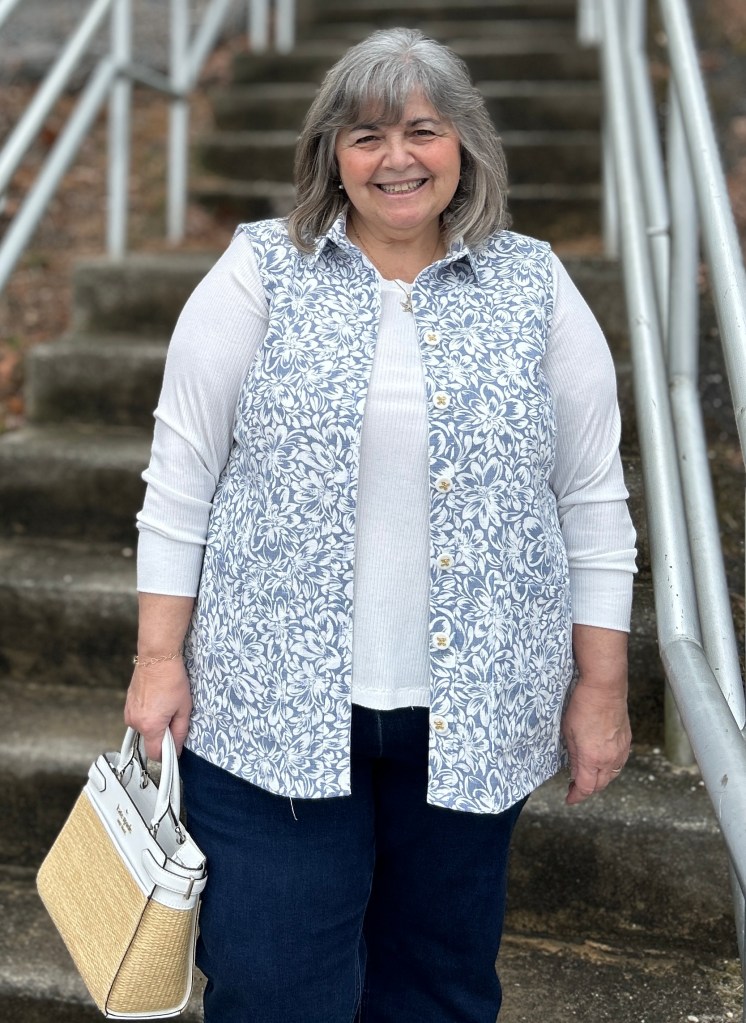

Changes I made were:
- Removed curve from the lower edge.
- Finished armscye with bias binding. I used store bought since this linen was fairly thick.
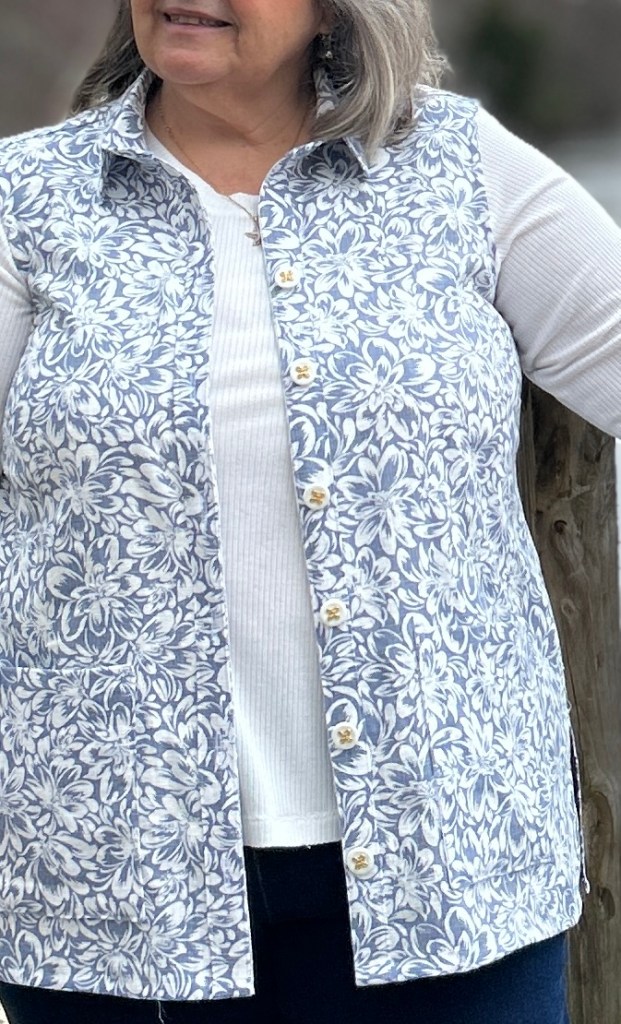
- Omitted the top pocket and added 2 lower lined pockets.
- I cut my pocket pieces 7″ X 8 1/2″
- To line the pockets ~ Cut pocket lining pieces 2″ shorter than pocket pieces but the same width.
- Sew pocket and lining right sides together with a 1/4″ seam across the top edge. Press seam flat.
- leaving a small opening at the bottom(note the main fabric will fold over since the lining is shorter)
- Turn right side out and press.
- Topstitch along top edge if desired. Attach to shirt/jacket.
Sew MaryMac’s Tips for Sewing the Aria
- Note on the Cutting page (page 7) there are Piece Prep instructions at the bottom of that page. Don’t skip the stay stitching step!!!!
- On page 13, step #4~ I found it helpful to use a water soluble marking pen to draw my stitching line for the collar notch area.
- Page 13, step #5~ PRESS!!! When topstitching this step, I found it helpful to begin at the center back of the collar/yoke and work my way around.
- PRESSING!!! This can really make a difference in your completed garment. I am definitely team press as you go. There are times when you just can’t wait until the end to press everything. Making a classic shirt like the Aria really calls for pressing. It truly can make the difference between handmade and homemade.
- Remember that the button placement markings on the front band piece are just a suggestion. I rarely follow these. I try on my garment and start by placing a button at my bustline to avoid gaping. I actually used 8 buttons on my shirt instead of 6. This is the advantage of sewing our own clothes. I have NEVER been able to buy a classic button-down shirt that I can button or wear comfortably.
- If making your Aria in a plaid or stripe, cut plackets on the bias so you don’t need to work about matching them.
Nervous about sewing a button down shirt? No need to be! There is an awesome sewing course you can purchase that holds your hand every step of the way. I have personally viewed the entire course and must say it is amazing! You can find the Aria Course HERE.
If you’d like to see more of my Aria Collection, visit this blog post.
If you’d like more details on the Aria pattern and how I blended sizes for my petite pear shape, visit this BLOG POST.
Thanks for stopping by! I truly appreciate all of you that visit! If you enjoyed this blog post, consider subscribing to my blog to stay up to date with all my posts!
Mary Anne 🙂
Remember to follow me over on Instagram to see all my latest makes! @sewmarymac
You can also follow my Facebook Page~ Sew Mary Mac. On this page you will find information on my makes from all pattern companies. If I know of any good sales(pattern or fabric) I will also feature this information. I have had many of my loyal followers send me friend requests on Facebook. I do post in the Love Notions group under Mary Anne MacLean, however this Facebook account is private. There is no sewing content on that Facebook Account.
You can get the Aria Button Down pattern HERE.
This is an affiliate link. It costs you nothing to purchase from this link, it just helps fund my fabric addiction which allows me to test and review more patterns.
To receive an additional 10% off the pattern price, use this coupon code LOVEMARY10LN. This coupon code can be used at anytime on any pattern….even a $6 Feature Friday pattern. My code does change quarterly, so please always check the newest blog post for an update if you find a code isn’t working. This code will be good through the end of June 2025. Beginning July 1, 2025 my code will change to SEWMARY10LN.
Fabric Resources
Metro Textiles
The Navy linen gingham is a designer headstock from Metro Textiles in the Garment District of NYC. The solid green mid weight linen is also from Metro. I’ve used this linen several times. I made a bright pink sleeveless Aria dress when the Aria released. You can see that dress HERE.
Metro has an online store as well. Follow them on Instagram to see the great fabrics Kashi gets in as well as all the sale promo codes. If you ever happen to be in NYC, it is a place you must stop in!
Mood Fabrics
The Red and White Seersucker is from Mood Fabrics, also in the NYC Garment District. They also have an online store.
Style Maker Fabrics
The blue and white floral linen is from Style Maker Fabrics. This is one of my most favorite online stores! They are a small mother/daughter owned store. They always have a beautiful selection of fabrics that are of very high quality.


All of your Aria makes have me inspired!
😍
LikeLike
Thanks!! I always have a new Aria on my mind!
LikeLike