
…A Mini Tutorial Blog Post
Today, 2/13/26 isn’t a bad luck day, it’s actually a lucky day because the $6 Friday Pattern is actually 3 patterns! The whole Clef Coat Collection is on sale today, each one just $6 a piece. If you purchase 2 or 3 of the Clef Coat pattern you can get an additional 10% off by using my code 10MACSEWS. This means the Ladies Clef Coat, the Mens Bass Clef CoatAND the Kids Treble Clef Coat are all on sale.
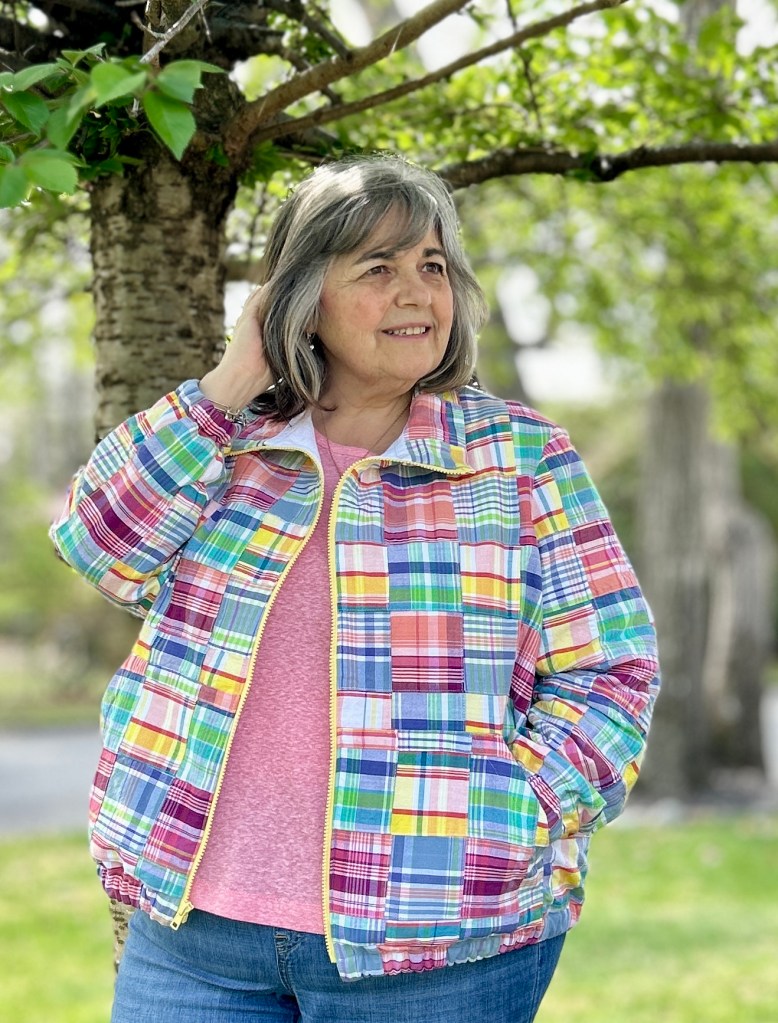
When I tested the Clef Coat and made a few versions back in January, in the back of my mind, I knew it would be perfect for a Summer vacation coat! We spend a lot of time on the New England Coast where jackets are always needed in the evenings and when out on the water.


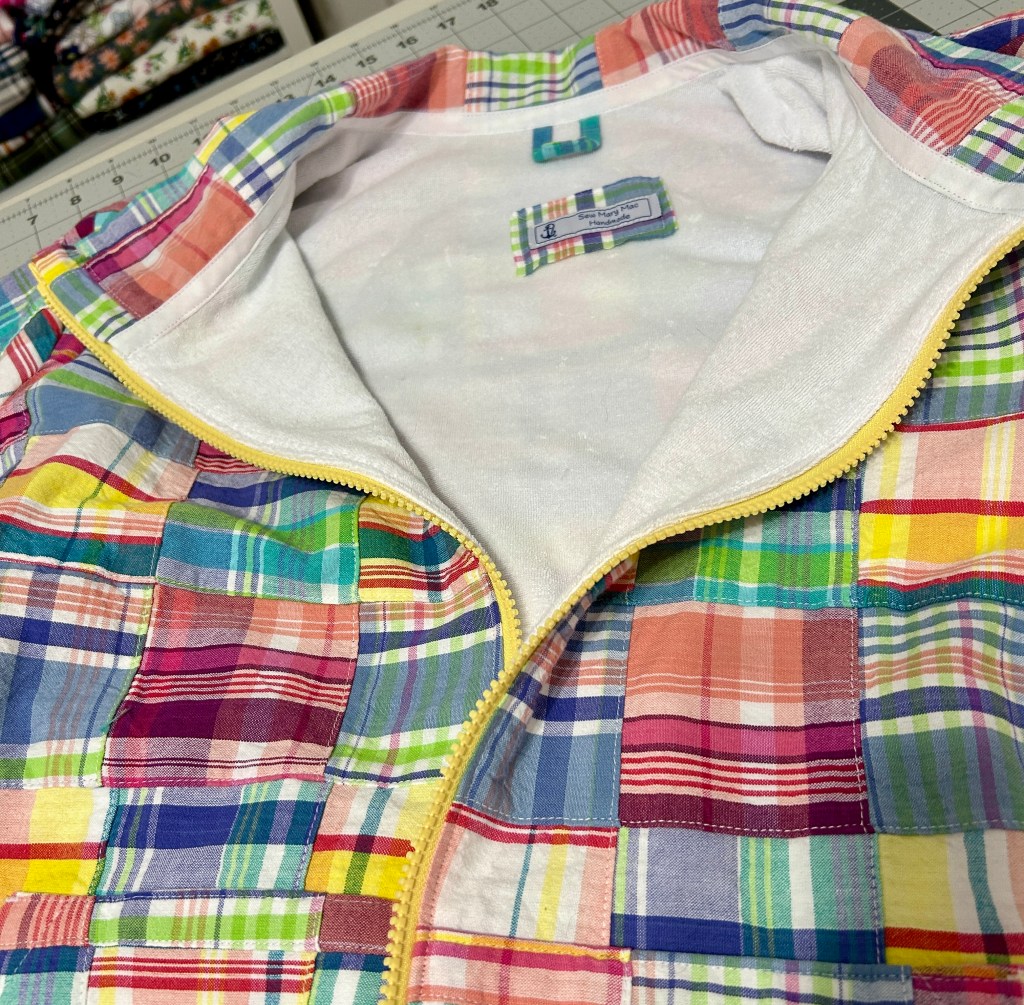
I purchased this madras patchwork fabric at the end of last summer from Cali Fabrics. At the time, I didn’t know what I would make with it. But, once I made my first Clef Coat a few months ago~ I knew it would be perfect for a Summer Clef Coat. I decided to really get a lot of use out of this coat that I would line it. I used a knit Loop French Terry from Raspberry Creek Fabrics to line my newest Clef. It was much easier to do than you might think!
First, I reviewed the You.Tube video that Tessa, from Love Notions made. Her lining directions were for the hooded version of the Clef. I highly suggest viewing that video before you begin. You can find that video HERE.
The hooded version is actually a tad bit easier to line than the collared version. The Video linked above is very helpful~ but a few changes need to be made for the collared version.

How to Line A Collared Clef Coat
…Note: You will still need to follow some of the directions from the Love Notions tutorial
- Cut 2 sets of your pattern pieces, one in main fabric and one in lining fabric. You will cut the sleeves, front, back and pockets in both fabrics. Only one collar is needed, cut in your main fabric.
- Pockets~ Trim off the “flap on the pocket lining. This is to reduce bulk.
- I like to finish off the pocket opening edge with bias tape for a more professional look. Press and sew pockets on to main front as indicated on the pattern tutorial.

with bias tape

4. Sew main pieces together. Follow pattern tutorial for sewing together the front and back, attaching sleeves and side seams.
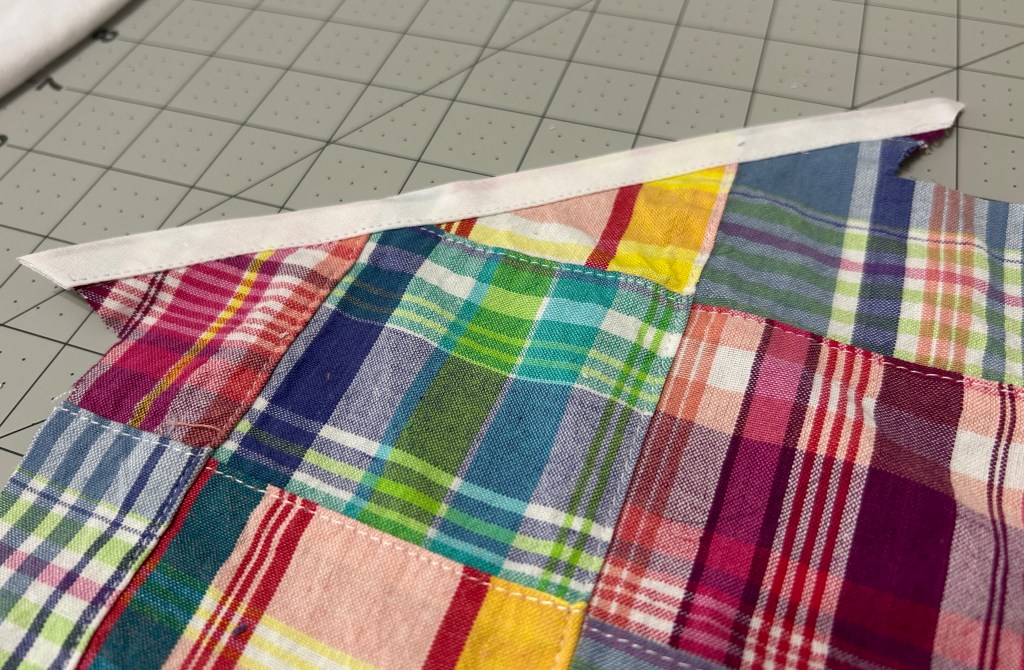
5. Finish one long edge of the collar. I prefer to finish this with bias tape. It will give the coat a nice clean finish on the inside, and it can be seen when the collar is not zipped all the way up.
6. Attach the unfinished edge of the collar to the main coat fabric, as per tutorial.
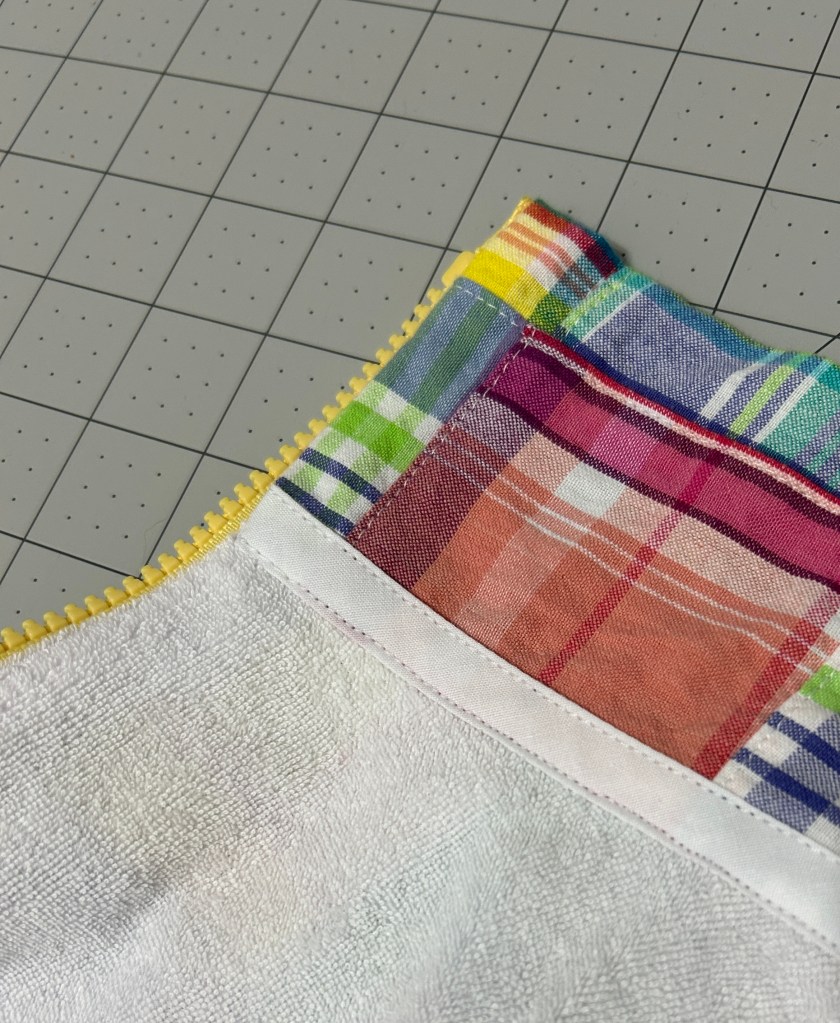
7.. Install zipper according to pattern tutorial. You are attaching the zipper RST to JUST the main front (and collar) edges.

Step # 7 completed. For Step#11 you will place the lining RST with these pieces and pin the front edges. The neckline edge of your lining should extend 3/8″ past the collar seam.
8. Before sewing lining pieces together, trim off 1″ at the lower edge of the sleeve and hem. This is to reduce bulk for the elastic casing.
9. Sew lining pieces together. Sew front and back at shoulder seam. Attach sleeve and then sew side seams.
10. Since my lining is a knit, I placed a strip of tricot knit interfacing along the center front edges to help prevent it from stretching when doing the next step. If you lining is woven, this isn’t necessary.
11. Sandwich the zipper in-between the lining and your main fabric RST. Go back and check out Tessa’s video to see this. This is shown at 13:25. Sew down the front edges along the zipper. You will be sewing all 3 layers together ~ Main, zipper and lining. Refer back to the video if you need more visual directions. Remember to ignore the hood directions. When lining up the front edges, the neckline edge of the lining should extend 3/8″ past the front/collar seam of the main fabric. This is so that the raw edge of the lining will be enclosed in the next step.
12. Turn coat side right side out, pushing sleeve lining into the sleeves.
13. Line up the neckline edge of your lining with the raw edge of your seam allowance( where the collar and main body are sewn together. Pin then baste in place.
14. Fold collar over RST over the zipper tape. Stitch short ends through all the layers as per the tutorial. Turn collar right side out.
15. Pin down the inside edge of the collar(along bias tape) making sure you care covering the raw edge of the lining. Stitch in place. I like to stitch this down from the inside of the coat so that the stitching looks nice and neat. Some people prefer to stitch in the ditch from the outside~ like the tutorial directs you to.
16. Sleeve Hems
- Finish the sleeve hem of the main fabric with a serger or press up 1/4″.
- Your lining will be shorter, since you trimmed off one inch earlier.
- Fold up the sleeve hem 1″ to the wrong side, pin in place making sure the edge of the lining is enclosed.
- Stitch in place, leaving an opening to insert elastic.
- Insert elastic.
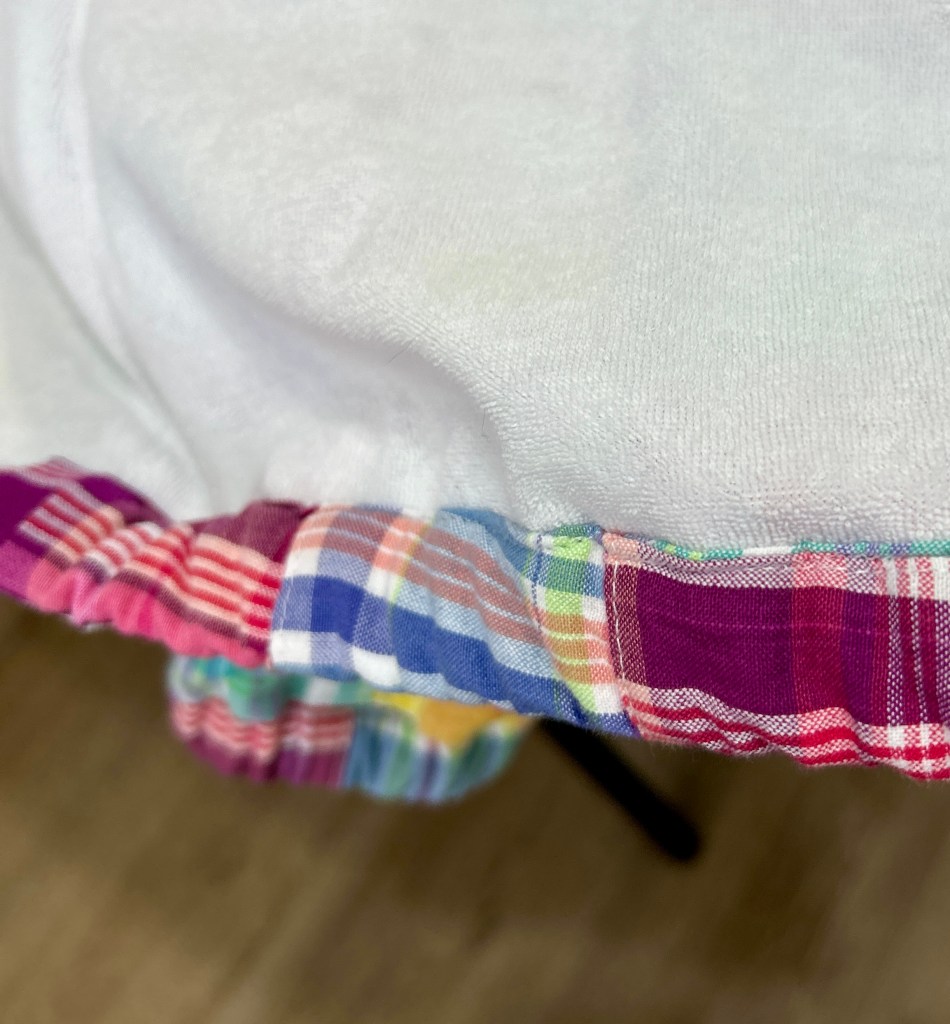
17. Bottom Hem
- Finish the raw edge of the main fabric with a serger or press up 1/4″.
- Baste lining to main fabric to keep in place. You will now treat this as one fabric.
- Continue with the direction on page 25 of the tutorial for finishing the bottom edge.
18. Finishing: Finish coat by topstitching around the zipper and collar (as per the very last step of the tutorial)

Whenever I make jackets or coats, I love adding a loop so I can hang it easily on the coat rack I have in my hallway. They are super simple to add~ the hardest part is remembering to add it before stitching the collar closed! If you want the details on how I made my hanging loops, visit this blog post.
I also love adding my handmade tags to my makes. I order mine from Dutch Label Shop.
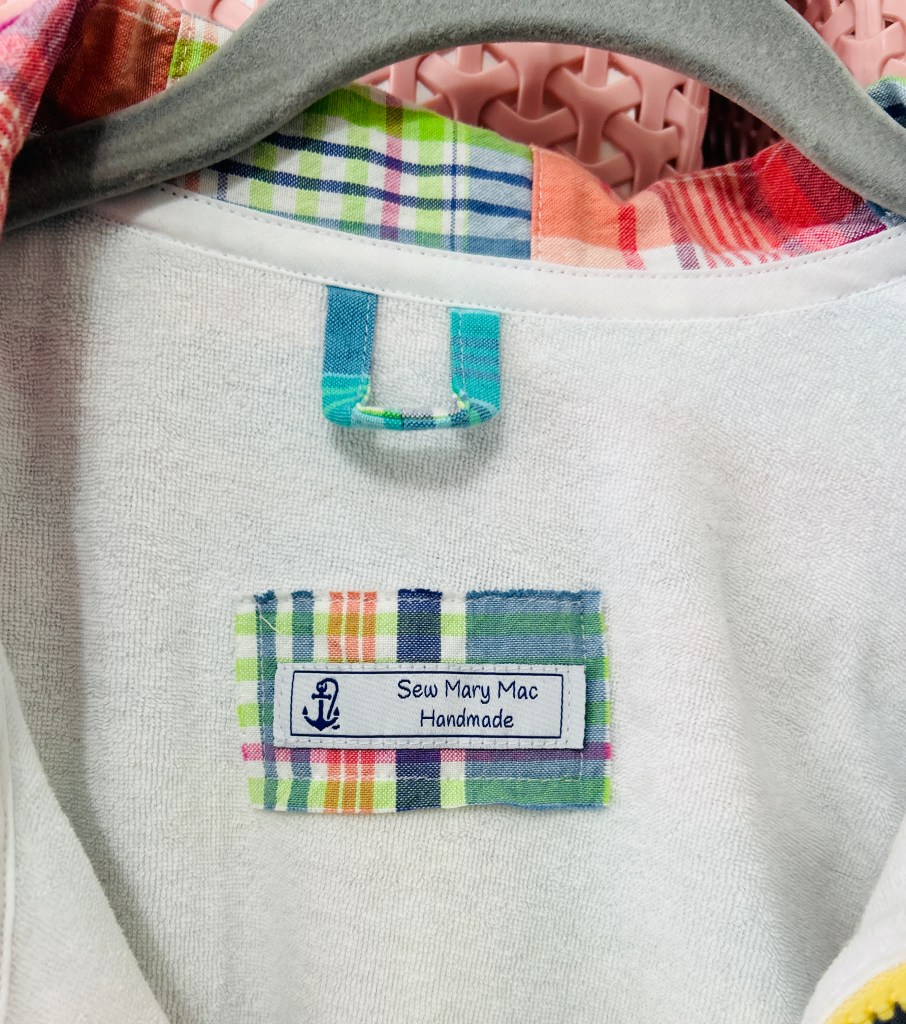
Close up of the Loop Terry I used for the lining.
For full details on the Clef Coat pattern, visit this blog post. On that blog post I discuss my fit alterations and modifications along with some sewing tips for the Clef.
For more vacation sewing ideas, visit this blog post.
Thanks for stopping by! I truly appreciate all of you that visit! If you enjoyed this blog post, consider subscribing to my blog to stay up to date with all my posts!
Mary Anne 🙂
Remember to follow me over on Instagram to see all my latest makes! @sewmarymac
You can also follow my Facebook Page~ Sew Mary Mac. On this page you will find information on my makes from all pattern companies. If I know of any good sales(pattern or fabric) I will also feature this information. I have had many of my loyal followers send me friend requests on Facebook. I do post in the Love Notions group under Mary Anne MacLean, however this Facebook account is private. There is no sewing content on that Facebook Account.
You can grab the Clef Coat pattern HERE.
This is an affiliate link. It costs you nothing to purchase from this link, it just helps fund my fabric addiction which allows me to test and review more patterns.
To receive an additional 10% off the pattern price, use this coupon code 10MACSEWS. This coupon code can be used at anytime on any pattern order of $8 or more. Typically it couldn’t be combined with the $6 Feature Friday pattern sale~ but if you order 2 or 3 of the Clef Coat patterns it may be used! . My code does change quarterly, so please always check the newest blog post for an update if you find a code isn’t working. This code will be active through March 2026.
Fabric Resources
The Madras Patchwork fabric is a Robert Kaufman fabric. I purchased this last summer from Cali Fabrics. It is no longer in stock there, however it often pops up in various online fabric stores. If you search “Robert Kaufman Nantucket Madras” you will see some in various color combinations available from some Etsy shops and other retailers. Look specifically for the Robert Kaufman brand, since I have found others sometimes are not constructed as well as this.
The Loop Terry I used for my lining was purchased from Raspberry Creek Fabrics. It is still available in white and a few other colors. You can find all the Loop Terry HERE.


your jacket is cool! Love the colors!
LikeLiked by 1 person
I’m still nervous to try the lining but much prefer the finish on a woven fabric than the other options. I will definitely be using your blog to help me when I get round to doing it.
LikeLiked by 1 person
You can do it!!!! Be sure to let us all see!!
LikeLiked by 1 person
Pingback: Sewing A Classic Fall Wardrobe With Love Notions Patterns |
Pingback: A Closet Full of Clef Coats |
Pingback: My Favorite Love Notions Makes Of 2024 |