

………A Cuddly Coat Pattern From Love Notions
*Updated 2/2024 and 10/25 with some new photos
The newest pattern from Love Notions is here and it’s a good one! The Coda Quilted Coat is the perfect piece to add to your outerwear collection. I’ve made mine from a bed quilt from Home Goods! The possibilities are endless!
The Coda Coat is the perfect pattern that helped me create a “Coastal Grandma” style coat for my wardrobe. I must warn you though, this pattern is dangerous. Ever since I made mine, I spend hours of dreaming different ways to make another one. And yes, I will be making another one! The Coda is addictive~ you can’t make just one!! The Coda Coat is the a Feature Friday pattern today 10/24/2025 ~ just $6 today. Use code 10MACSEWS for an extra 10% off!.
The Details
The Coda Quilted Coat is such a versatile pattern. Are you a quilter? You can piece the back and quilt it yourself with the help of Alderwood Studio’s design and instructions. Not a quilter? The Coda could be your chance to give piecing and quilting a try. Any way you choose to make it~ it’s gonna be great!
- Three neckline options: bias, hood or collar
- Large pockets; with our without flaps
- Pieced or Quilted options
- Can be classic, preppy, boho or eclectic depending on your fabric choices

Fabrics and Notions
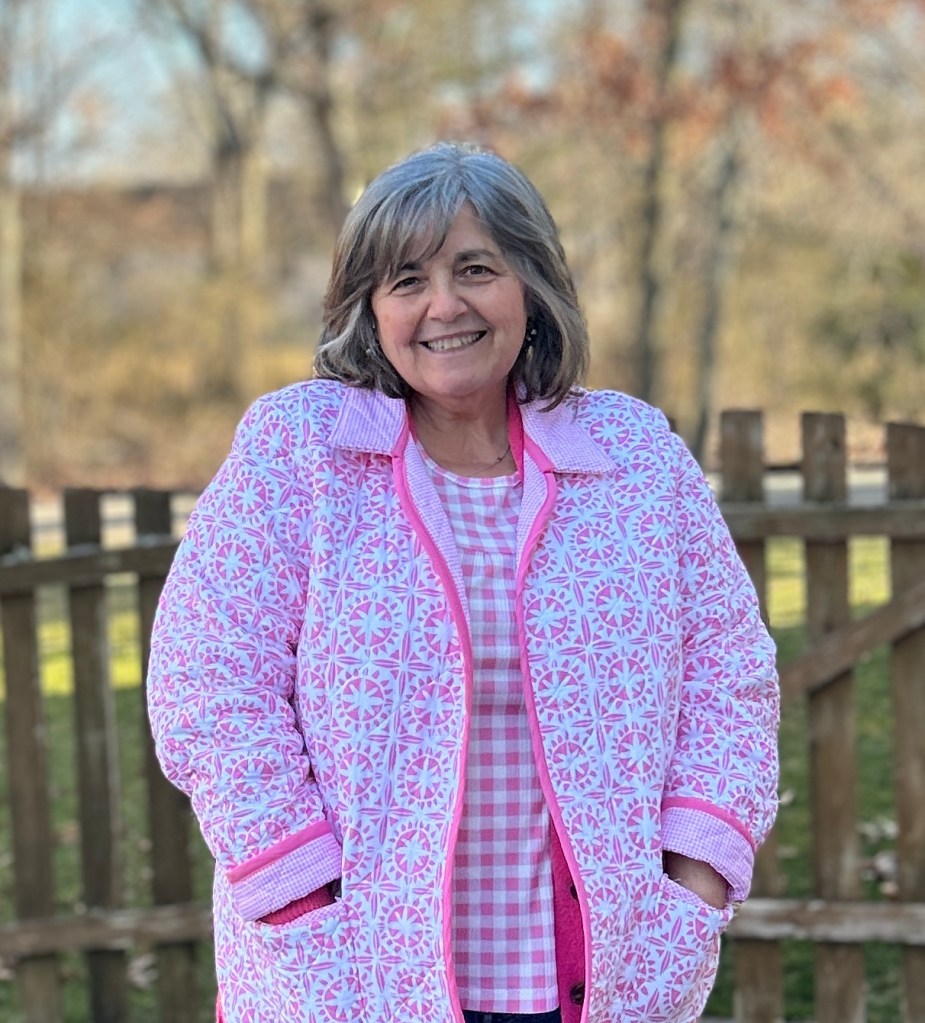
The Coda Quilted Coat is designed for STABLE woven fabrics. For a super quick sew use a double sided pre-quilted fabric. You’ll just want to make sure you finish your inside seams. I wasn’t finding any double sided pre-quilted fabrics that I liked~ so I just used a bed quilt that I bought at Home Goods!
You may also sew the Coda in denim or twill and then line it. My first tester version was made in a twill that I lined with gingham. I’ll show you that version below. This version doesn’t fit me a well as I would like. But I used the results of this version to modify my pink coat and make it work perfectly for me.
You can make this a true quilted coat by using quilting cottons with a batting and lining. It’s your choice it you want to actually piece and quilt the back. One day I think I will make a pieced version using up all the linen scraps that I have. (I never throw away linen scraps no matter how small they are!)
Notions
- Outer jacket fabric
- Batting and lining, is desired or needed
- 1/2″ double folded bias tape; prepackaged or make your own.
- 5 1/2″ buttons or snaps. (I have chosen not to do either right now. I’m going to wear my coat a few times and then decide.)


Sizing and Alterations
The Coda Quilted Coat pattern is available in sizes XS through 5X. A full bust front pattern piece is included. The Coda is meant to be a layering outerwear piece. Choose your size based on your high bust measurement. If your full bust is more than 4″ larger than your high bust measurement, use the full bust front pattern piece. Remember that using the full bust front pattern piece increases the waist and hip finished measurements by 2″ each.
The Coda is meant to hit at the high hip. The center back length is 22.75″. Remember to keep this in mind when selecting your size. All Love Notions Pattern are designed for someone who is 5′ 5″. You should take this into consideration when you plan yours.
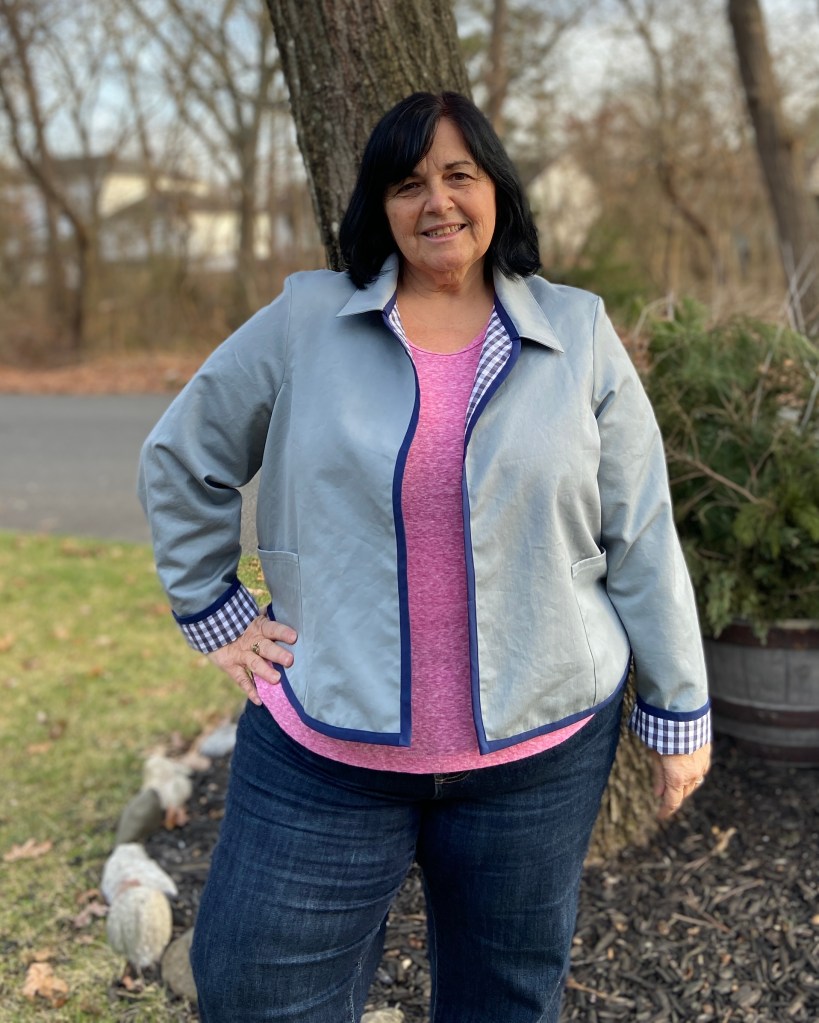
First Tester Version: Gray twill and navy gingham version. XL Full Bust graded out to a 2X hip. Coat was not shortened, sleeves shortened by 1″.
On this test version I used the full bust front piece~ if you look closely you can see that I have too much excess fabric on the sides right underneath the armscye. So I made another muslin to check the XL regular front piece to see how that fit me. I was happy with that so I proceeded.

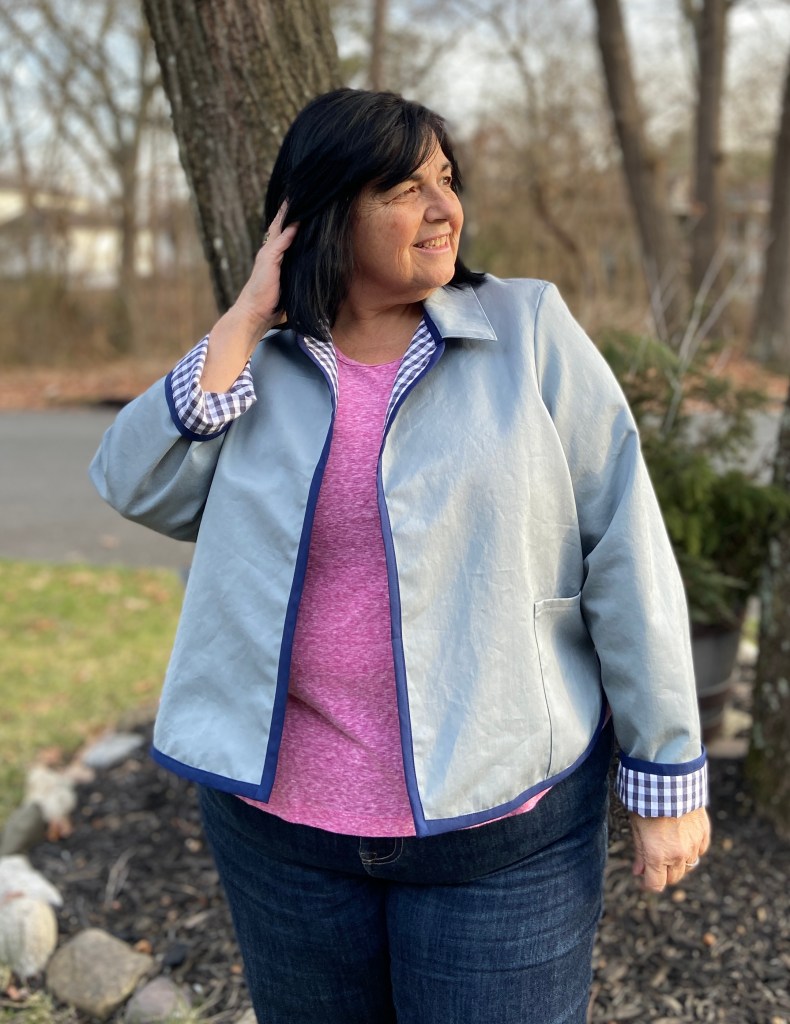
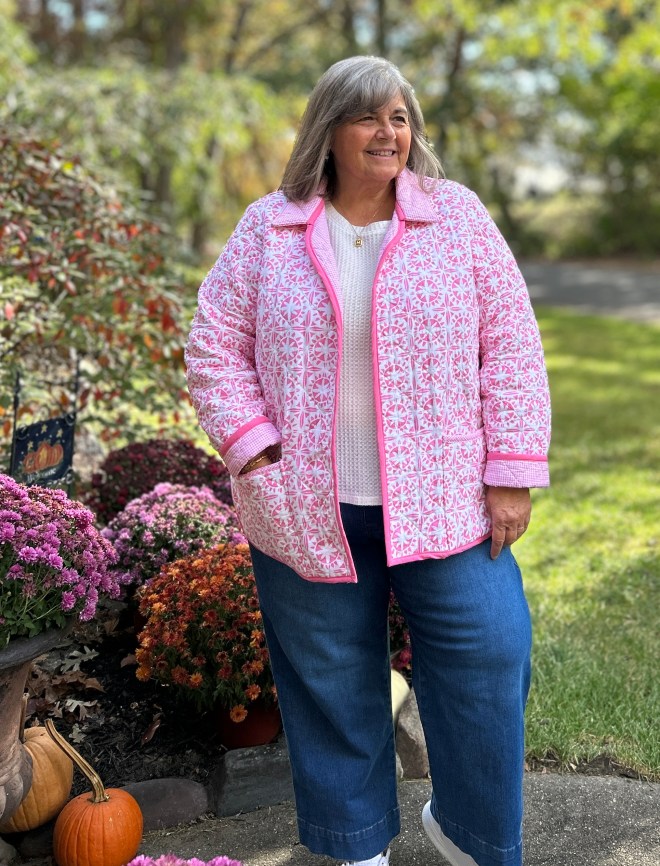
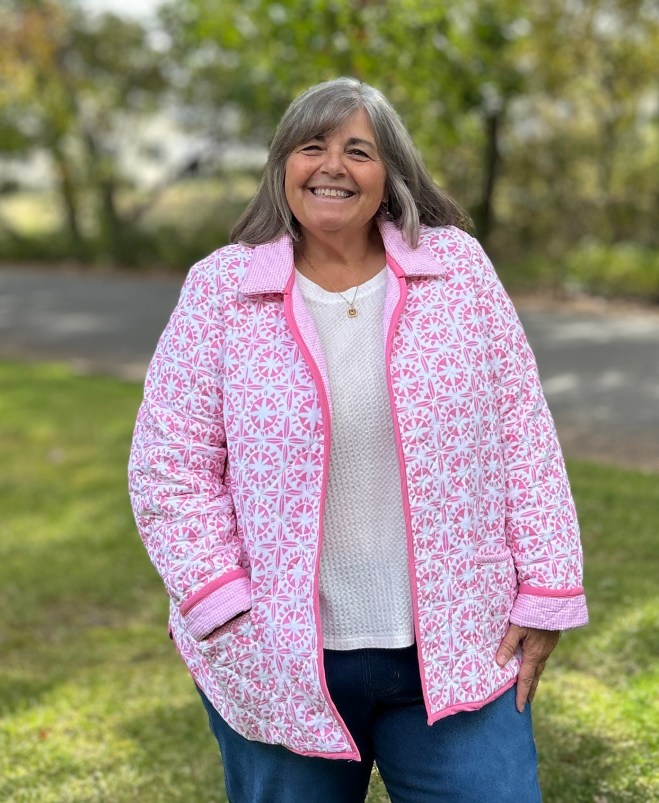
Final Version: Pink quilted version. XL regular front piece graded out to a 2X hip. Sleeve shortened 1″. Lengthened 3″ for personal preference.
For my final pink quilted version I dd NOT use the full bust front pattern piece. My high bust puts me in the XL and my hips are in the 2X range. My weight has been fluctuating the past few months. (Thankfully going downward after the holidays!). In the past I typically always used the full bust pattern piece. Right now my full bust is almost 4″ larger than my high bust. Because of this~ I didn’t need the full bust front piece.
My advice is that if you are on the border between using the full bust or regular front pattern piece~ make a muslin!! Simply cut a lining out of anything you have on hand. (I have full bolt of muslin that someone gave me.) Use an old sheet, fabric you don’t love anymore to check the fit. Pre-quilted fabrics aren’t inexpensive, so you want to get the fit right. If you’re piecing and quilting your coat~ you want the fit to be good! This is one time I don’t suggest cutting corners!
Pattern Modifications
I am a petite pear. I am just 5 feet tall and the widest part of my body is my high hip. In addition, my high hip is very curvy. After making my first tester version I decided that although I liked this Coda, I probably wouldn’t wear it much. Why? The shorter length just isn’t flattering on me, and I feel uncomfortable wearing it. Things that hit me at my high hip make me look even rounder than I am. However, I LOVE the coat and think it is so cute. Seeing all the other testers quilted versions really made me want one! Soooo~ what could I do to it so that it would work for me? I decided to simply lengthen it by 3″, now the coat hits me below the fullest part of my hip. I have to admit, I’m so happy with it that I now want to make another one!!
I also changed the pockets on my pink quilted Coda. Since I lengthened the coat, I needed to increase the height of the pockets so they wouldn’t be too low. I also decided I wanted more of a patch pocket rather than it extending all the way over to the side seam. This was simple to do. I used the pocket pattern piece as a guide, just added about 2″ of height and marked the width that I wanted. I used the pattern piece to maintain the curve at the bottom of the pocket. I also used the existing bias binding of the quilt to trim the top of the pocket.
Remember, that is the beauty of sewing. You can change things however you want to make them work for you!
Sew Mary Mac’s Tips for the Coda Coat
- Remember this pattern includes 1/2″ seam allowances!! If you use Love Notions patterns often you will know this is different than their typical 3/8″ seam allowance.
- The most important tip I can give for the Coda is to make a muslin!
- I chose to attach my bias binding before I sewed the side seams together. I found it easier to get a clean looking curve by doing this.
- If using a thick quilted fabric, you may want to grade your seam allowances when sewing the collar.
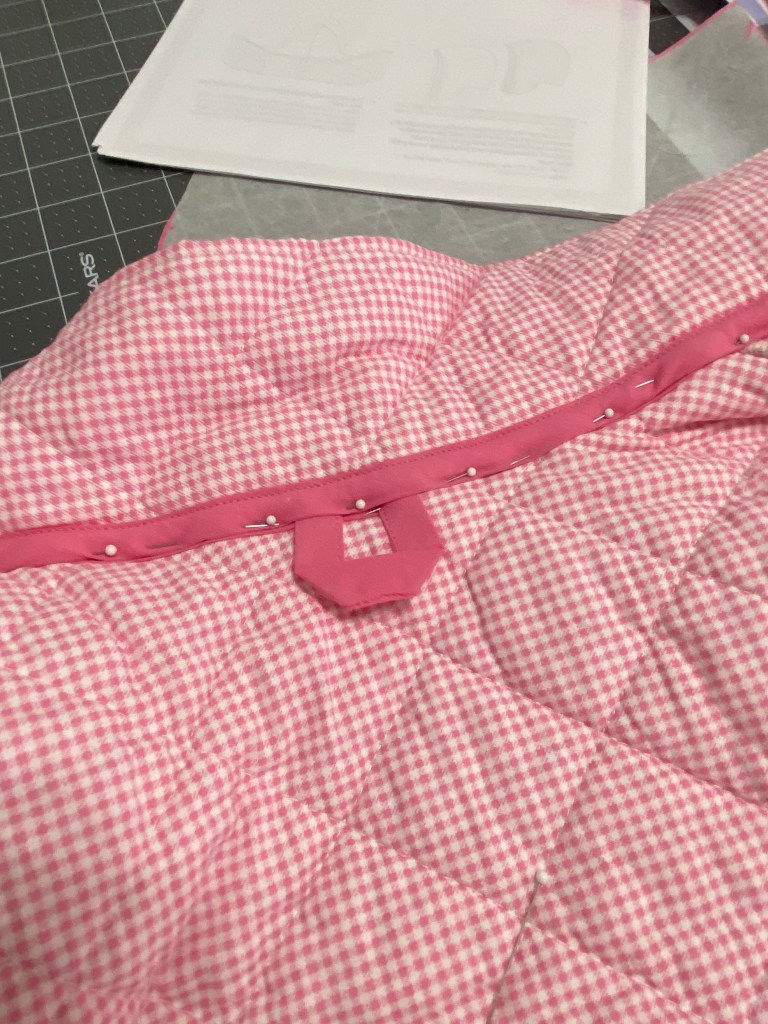
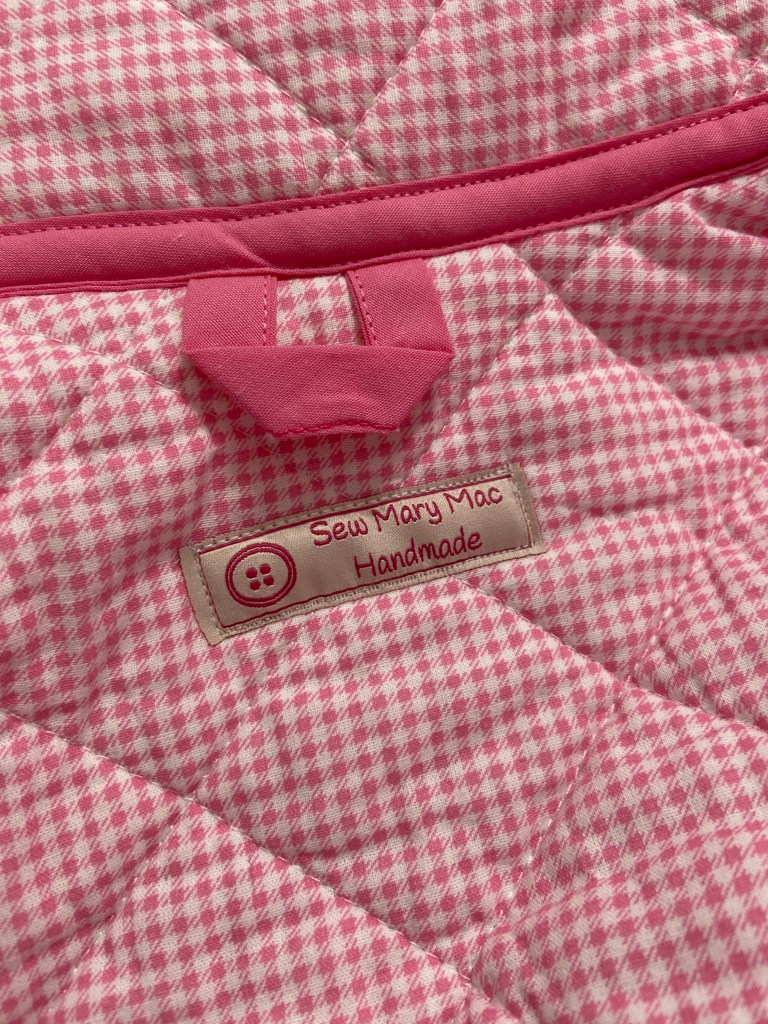
- Add a hanging loop! I had a coat rack with hooks in my mud room area. I find I wear the coats hanging there more often than the coats in my coat closet. My quilted coat wouldn’t hang nicely on one of the hooks, so I added a loop. See directions below.
Adding a Hanging Loop
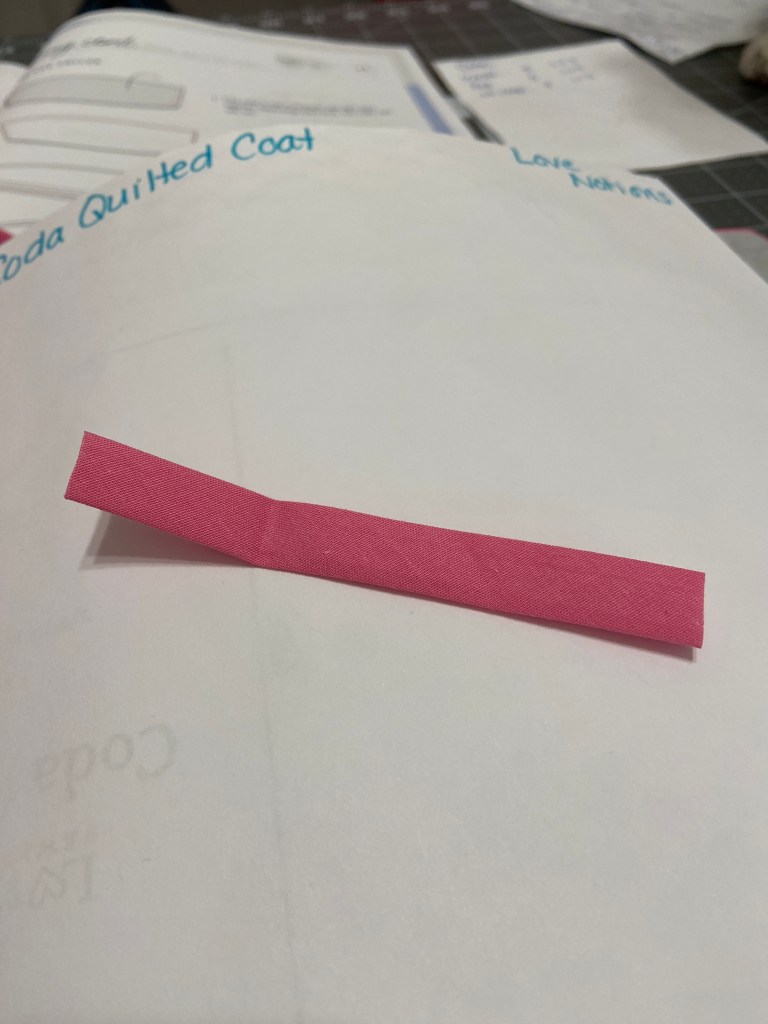
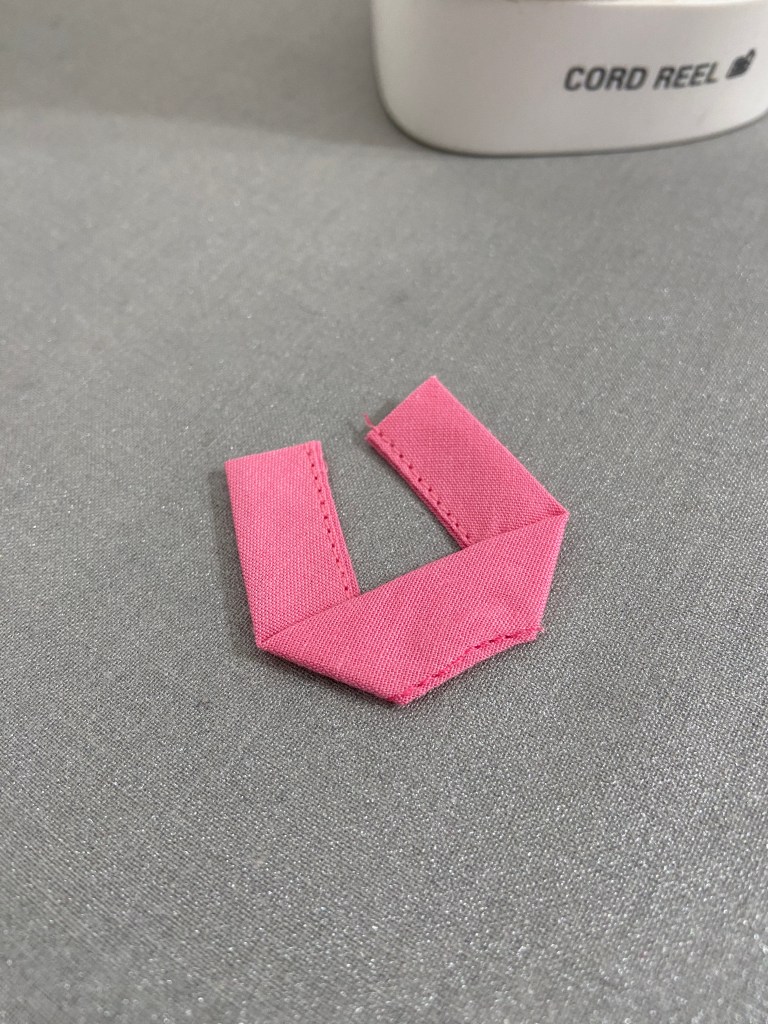
- Cut a piece of bias tape 4″ long and stitch the long sides together.
- Fold and press bias tape as pictured
- Place the loop in-between the neckline and collar/hood piece. Pin in place.
- Attach loop when sewing the collar/hood to the neckline.
- If sewing the bias version (without the collar or hood), attached the loop before sewing the bias tape on the neck edge.

Fabric For The Coda Coat~ added 10/2025
I’m not a quilter, and I really haven’t wanted to quilt fabric for my Coda Coats. So if you’re like me~ you may want some resources for quilted fabrics. There isn’t much available that I’ve been able to find.
My pink and white version is made from a quilt I purchased at Home Goods. I did go looking there again, but they had mostly comforters that were much too thick. Here are my suggestions:
- Go to Thrift shops and search for actual handmade quilts.
- Go to Home Goods, Marshalls, Home Sense , TJ Maxx and similar type stores
- Visit Brick and Mortar AND online Quilt shops.
- Sometimes these are a more expensive option
- Often most prints are Holiday and Children’s prints
- Etsy~ I’ve seen some really pretty options there. Be sure to read through all the reviews for that seller before purchasing. Here are a few shops I found:
- Little Legs Fabrics (UK company)~ has some beautiful ones including quilted double gauze, however shipping costs are high to the US
- I See Fabric Shop~ has beautiful block prints (but only 2 colors remaining) that are PERFECT for the Coda!
- Spring Lake Fabrics~. Very nice selection, good variety, ships from NY
- Cotton Fabric Hub~ Now this shop has exactly what I’m looking for, however they have only been on Etsy for 2 months with no reviews yet. Fabric ships from India and it’s expensive. ($85 + shipping) How pretty are these!
Thanks for stopping by! I truly appreciate all of you that visit! If you enjoyed this blog post, consider subscribing to my blog to stay up to date with all my posts!
Mary Anne 🙂
Remember to follow me over on Instagram to see all my latest makes! @sewmarymac
You can also follow my Facebook Page~ Sew Mary Mac. On this page you will find information on my makes from all pattern companies. If I know of any good sales(pattern or fabric) I will also feature this information. I have had many of my loyal followers send me friend requests on Facebook. I do post in the Love Notions group under Mary Anne MacLean, however this Facebook account is private. There is no sewing content on that Facebook Account.
You can grab the Coda Coat pattern HERE.
This is an affiliate link. It costs you nothing to purchase from this link, it just helps fund my fabric addiction which allows me to test and review more patterns.
To receive an additional 10% off the pattern price, use this coupon code 10MACSEWS. This coupon code can be used at anytime on any pattern….even a $6 Feature Friday pattern. My code does change quarterly, so please always check the newest blog post for an update if you find a code isn’t working.
I am currently a Love Notions Patterns Ambassador. I was given this pattern in return for testing it. As always all opinions are my own.


Thank you for this review. Your pink coat is lovely – so cheerful it has me thinking of warmer temperatures! Thank you for all of the tips and tricks.
LikeLiked by 1 person
Thank you for visiting!! I can’t wait for it to warm up a bit so I can wear it! But it is pretty warm!
LikeLike
Thanks for the information. I’m also not comfortable in short coats. Does the 3″ that you added cover your backside? How much length do you think can be added and still look good?
LikeLiked by 1 person
I think you could add up to 4” or so. The 3” just about covers my bum. I am only 5’ tall.
LikeLike
So glad I read your post, I don’t like short jackets and your post has encouraged me to try my own alterations in length; BTW I’m a quilter who also sews clothing so this is a pattern I am excited to make
LikeLiked by 1 person
I’m so glad you found it helpful!! That’s what I live about sewing- we can make things exactly the way we want! I’m so excited to see the Codas all you quilters make! You’ll all be inspiring to me!
LikeLike
I really love your Coda! I was on the fence about this pattern since I don’t love short coats much either (I am also 5′ and currently 7 months pregnant), but I really could use a coat like this for the transition into spring!
LikeLiked by 1 person
I loved the Coda when I first saw it. I knew I didn’t like shorter coats but tested it anyway – knowing that I could make it work for girls like us!!
LikeLike
Thank you for this review. I have been looking for a simple pattern to make a quilted jacket and I really like the Love Notions full bust option. My usual size is too tight. I am working on the premise that an outer layer garment needs to have a lot of ease in order to use it for it’s intendent purpose. I am now working on my 3rd muslin. I reprinted the original pattern in an XL regular bust, up from my usual size of L full bust. When I finally get it right, I know I’ll be happy, but for now, I’m just a little but frustrated.
LikeLike
Thank you for sharing your make. I love your final pink version and the hook tag that you added. I am a new sewist (been quilting for 30 years) and am struggling with how you complete the raw edges of the bias binding for the collar attachment. The instructions of the pattern were not clear. I appreciate your tips.
LikeLike
Pingback: A Clef Coat For Summer Fun |
Pingback: Colorful Coda Coat | This Thing
Hi, love your pink jacket! Do you remember what size quilt you purchased to make it? Thanks.
LikeLike
Hi! I’m actually in Lewes today bike riding- I’ll let you know when I get home because I don’t remember🤪
LikeLiked by 1 person
Hi, love your pink jacket! Do you remember what size quilt you purchased to make it? Thanks.
LikeLike
Hi Pat, I actually purchased a full size quilt for my Coda Coat. I had left over quilt pieces, but I also lengthened my Coda.
LikeLike