
I’m just gonna put this right out there. I bet that if you make a Love Notions Oakley Vest, you are going to LOVE it. I’ll also bet that you will immediately make another one! There, I said it! This is THE perfect make to add to your closet right now. I’ve been throwing mine on everyday since I made them, every time I get a tad chilly. And to top it off, the Oakley Vest and the Kid’s Acorn Vest are both just $5 today (1/13/2023) as the Love Notions Feature Friday patterns.


The Details
The Oakley Vest is the perfect addition to your winter wardrobe. It is the perfect layer to wear under your coat for added warm, without getting that extra bulkiness in your sleeves. With just one pattern you can get several different looks!
Oakley Vest Features:
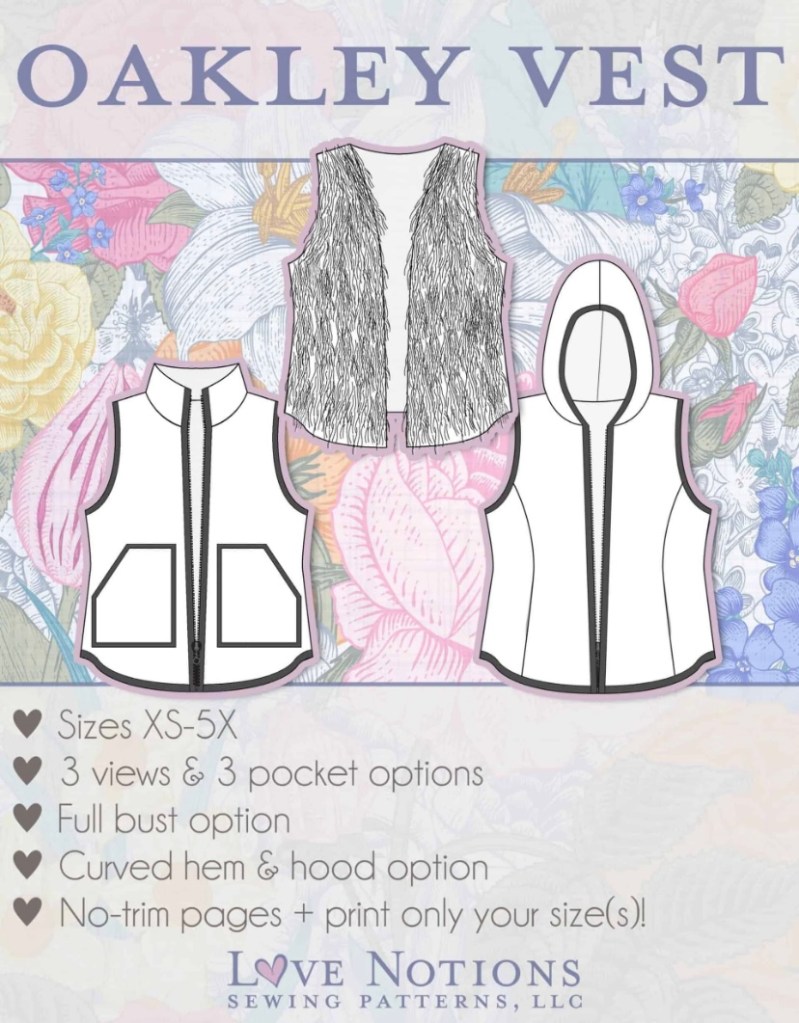
- Three distinct body views
- Three pocket options
- Curved hem
- Hood Option
- Full Bust Option
- Sizes XS-5X
- Skill level -Intermediate (but an adventurous beginner could easily make View A)
View A: Is an open front vest. It is fully lined with optional side seam pockets. It was designed for faux fabrics and milky-type fabrics.
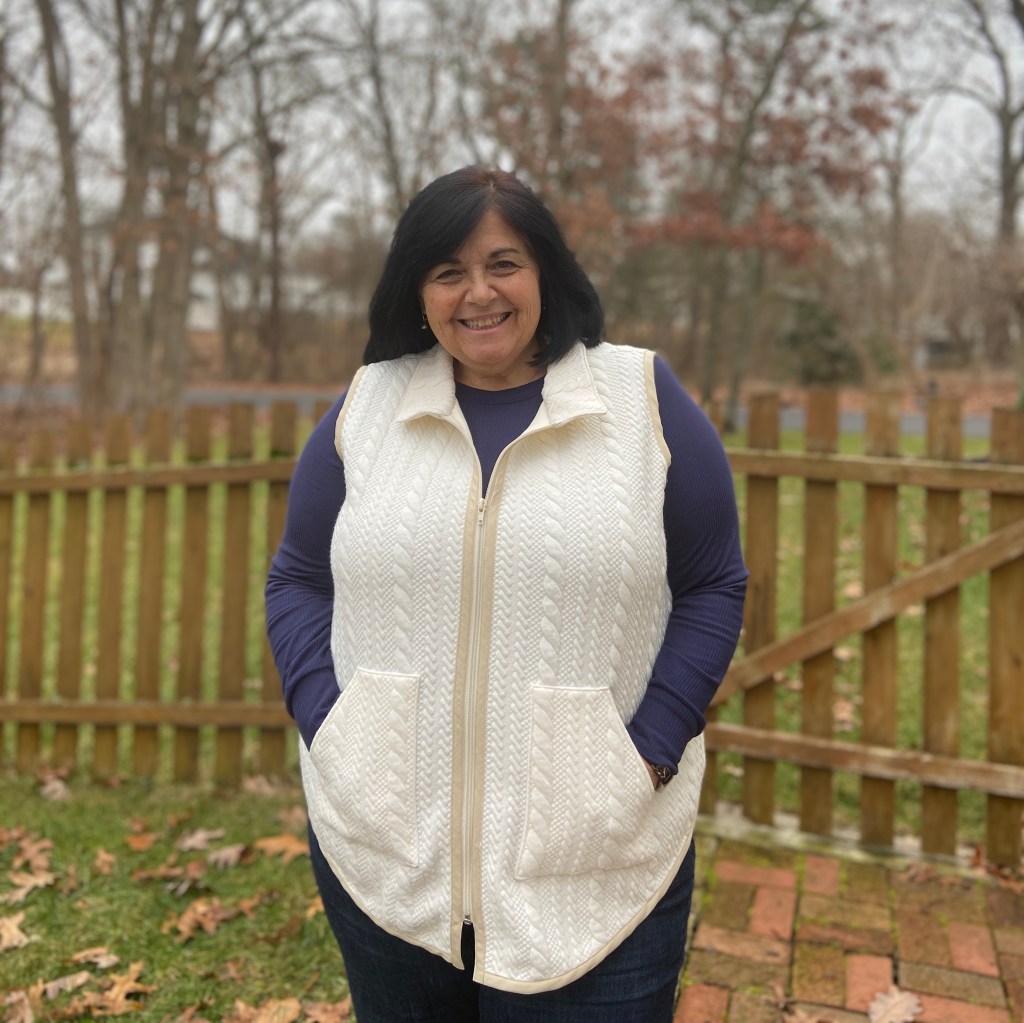
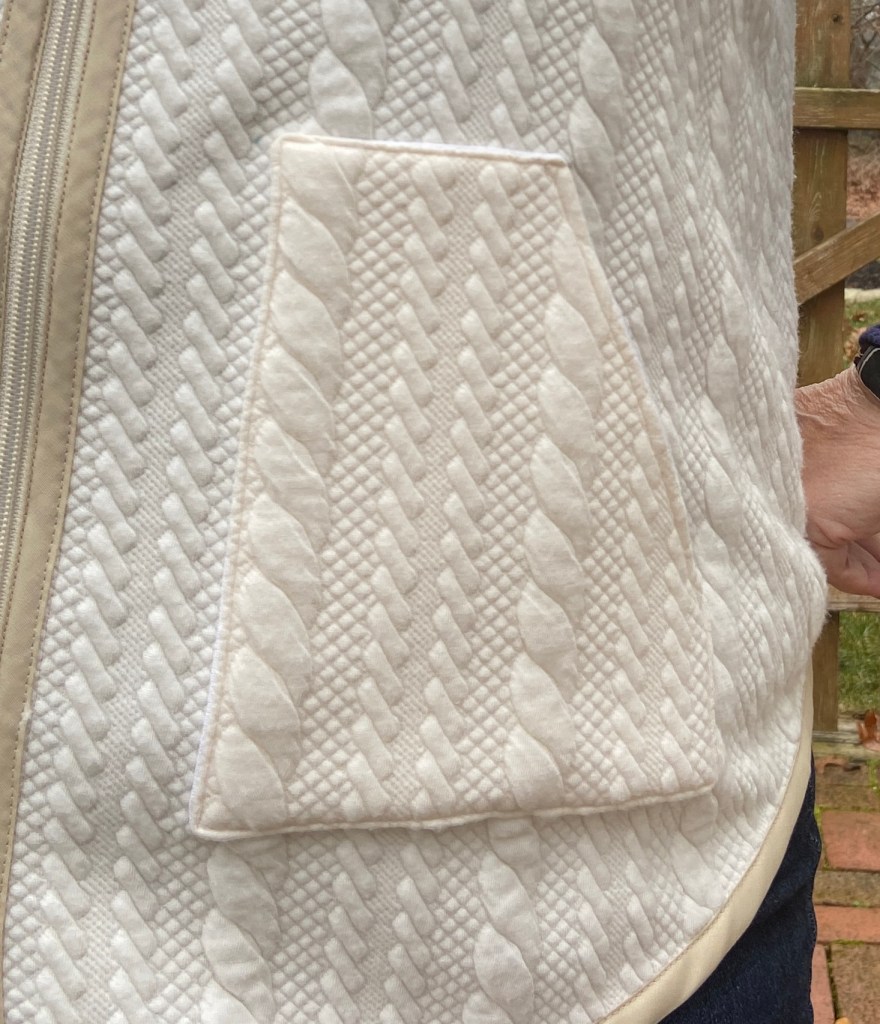
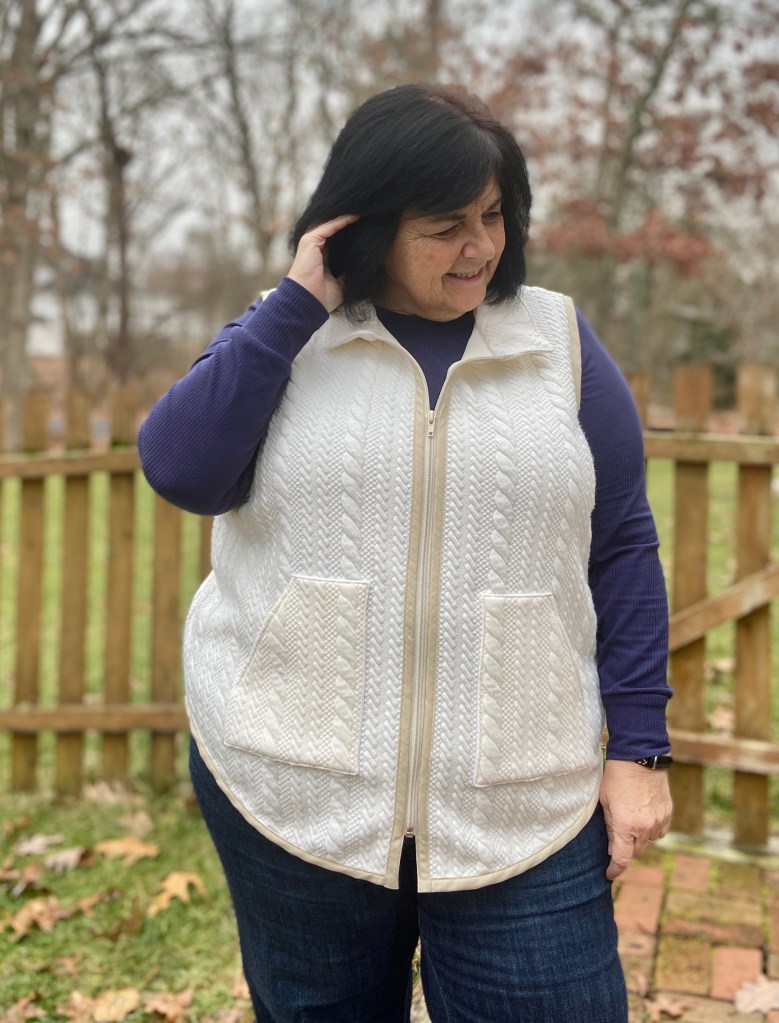
View B: Front has a separating zipper, bias binding, bias bound patch pockets, can be made with a collar or hood. (This is the View that I have made)
View C: Front has a separating zipper, bias binding, princess seams with inseam pocket, can be made with a collar of hood.
Sizing And Alterations
The Oakley Vest for women is available in sizes XS – 5X. A full bust front is available if needed. Be sure to choose your size according to your high bust measurement. This is extremely important to get a good fit at the shoulder and neckline. If in-between sizes, size down. Remember that all views have been drafted to be worn over layers. If you would like a closer fit you might want to size down.
My high bust measurement of 40″ puts me in the size XL. Since my full bust is more than 4″ larger, I have chosen to use the full bust front piece. (This is what I LOVE about Love Notions patterns!). My hips are currently just outside of the 2X. I graded out to the 2X hip only, since the full bust piece gives me the extra room that I might need. Remember that using the full bust piece adds 2″ to the waist and hips finished measurements.
I am just 5 feet tall, and I did NOT shorten this vest. If you look at the pattern listing photos, you will see that it is intended to hit at the hip. My high hip is the fullest part of my body, so I often choose not to have tops and such end there. I find that is most flattering for me,
Fabrics and Notions
The Oakley Vest is designed for medium to heavy-weight fabrics. View A is to be made from heavy fabrics such as faux fur, cuddle and minky. A lining fabric is also needed for View A, this should be lightweight fabrics such as satin. Views B and C are designed for medium to heavy weight fabrics such as fleece, double faced pre-quilted fabric, puffer vinyl and similar fabrics. You may use heavier weight knits as long as they are stable. If the knit has too much stretch, it will be very difficult to insert the heavier separating zipper without it rippling. I have used a quilted double knit for my cream version. It was stable enough for this pattern and sewed up nicely.


NOTIONS
For View A, you will find it easiest to cut the fur or minky with a craft/razor blade knife.
For Views B and C, you will need about 5 yards of 1/2″ double fold bias tape (you will need additional for the pockets and the hood) and a separating zipper. Typically I always prefer to make my own bias tape. For this pattern, I really do prefer the store bought bias tape. The store bought bias tape is rather stiff which normally I don’t like, but in this case it makes it much easier to insert the zipper. If you do choose to make your own bias tape, be sure to use a lot of starch on it! Your zipper length will depend on the size you are making. For my pink fleece version, I used a 24″ zipper, which was the suggested size. For my cream sweater knit version, I chose to modify the pattern and sew the collar without binding and to encase the zipper ends. I used a 22″ zipper for this version.
Pattern Modifications
Pockets
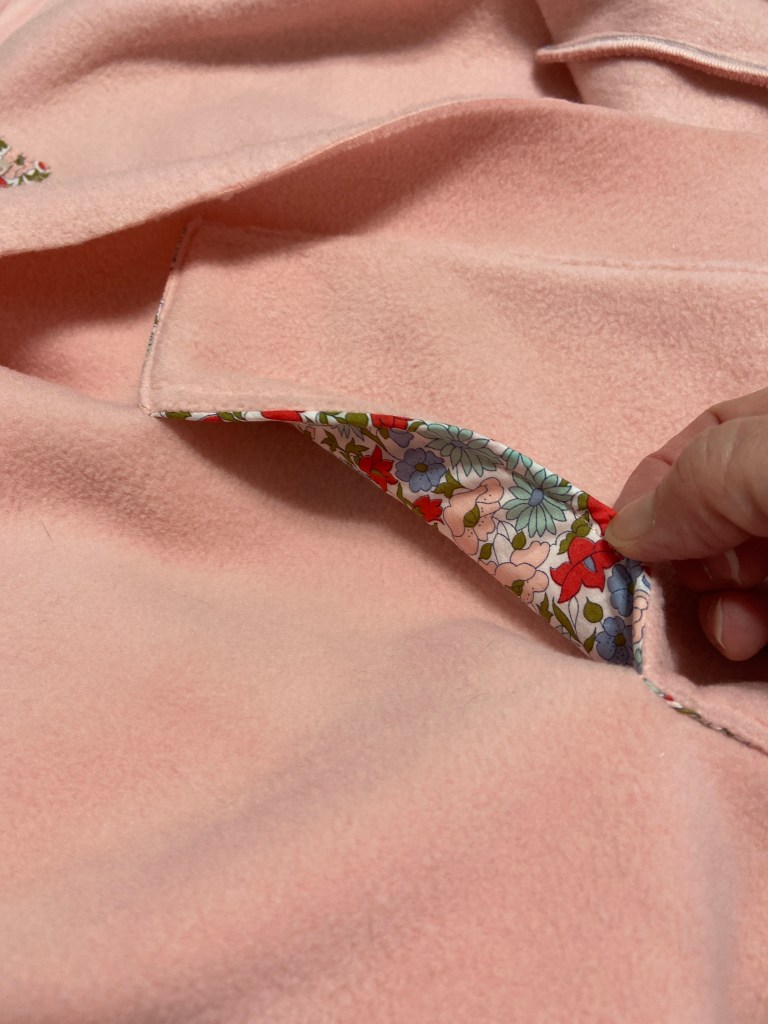
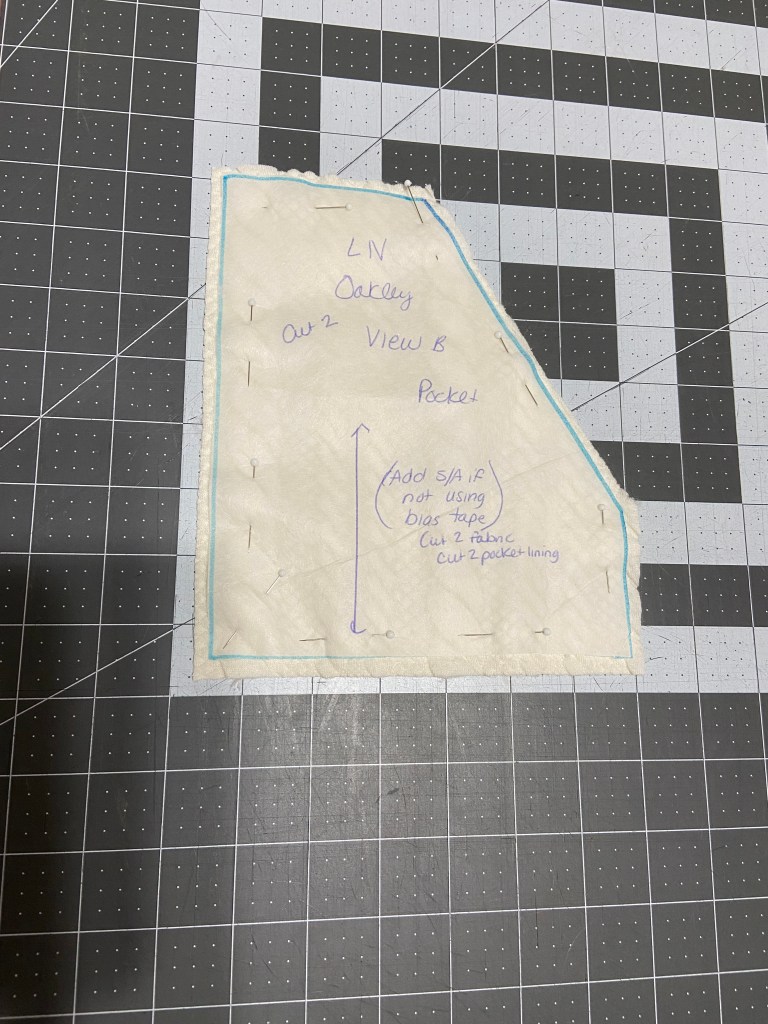
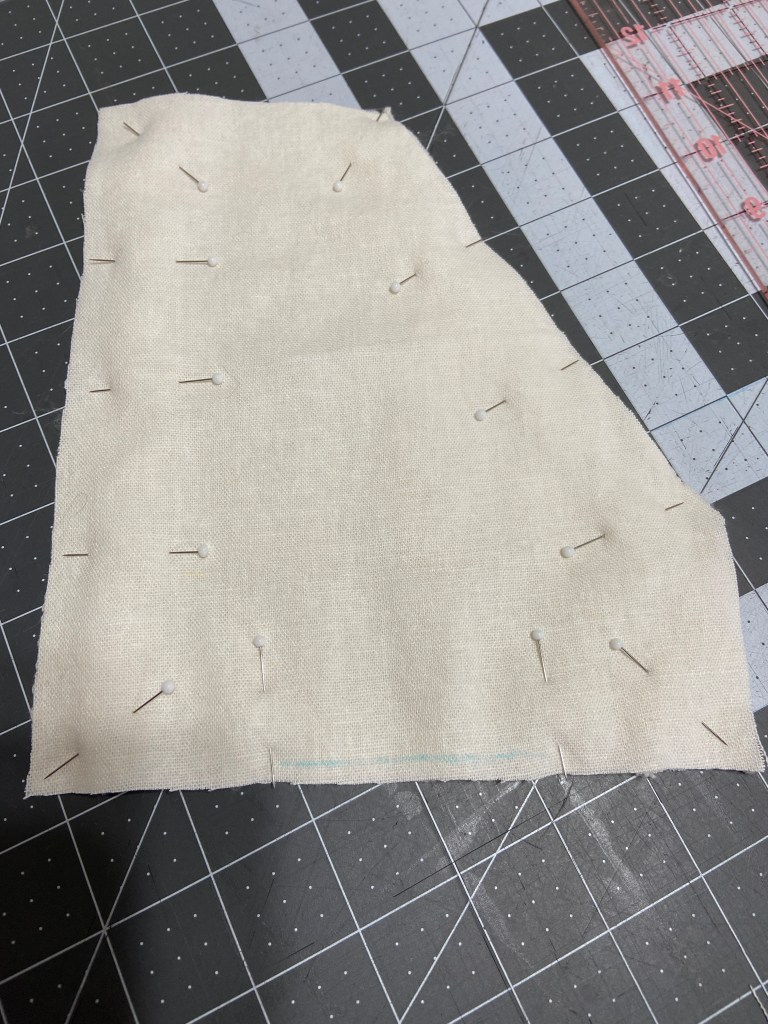
For both versions of my Oakley Vest, I chose not to use bias binding around the pockets. This was just a personal preference. I created fully lined pockets. To do this you must:
- Add a 1/4″ seam allowance on all sides of the pocket main fabric and lining.
- Pin and sew the pocket and pocket lining together with a 1/4″ seam allowance, leaving a small opening at bottom.
- Clip the corners and turn right side out.
- Top-stitch along the diagonal edge.
- Pin pocket in place and sew according to pattern directions.
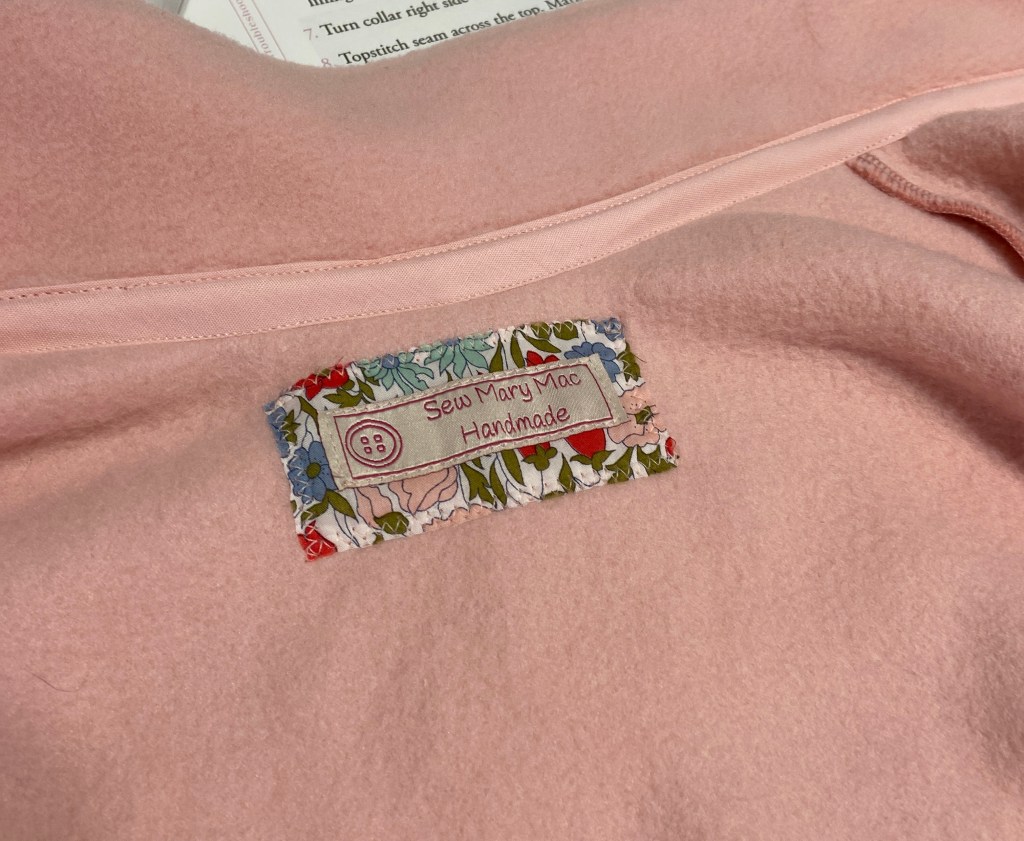
For my pink fleece version, I used a scrap of Liberty of London floral that I’ve had in my scrap basket. I also love to use my beloved scraps for making tags for my handmades. The cream sweater knit pocket lining is a lightweight rayon/linen blend from my scrap basket as well.
Collar/Zipper
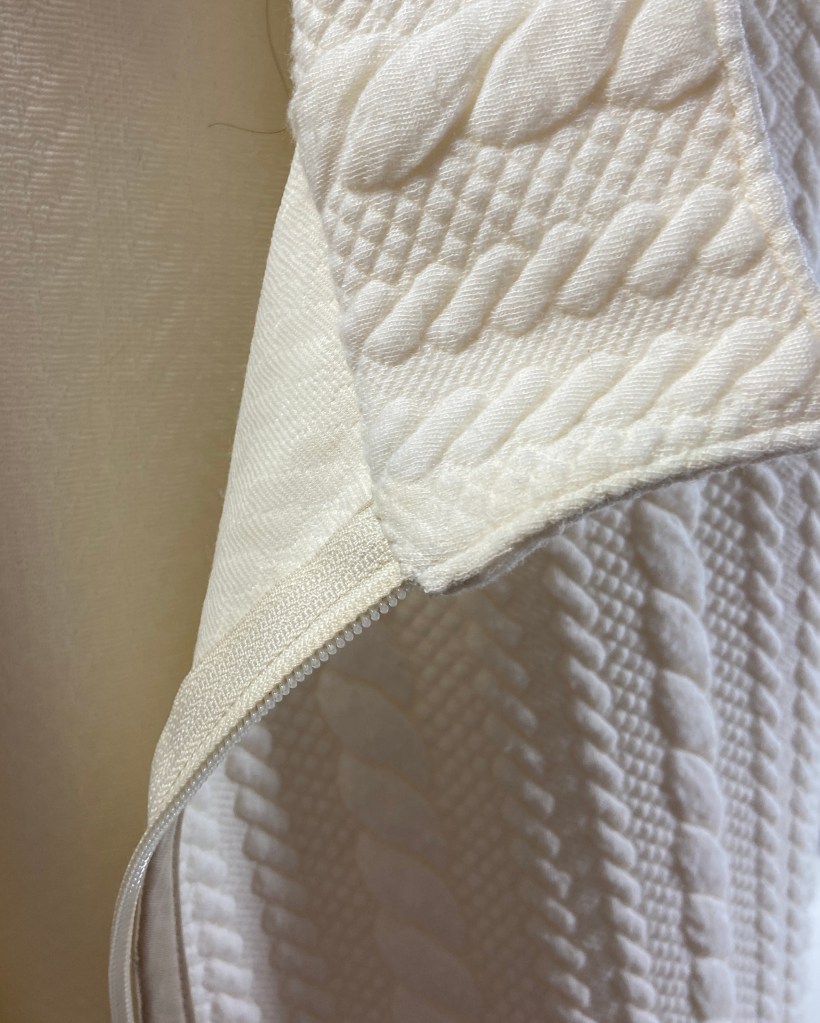
A modification I chose to do on my cream sweater knit was to finish the collar differently. I wanted a cleaner/dressier look for this version. My collar does not have binding on any edges and the ends of the zipper are encased.
- Attach the bias tape and zipper to the front edges before attaching the collar.
- Adjust collar piece by adding a 1/2″ seam allowance to the front edges(since you will be sewing a seam there).
- Pin and stitch 1 collar piece to the vest RST making sure the front ends of the collar extend 3/8″ past the zipper.
- Pin and stitch 2 collar pieces RST along top and front edges. You will be sewing across the top of the zipper and encasing it in between the 2 collar pieces.
- Grade seam allowance and turn right side out.
- Slip stitch the upper collar piece, encasing the seam.
- Top-Stitch the collar.


Sew Mary Mac Tips for Sewing the Oakley Vest
- Be creative! Everything doesn’t always need to match! I love how it turned out using the tan bias binding on my cream version rather than cream. It’s still a neutral wardrobe piece, but it’s got a bit more style.
- I recommend using store purchased bias tape because it is nice and stiff. (not always a good thing, but in this case it is!)
- To create a professional looking garment and a neat finish on the inside, I slip stitched the outer long edge of the zipper to the bias tape on the inside. Be careful not to go through to the outside of your vest.


Sew Mary Mac Tips for Purchasing Thread
- Buy a variety of all purpose thread in grays- light and dark, neutrals like beige, off-white, navy and black. These colors blend into many other colors very easily. (Remember this for serger thread!)
- Select a thread that is a shade darker than your fabric. Darker colors will blend in more easily than lighter colors. So if you are in-between two colors, always go darker.
- Match your thread, in daylight to ensure a good match. Florescent lights often don’t show colors as they truly are. I always walk over to the big front doors at Joann Fabrics to match my threads.
- If you have a few choices in your stash, sew one line of each and see which one blends in better.
- When top-stitching, it is always fun to choose a contrasting color, just remember your stitches will also be more noticeable.
- If top-stitching isn’t your forte~ be sure to select thread that blends in well.
- For patterned fabrics you can select the background color of your print OR you can select a color that stands out the most.
- Always pull the thread off the spool and lay it across your fabric. A single strand of thread will look very different than an entire spool of thread. (Yes, this is why the thread display at the store is always a mess with threads hanging everywhere!)
- Someone once told me years ago when I worked in the city (at a Big 4) that you only really need navy, black, red, beige, white, gray and mauve thread. I have always remembered that and those are the only colors of serger thread I buy! I often mix and match my needle and looper threads so my threads blend in.
To learn more about the basic types of sewing threads available, be sure to visit my post over on the Love Notions Blog about thread basics. Visit HERE.
Thanks for stopping by! I truly appreciate all of you that visit! If you enjoyed this blog post, consider subscribing to my blog to stay up to date with all my posts!
Mary Anne 🙂
Remember to follow me over on Instagram to see all my latest makes! @sewmarymac
You can purchase the Ladies Oakley Vest pattern HERE. You can purchase the Girl’s Acorn Vest pattern HERE.
These are an affiliate links. It costs you nothing to purchase from this link, it just helps fund my fabric addiction which allows me to test and review more patterns.
To receive an additional 10% off the pattern price, use this coupon code 10MARYMAC. This coupon code can be used at anytime on any pattern….even a $5 Feature Friday pattern. Coupon codes change each quarter, so if this code doesn’t work please refer to my newest blog post for the new code.
Fabric Resources
Quilted knit fabric is from Surge Fabrics. You can find it HERE. This color is still available along with black and gray. Surge has another type of quilted knit in many many colors that will also work for the Oakley Vest. You can find them HERE.
Pink fleece is from Joann Fabrics. Finally I found something I can make from the Lux Fleece, since that is practically the only fabric my Joann Fabrics sells!!


So glad I found your review! I have a piece of cable knit fabric that I’m planning to use for this vest. Before reading this, I hadn’t even thought about lining up the cables on the pocket with the cables on the bodice 😬. I also don’t want to use bias tape so the other tips are super helpful. Thanks!
LikeLike
Pingback: Sew a Coastal Preppy Wardrobe for Fall with Sew Mary Mac |
Mary, your sewing is impeccable! Such beautiful makes. What I was hoping to learn is how to attach the collar on to the Oakley vest. I can’t seem to find a tutorial so I do a nice job. Should I put the zipper in first?
Thanks for any help you can provide!
LikeLiked by 1 person
If you need additional info on this – I will have another Oakley blog post the first week in March. You can follow the pattern tutorial and attach the collar first/ then the zipper OR. Like my white quilted sweater version- attach the zipper and then attach the collar enclosing the ends of the zipper in it.
LikeLike
Pingback: Spring Ahead With The Oakley Vest |
Pingback: Sewing A Classic Fall Wardrobe With Love Notions Patterns |
Pingback: My Favorite Love Notions Makes Of 2024 |