
…Love Notion’s Newest Addition
The Lenox top and dress pattern is here! I tested this pattern, and I am putting the “Sew Mary Mac” stamp of approval on it! I’m so excited to share my versions with you! You know a pattern is a good one, when you already have plans for several more!
The pattern is on sale for just $6 today, 09/12/25. You can use my code 10MARYMAC for an additional 10% off. If you would prefer a printed paper pattern they will ship for free today(US residents). The Lenox paper pattern includes a printed pattern and tutorial, you also get the digital version included for $21. You may use my discount code to get 10% off.
The Details
The Lenox Top and Dress pattern is such a versatile pattern. Designed for knit fabrics, it can be casual or dressy depending on your fabric choice. The princess seams make it flattering on all body shapes and sizes. It’s that pattern you didn’t know you needed! It’s a great basic~ that’s not so basic! It includes so many options you can actually mix and match them to create 30 different looks! If you’re a confident beginner, this should be next on your to-sew list! It’s a really quick sew which will make it easy to fill your closet with a few. For my next Lenox I want to find a perfect weight solid white! No boring white tees for me!
Features
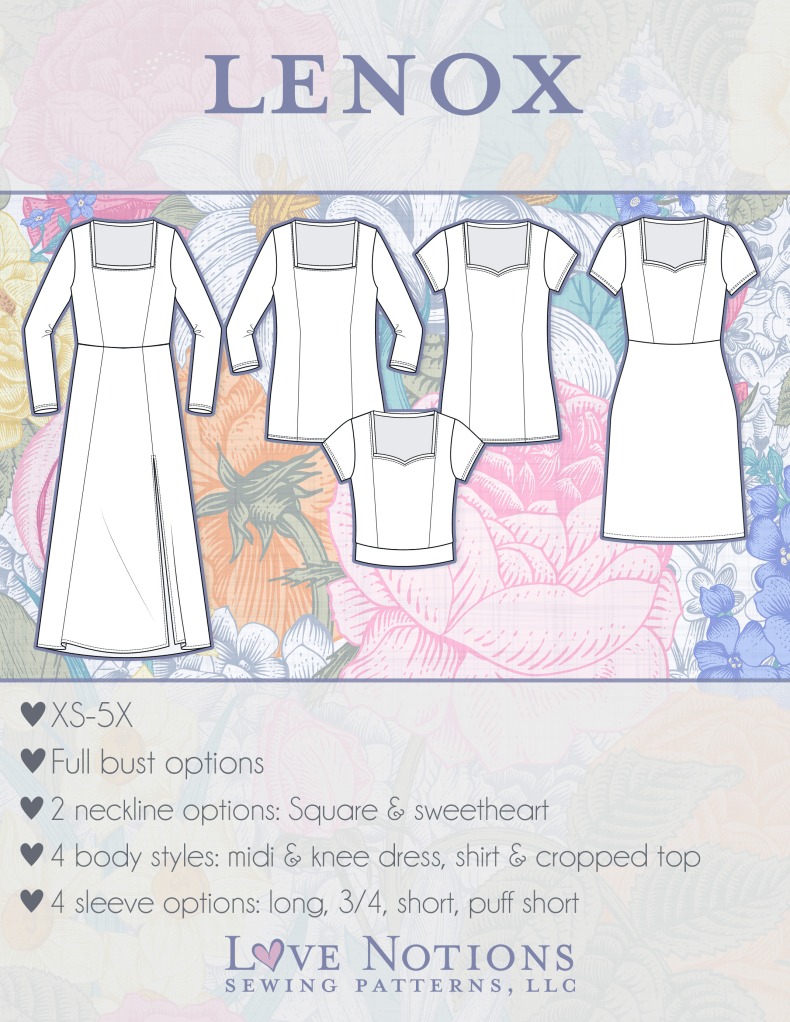
- Princess seams
- 2 Neckline options: square and sweetheart
- 4 Body styles: Midi and knee length dresses, shirt and cropped tops
- 4 Sleeve options: long, 3/4, short and puff short
Sizing And Alterations
The Lenox is available in sizes XS- 5X. There is a full bust pattern piece included. The Lenox is designed to be fitted with negative ease at the bust, 1″-3″ ease at the waist and 0″-1″ ease at the hips. To get a great fit on the Lenox, be sure to take accurate body measurements and use the body measurement and finishing garment measurement charts to select your size.
When selecting your size make sure you choose by using your high bust measurement. With a wider neckline opening like this square and sweetheart design, this is especially important! If your full bust is 4 or more inches larger than your high bust, you should be using the full bust front piece. Remember that the full bust option adds an additional 2″ to the waist and hip finished garment measurements. Keep this in might when deciding to grade in/out for your waist and hips.
The shirt length is meant to hit just above the full hip. The crop top length hits between the natural waist and the high hip. The midi-length dress hits at the calf, while the knee length dress hits just about the knee on the average 5’5″ woman.
If adjusting for your height(or lack of it like me) remember you must adjust the front, back AND center front pattern pieces. Be sure to use the length/shorten lines indicated on the pattern. Since the Lenox is designed to be closer fitting you want to make sure the waist hits you in the correct spot. You don’t want to just add or delete length at the bottom of the top/dress. See my notes below about the length. I prefer my tops to be just a tad longer, so on my first version I did NOT shorten the top for my lack of height. My later versions did include some additional length.
My Adjustments
My high bust measurement of 40″ puts me into an XL. Since my full bust of 45″ is more than 4″ larger, I used the full bust front piece. I graded out to the 2X at the waist and hips. My hips are just over the 2X measurement ~ but that will be fine because of the extra 2″ of ease at the waist and hips when using the full bust front piece. When cutting, I use the XL for the neckline and shoulders, then grade to the 2X.
Edited to add: Since I am petite in height, I found the neckline a bit too low for me and my larger bust. Read below how I adjusted the neckline to be perfect for me!!
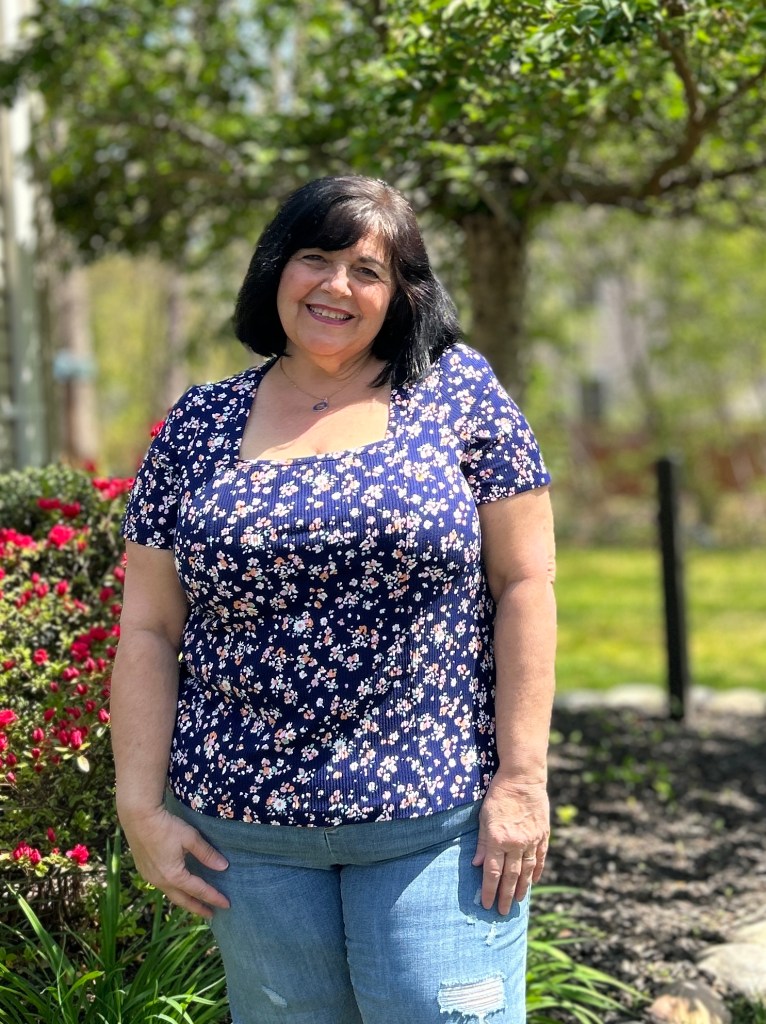
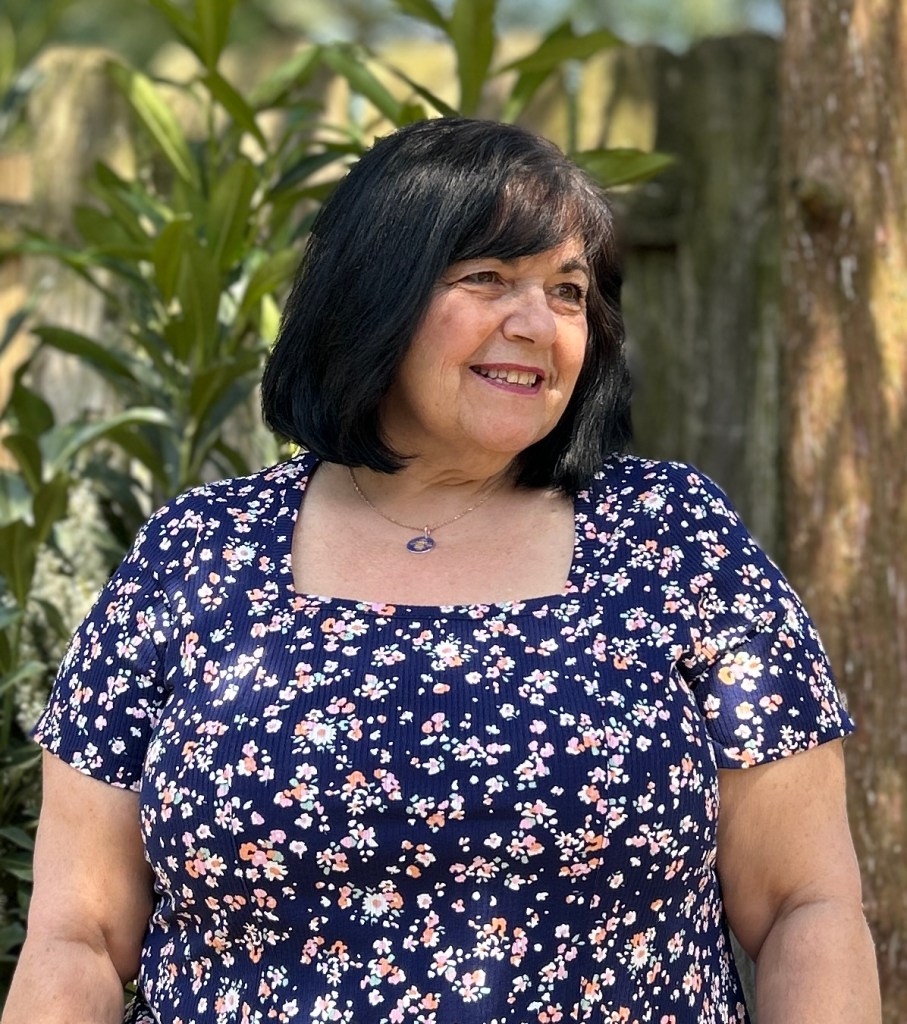
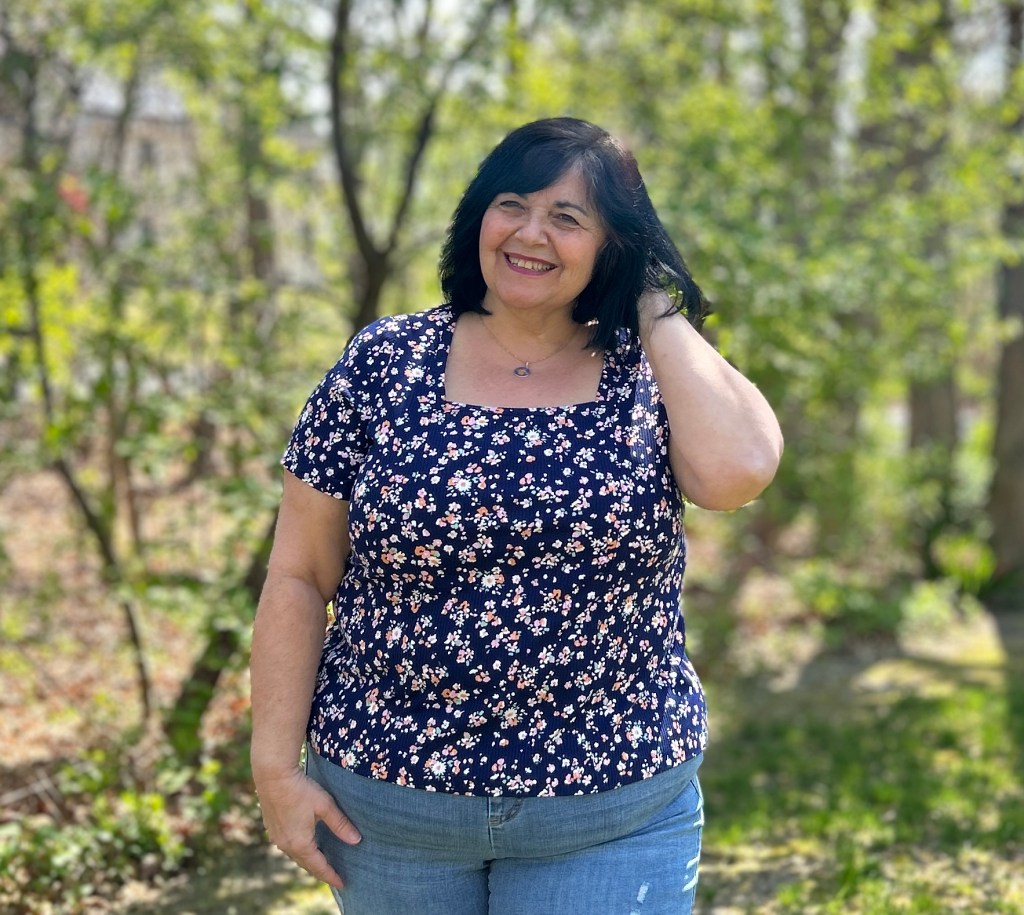
Version 1~ Navy Floral
The Navy Floral rib knit was my first version (after my first tester version). I did not make any length adjustments on this version. The length is a bit shorter than my personal preference, but it would probably be fine for most others. This version included the square neckline and the short sleeves. Overall, I was very pleased with the fit (other than the length). I did feel when I leaned forward that the neckline was a tad too low for me while standing up straight it was fine,
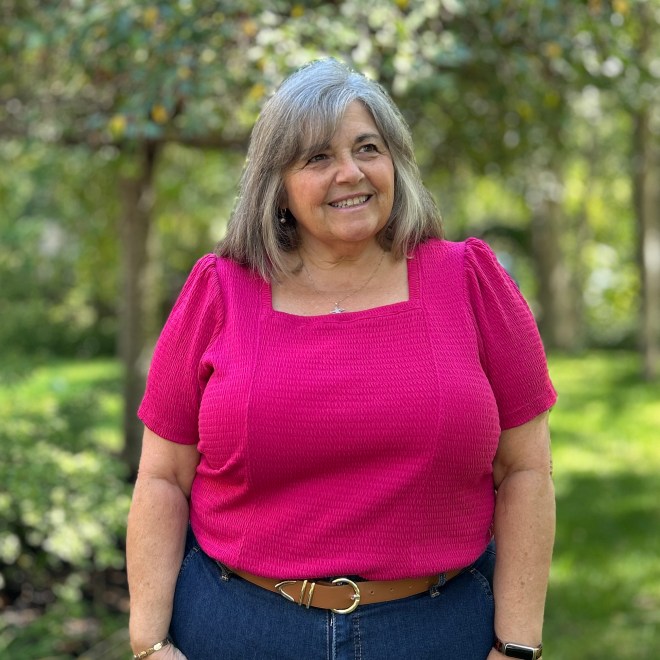
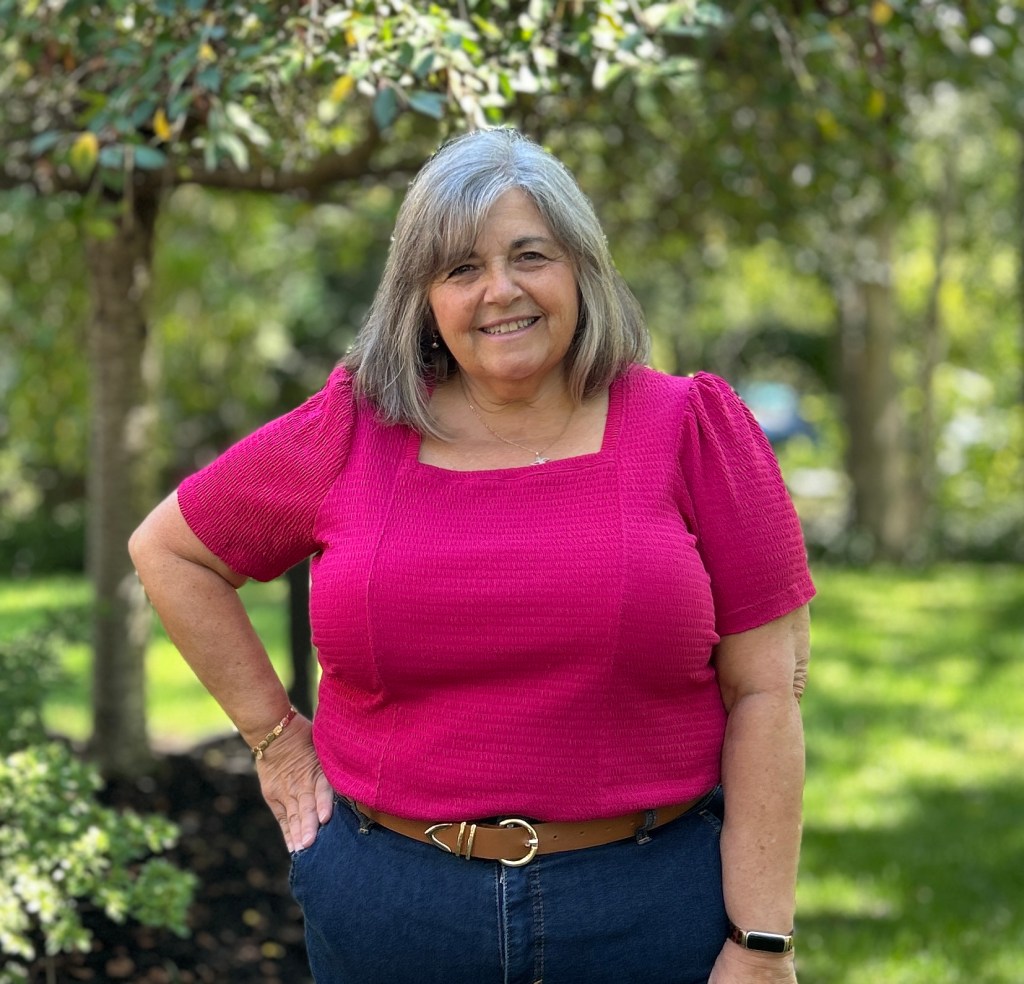
Version 2~ Magenta Smocked Knit
This version is also an XL with the FBA front graded to the 2X hip. For this version, I raised the neckline by 1″ and lengthen the top 2″. I love where this neckline falls on me. I feel it is exactly how the pattern was designed to fit. I am only 5 feet tall, and I know this is why necklines are sometimes too low on me. These are the puff short sleeves. The only thing I didn’t love about this version is the hem(all me)~ stitching a hem on smocked fabric caused some rippling. I’m going to wash it and then try and steam it a bit to see what happens. If that doesn’t work, I think I will shorten it 1″ and re-hem it.
Version 3 ~ Magnolia Floral Bamboo Cotton
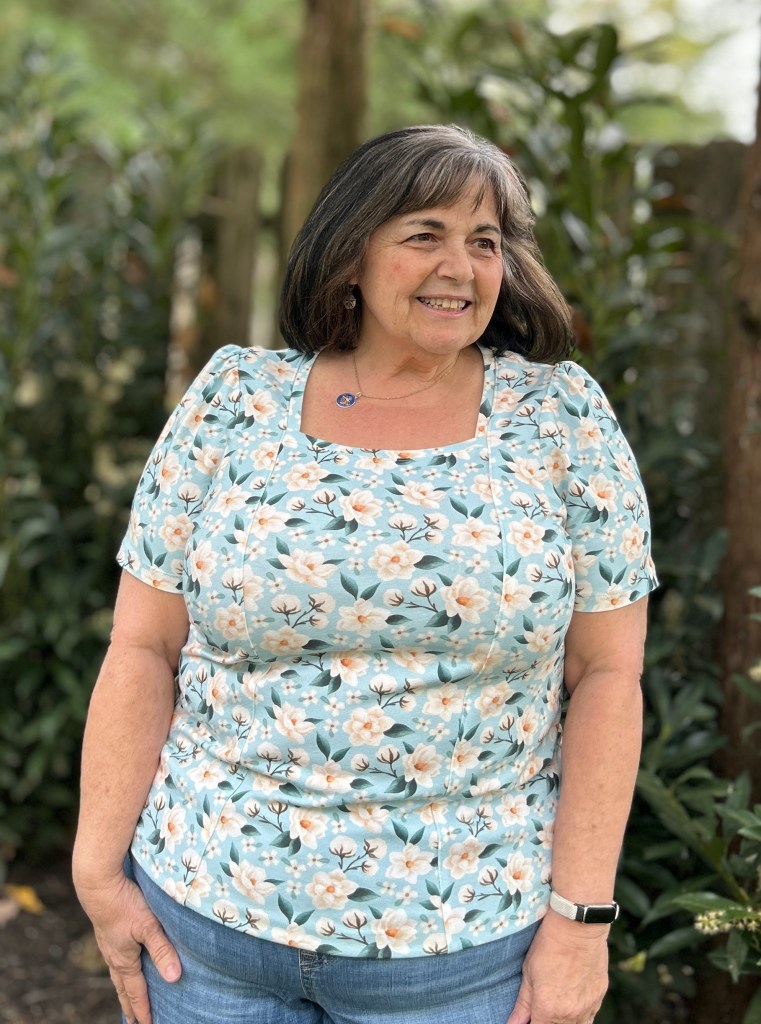
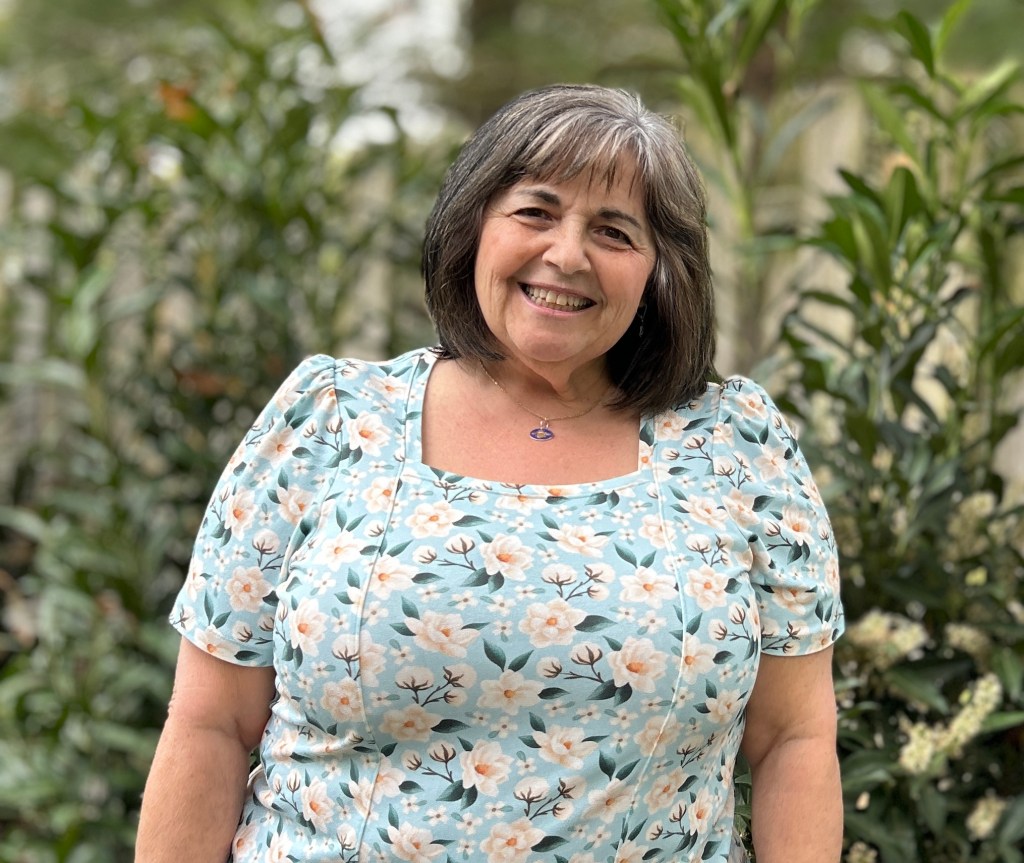
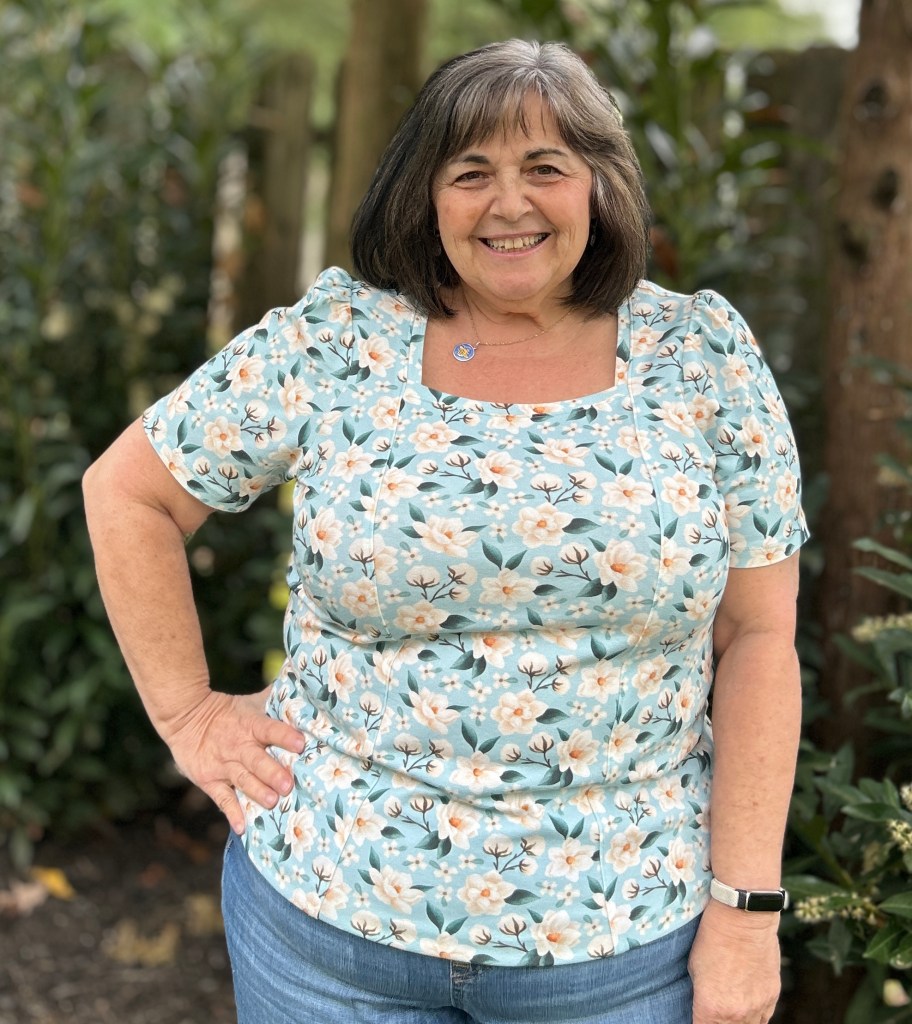
This version fits me perfectly!!! The only difference between this Lenox and the magenta one, is the overall length. I only added 1″ in length to this one. Moving forward, this will be the version I stick with.
Raising the Neckline
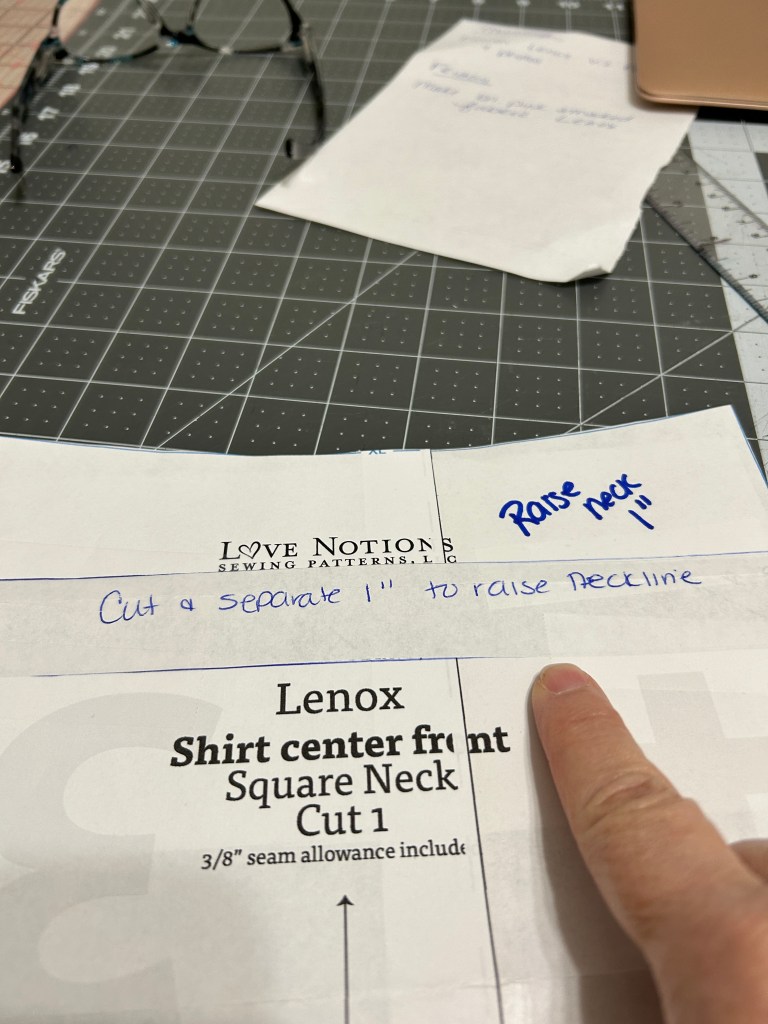
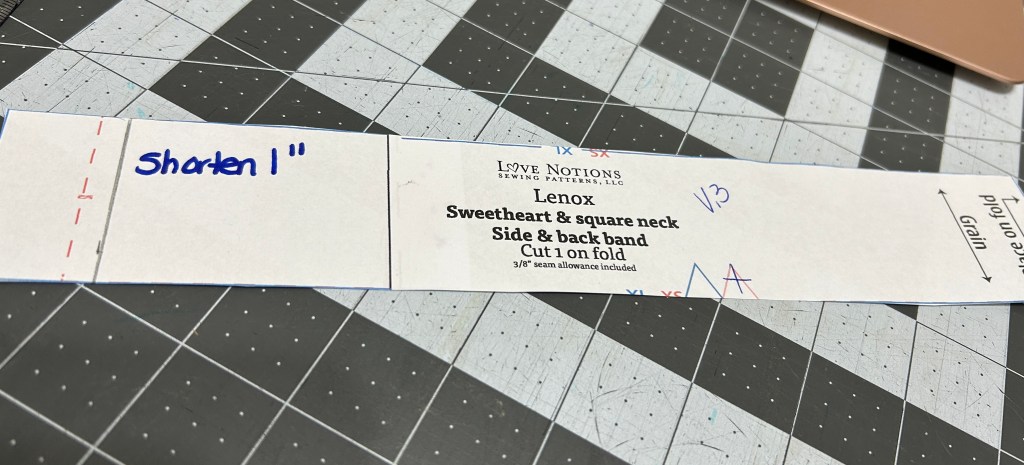
Raising the square neckline of the Lenox was simple to do. Only 2 pattern pieces need to be adjusted, the center front and the side/back neckband.
To maintain the curve of the top of the neckline, I cut and spread my center front pattern piece about just a tad over an inch below the top edge. Since I raised the neckline, thus making the neck opening smaller, I needed to shorten my side/back neckband as well. For the neckband, I needed to take off 1″ from the end opposite from the fold marking. If you take it off the folded end, your notches will not match up when trying to attach the side/back neckband to the top.
Fabrics and Notions
The Lenox top and dress is designed for knit fabrics with at least 40% 4-way stretch.. Fabrics such as rib knits, jersey blends, cotton lycra and interlock would work well. The knit you choose should have good recovery, without it, you might find that your neckline droops.
I made a my original tester version from double brushed poly. To be honest, it was my least favorite of all the fabrics I used. I will add that is was a rather think DBP from my stash that I held onto for pattern tests. I think knits that are super drapey, like rayon spandex, may not give you in intended look. I often don’t like using cotton lycra for myself, however this pattern is perfect for it! My suggestion is to always look at all the tester photos and see what types of fabrics they used, this can give you a good indication of how different fabrics work with a pattern.
One thing I love about the Lenox, is that the short sleeved top version requires less than 1.5 yards!! All you need is your fabric and thread!
Sew Mary Mac’s Tips for Sewing the Lenox
- Remember to check the length BEFORE you cut your fabric. You want the waist to hit you in the right spot to get the intended fit of the Lenox.
- It’s extremely important to transfer your pattern markings! This is especially true for the side front pieces so you know exactly how far to sew down the side neckband pieces.
- Page 11, Step 3~ it is very easy to accidentally twist the side front pieces when pinning the center front to them. Just make sure both sides are laying the right direction when doing this step.
- If using a drapier knit (such as DBP), you may want to tighten the the back neckband a tad. This would mean shortening the side/back neckband pattern piece.
- Do not to any of the topstitching on the neckband pieces until you have tried on your Lenox. It’s much easier to take off a neckband and tighten it if there is NO topstitching.
A Little Bit About Pattern Testing
I was one of the testers for this pattern, and it always amazes how much time Tami(the designer) puts in to make each pattern the best it can be. As with all new releases, the pattern is pretested in every single size. During this pretest, we look at fit and construction issues. Testers make recommendations and Tami listens to everyone’s feedback. The pattern pieces and tutorial go through several versions before it ever gets to you!
Thanks for stopping by! I truly appreciate all of you that visit! If you enjoyed this blog post, consider subscribing to my blog to stay up to date with all my posts!
Mary Anne 🙂
Remember to follow me over on Instagram to see all my latest makes! @sewmarymac
You can also follow my Facebook Page~ Sew Mary Mac. On this page you will find information on my makes from all pattern companies. If I know of any good sales(pattern or fabric) I will also feature this information. I have had many of my loyal followers send me friend requests on Facebook. I do post in the Love Notions group under Mary Anne MacLean, however this Facebook account is private. There is no sewing content on that Facebook Account.
You can grab the Lenox top and dress pattern here.
This is an affiliate link. It costs you nothing to purchase from this link, it just helps fund my fabric addiction which allows me to test and review more patterns.
To receive an additional 10% off the pattern price, use this coupon code 10MARYMAC. This coupon code can be used at anytime on any pattern….even a $6 Feature Friday pattern. My code does change quarterly, so please always check the newest blog post for an update if you find a code isn’t working.
Fabric Resources
Magenta Smocked Knit is available from Surge Fabrics. It is available in a variety of colors. I really like the texture of this fabric. You can find this fabric HERE. EDITED 9/2025: This color is no longer available, however several colors of this fabric are now in the clearance section for just $5 per yard. (If you act quickly there is a remnant of the magenta in the sale section!)
The Light Blue Magnolia print is custom printed on Bamboo Cotton from Raspberry Creek Fabrics. The bamboo cotton blend is THE best fabric for hot weather! You can find this print HERE.
The Navy Floral rib knit is from Mily Mae Fabrics. This is from my stash and no longer available, but they always have a great selection of rib knits to choose from. Both Raspberry Creek Fabrics and Surge Fabrics both have a nice selection of rib knits as well.


Mary, your tops are beautiful! Though the design is lovely, I was on the fence about buying this one because of the neckline depth–I’m short and prefer higher necklines. Now that you’ve explained how simple it is to fix that issue, I’m ready to add the Lenox to my collection, too. Thank you!
LikeLiked by 1 person
Great explanation on raising the neckline! I made my first toile of this top today, and I I will feel more comfortable if I raise the neckline an inch or so. I made the sweetheart version-I assume up your technique will work for this as well. Thank you!
LikeLiked by 1 person
Yes- same technique for that neckline as well. That is the next version I want to sew up!
LikeLike
Thank you so much for the info on raising the neckline! It really helped me.out, but i did find that i had to raise the markings on the side bodice as well, the ones that tell you were the back/side neckband end, by the same as I shortened the front neckband and raised the bodice piece.
LikeLike
Yes! Thank you for catching that! I will add that to my post! Sometimes I just do things automatically and forget to include every tiny detail!
LikeLike
You have no idea how happy I am to have found this post. I want to make the Lenox but I know I will need to raise the neckline. Thank you for posting this information and all the useful information about sewing the Lenox.
P.S. Any chance you have a post about raising a scooped neckline? I don’t fear raising the neckline its just have to adjust a neckband and/or facing that worries me.
LikeLike
I don’t have a post on that specifically- but I just use a French curve ruler to draw a new higher neckline. Sometimes, like I did with my Classic tee- I took the neckline from the LaBella Donna top and traced it to the Classic. For the neckband you would simply measure your new neckline and use 80 to 85% of that measurement for the neckband. So if you neckline was day 24” you would take 24 X .80 to get your band measurement Hope that helps!
LikeLike
Hi Mary: Sorry to bother you again but I note that you like to wear your tops a little longer, and sometimes, so do I. The problem I run into is making the back large enough to slide over my backside instead of pooling up just above my bum. Do you make any adjustments to accommodate for the back of the pattern – I find mostly the front fits fine. Thanks in advance for your consideration.
Marlene
LikeLiked by 1 person
Sorry I didn’t respond right away (I was on vacation on an island without the best Wi-Fi). I don’t make any adjustments for the back- since I’ve got a flatter butt- just rounder hips. Sometimes I will gradeout a tad on the hips for extra room.
LikeLike