
…How to Keep your Sleeve Caps Puffy…A Mini Tutorial Blog Post
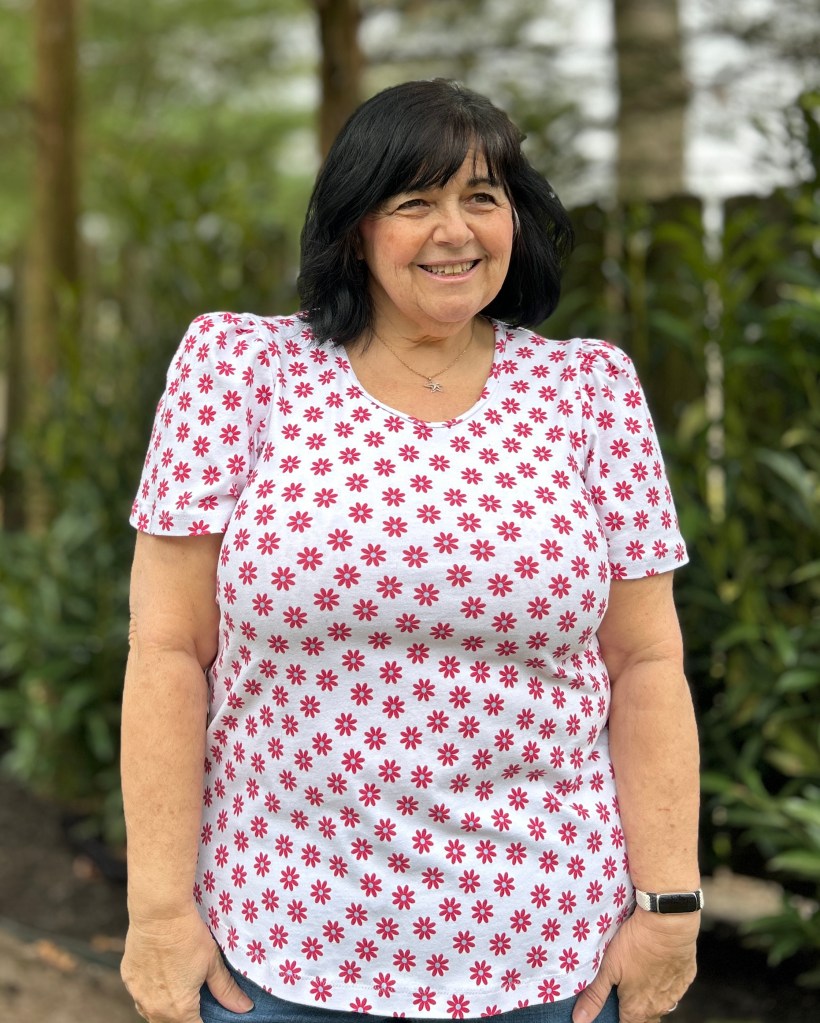

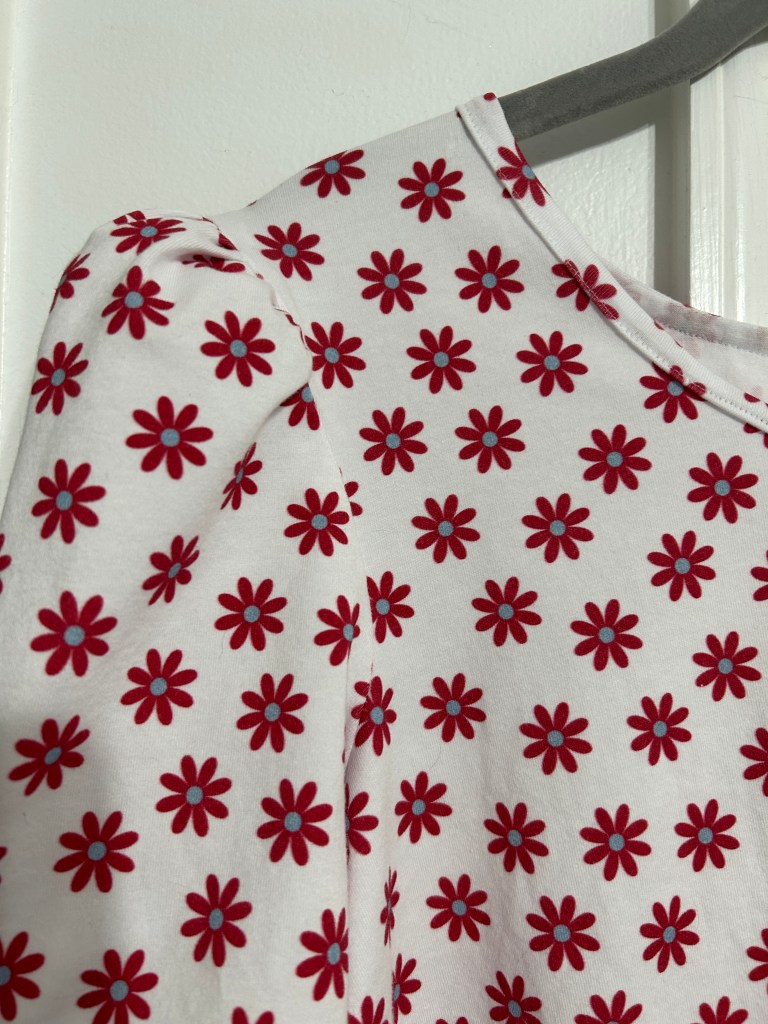
A few weeks ago, I posted this Tossed Daisy print top I made for Raspberry Creek Fabrics Patriotic fabric release. So many of you loved my puff sleeves and asked “how did you get them stay so puffy?”. Well, as promised, I’m here to share my little secret. This is something we used to do back in the 80’s~ don’t worry, it’s NOT shoulder pads!
First, the details on the actual top pattern. This is a mashup of the three following Love Notions patterns.
- Classic Tee- main body
- La Bella Donna top- neckline and hemline
- Arlington Sweater- Sleeve
For complete details on how I created the “Classic Bella or Bella Classic” as I call it, visit this blog post.
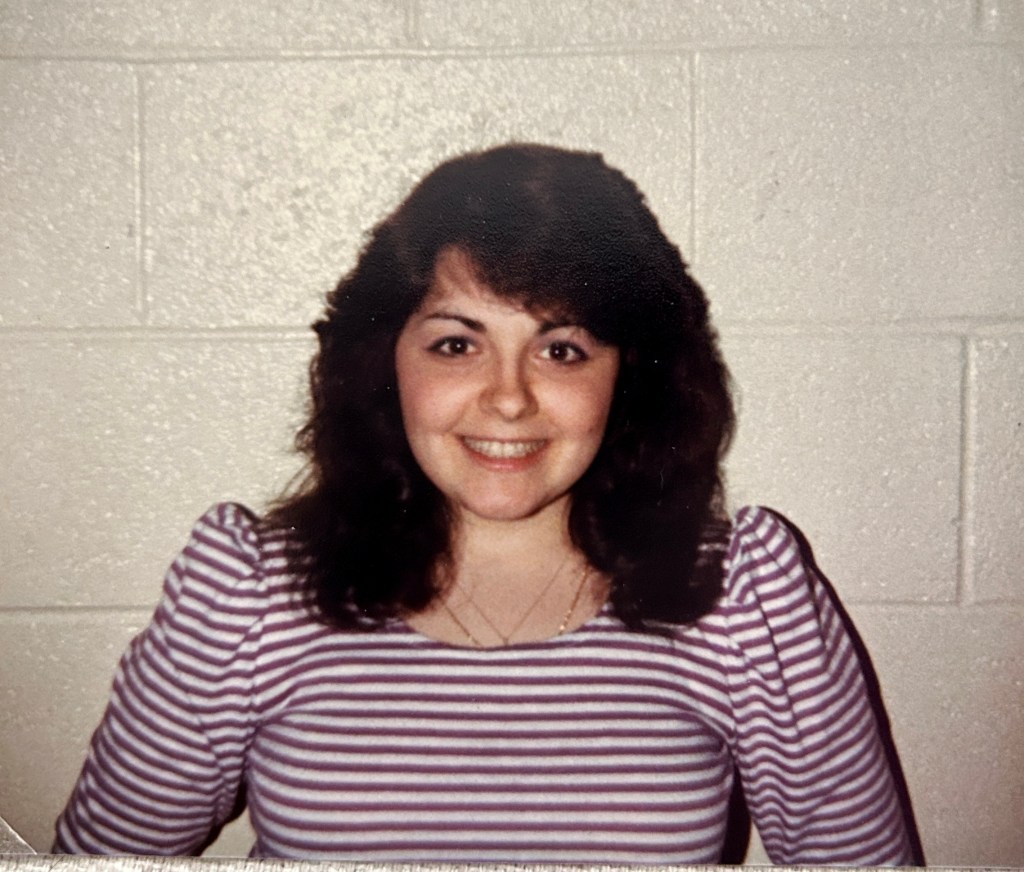
Now let’s talk about my puff sleeve. First off, I went to college in the 1980’s. We LOVED our puffed sleeve caps! And I have proof! This is a picture of me from 1983 wearing a striped puff sleeve knit top I made 40 years ago!! Look at those sleeve cap puffs! I loved this shirt and wore it often!
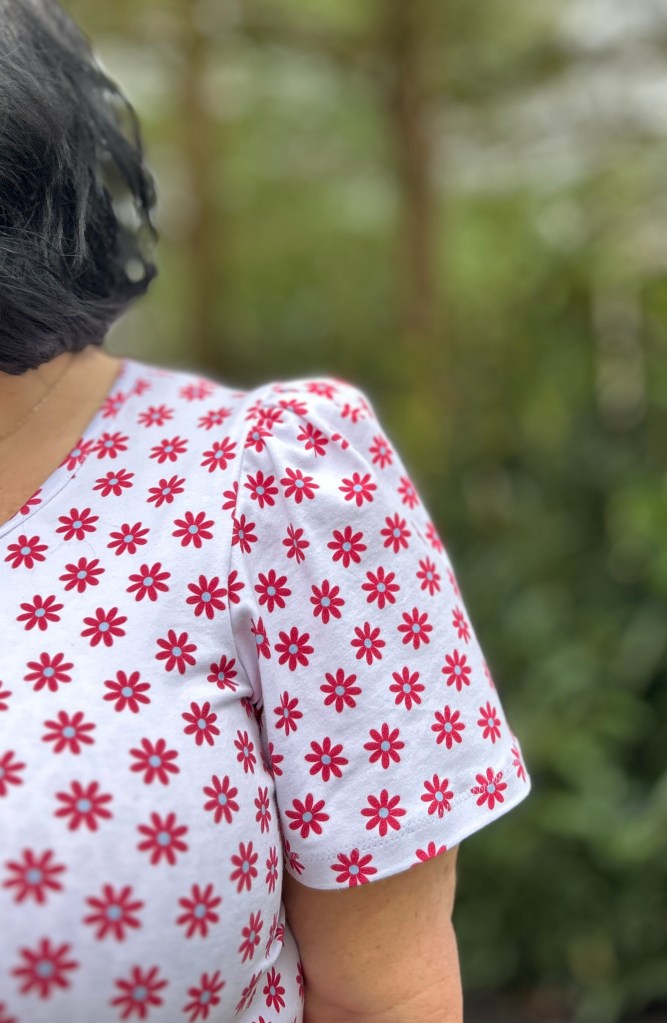
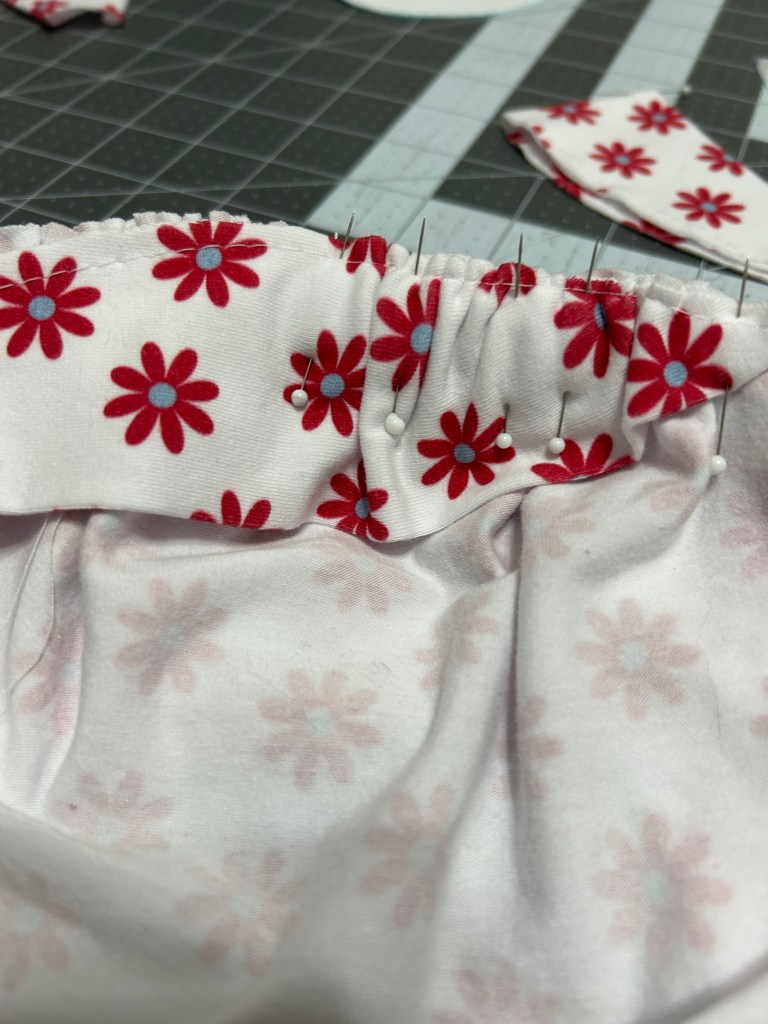
Back then, our secret to keeping our “puffs” from being droopy was to create a small sleeve cap attachment that helped to support the gathers of our sleeve caps.. It’s a very simple addition to the sleeve head seam.
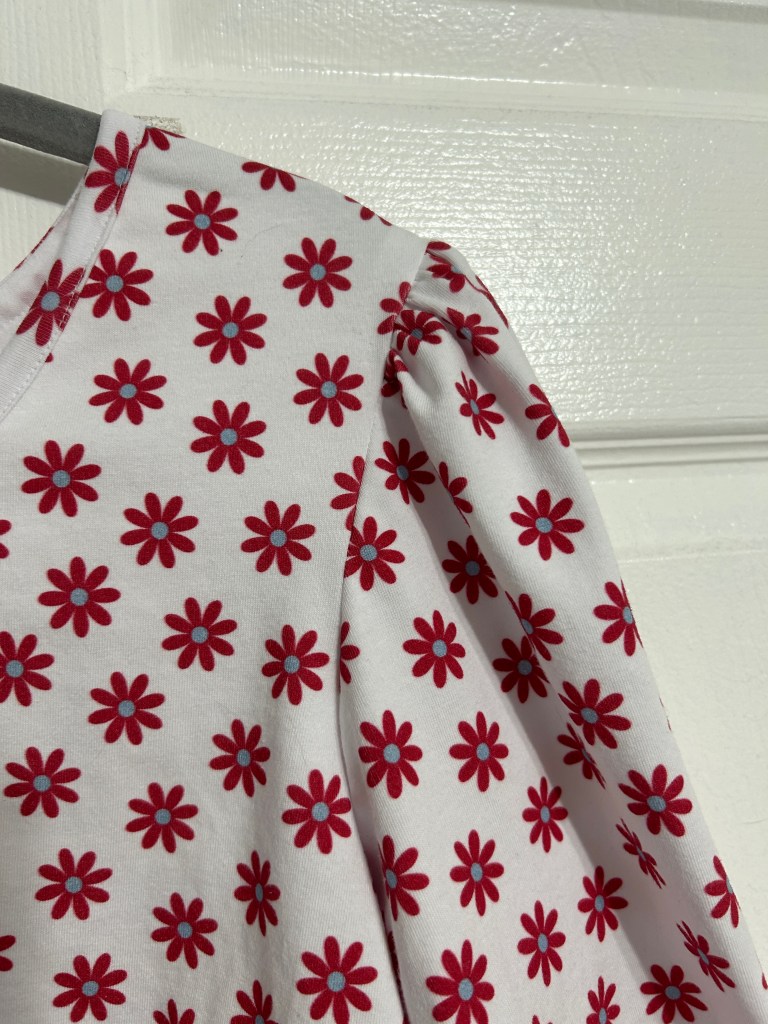
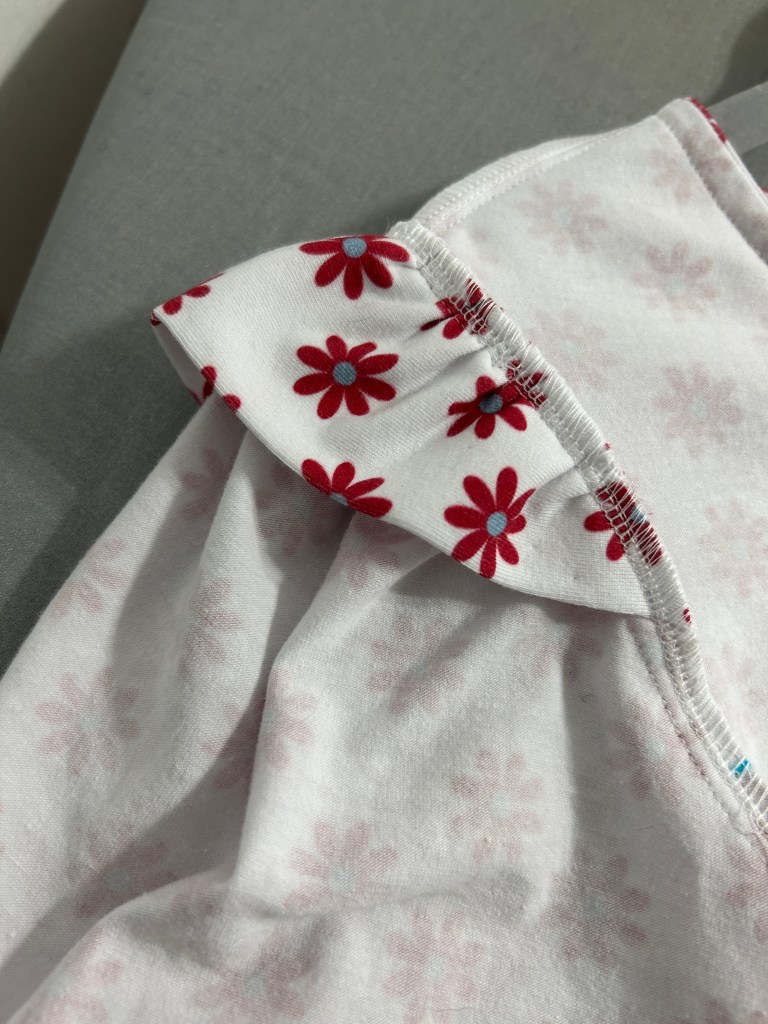
Right- after with the sleeve cap attachment.
How to Create your Sleeve Cap Attachment
- Attach your sleeve according to pattern directions. Do not overlock this seam yet. Just use your regular machine.
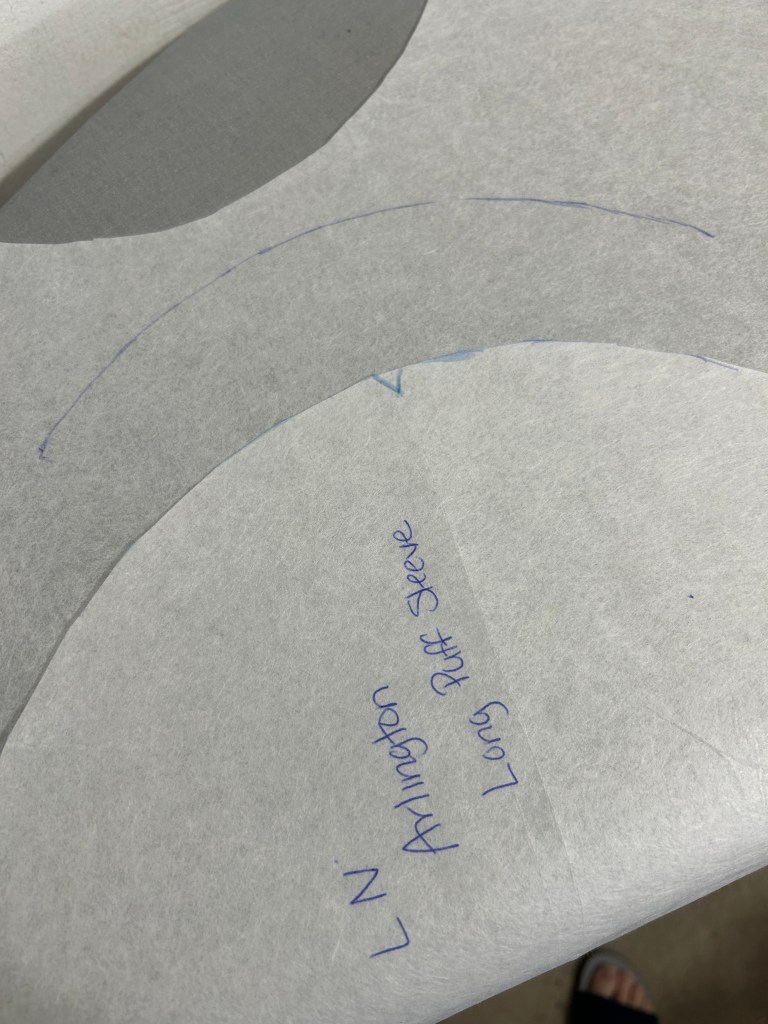
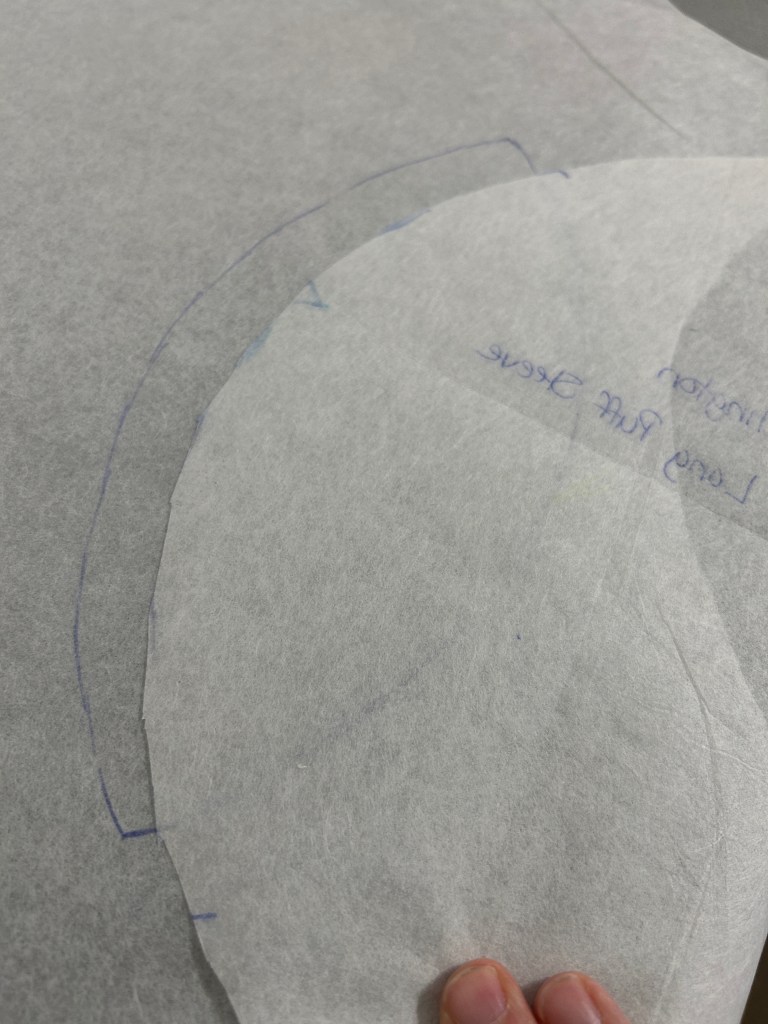
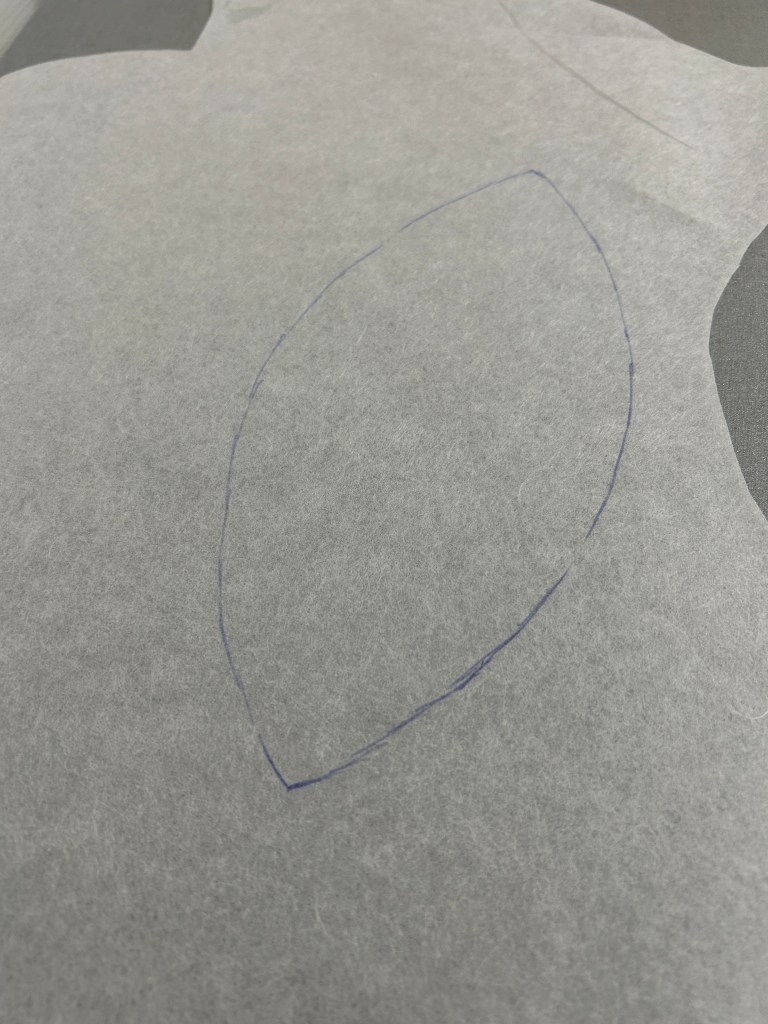
Using your sleeve pattern piece, trace the sleeve cap curve on to paper or pattern tracing cloth. Trace from notch to notch.
Flip the pattern piece over and draw a mirror image of the curve. You should now have an ellipse (football) shape drawn. This is your pattern piece for your sleeve cap attachment.
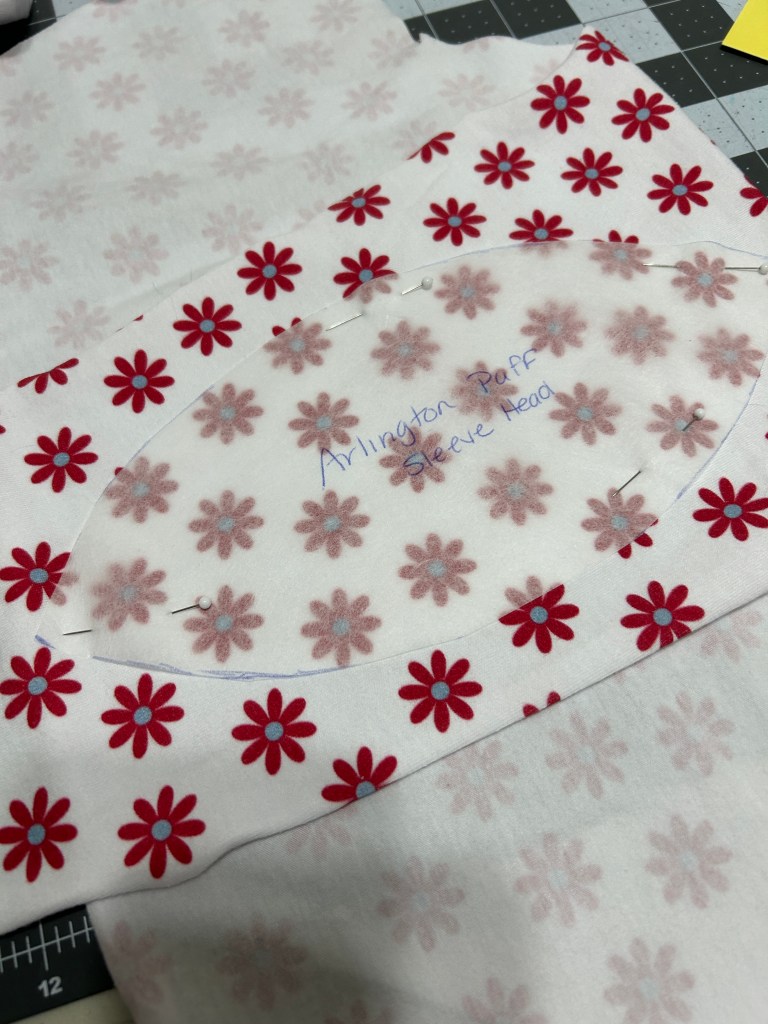
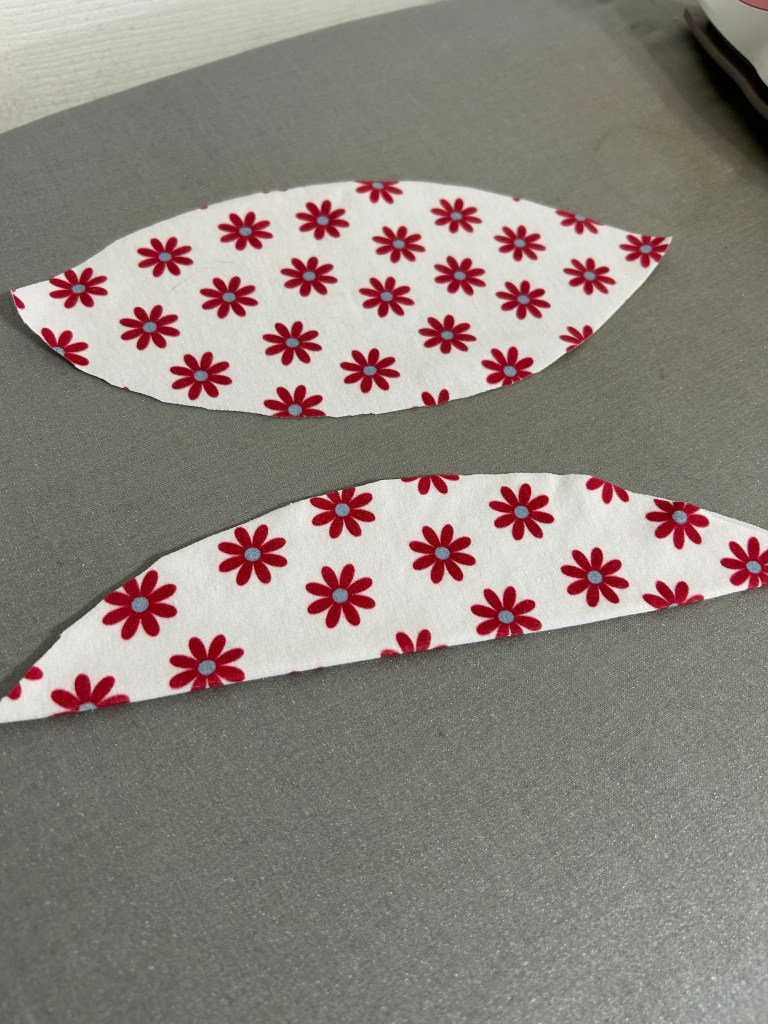
Cut 2 ellipses from your fabric, or any fabric that has some structure to it. Back in the 80’s we often made them from nonfusbile interfacing.
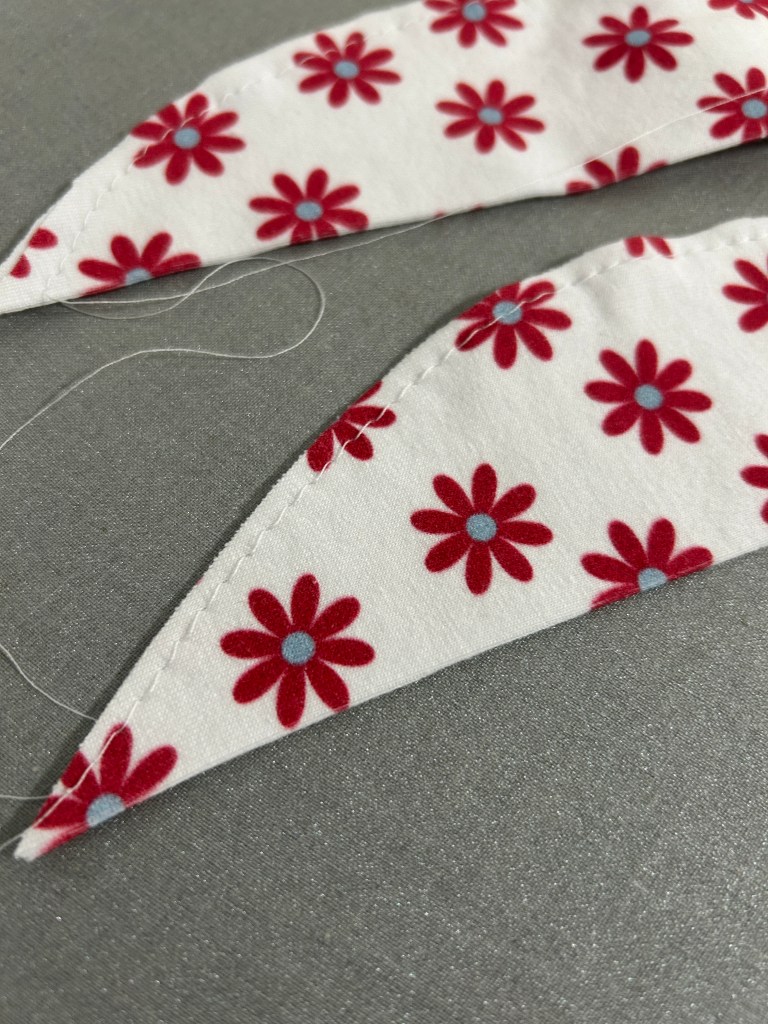
Fold each ellipse in half and press.
Gather along the curved edge.
Mark the center of the sleeve cap attachment and align it up with shoulder seam.

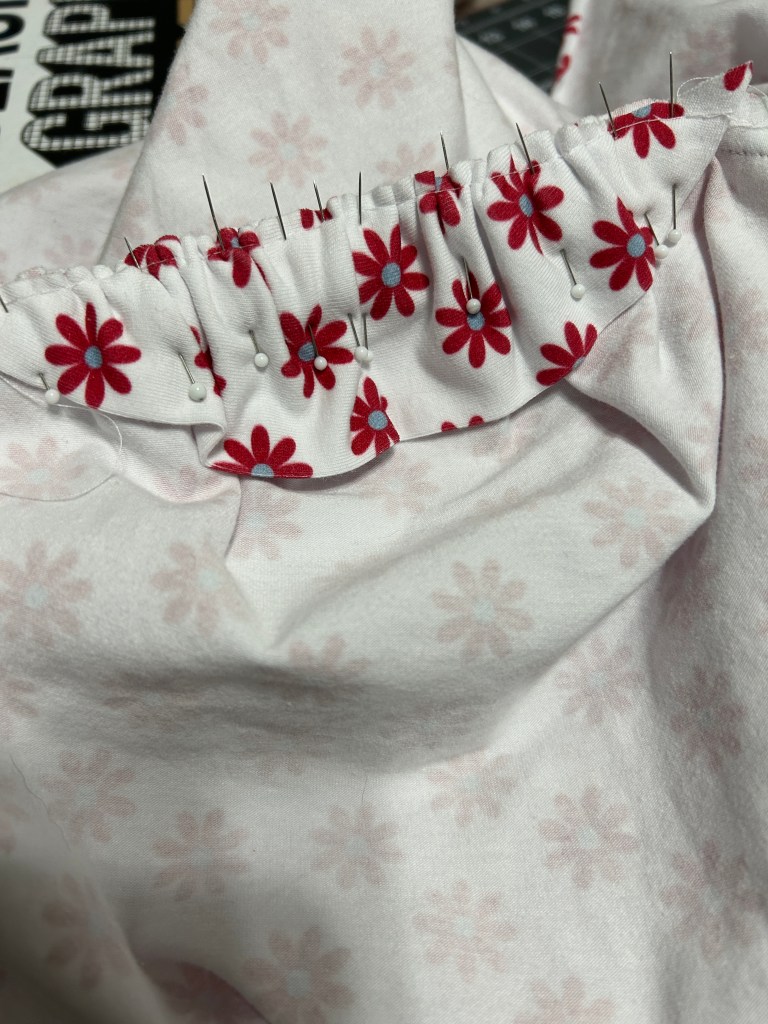
Pull gathers to fit. Sleeve cap attachment should extend about 2″ in each direction of the shoulder seam.
Pin and baste sleeve cap attachment in place.
Now finish your armscye seam with your serger if you would like.
There! You can do this little trick on any garment when you don’t want your sleeve cap gathers to be droopy.
Thanks for stopping by! I truly appreciate all of you that visit! If you enjoyed this blog post, consider subscribing to my blog to stay up to date with all my posts!
Mary Anne
Remember to follow me over on Instagram to see all my latest makes! @sewmarymac
You can also follow my Facebook Page~ Sew Mary Mac. On this page you will find information on my makes from all pattern companies. If I know of any good sales(pattern or fabric) I will also feature this information. I have had many of my loyal followers send me friend requests on Facebook. I do post in the Love Notions group under Mary Anne MacLean, however this Facebook account is private. There is no sewing content on that Facebook Account.
You can grab the Love Notions patterns I used here.
These are affiliate links. It costs you nothing to purchase from this link, it just helps fund my fabric addiction which allows me to test and review more patterns.
To receive an additional 10% off the pattern price, use this coupon code MACSEWS10. This coupon code can be used at anytime on any pattern….even a $5 Feature Friday pattern. My code does change quarterly, so please always check the newest blog post for an update if you find a code isn’t working.
Raspberry Creek Fabrics is one of my go to shops for cotton jersey and French Terry. You can shop the entire Patriotic line HERE.
You can find the Tossed Daisy Print HERE.
I am currently a member of the Promo Team at Raspberry Creek Fabrics. This fabric was given to me to sew up and promote during the release of their Patriotic fabric line. As always, all opinions are my own!