
Edited 4/22/25 with updated photos
The Rhapsody is the $6 Feature Friday pattern at Love Notions on Friday, April 25, 2025. Be sure to use my code LOVEMARY10LN for an additional 10% off.
…A Mini Pattern Hack Blog Post
This is a mini blog post on how to create a Bishop sleeve with a ruffle cuff. For more detailed information of the Love Notions Rhapsody Blouse visit this blog post.
With the anticipation of Spring’s arrival, I am always anxious to add a few new Rhapsody Blouses to my closet. Add in new rayon challis prints available from Raspberry Creek Fabrics ~ and I am ready to get sewing.
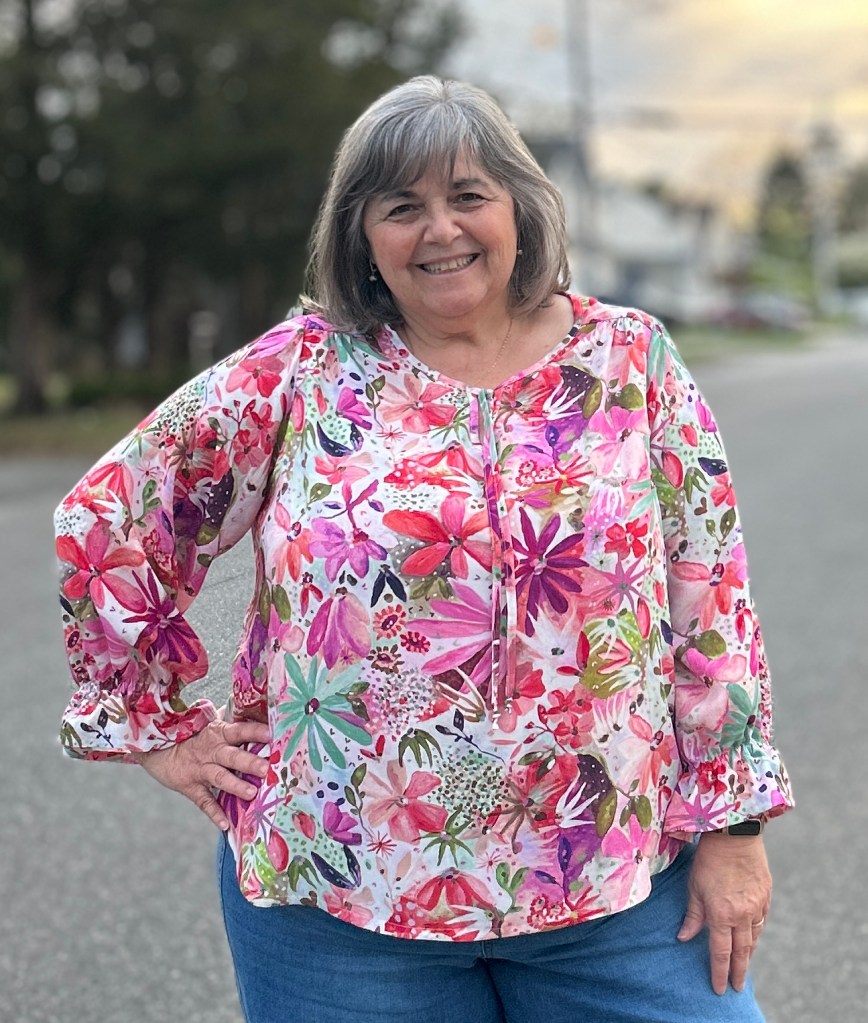
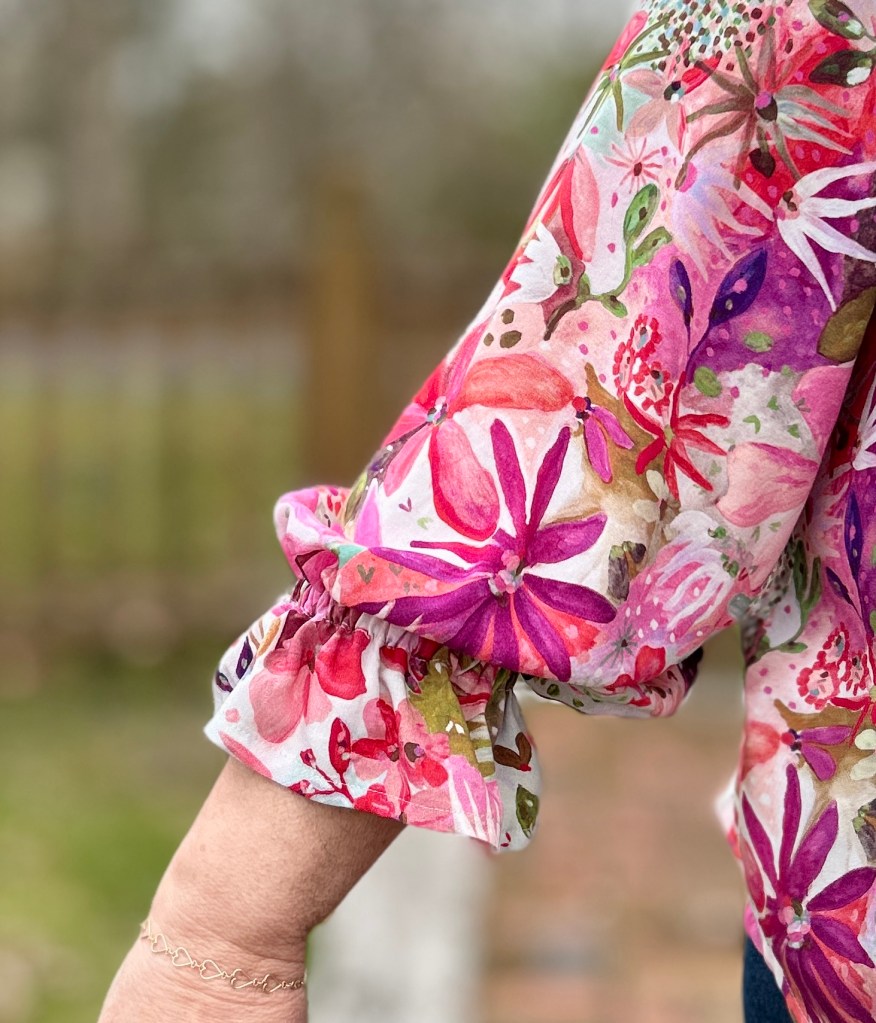
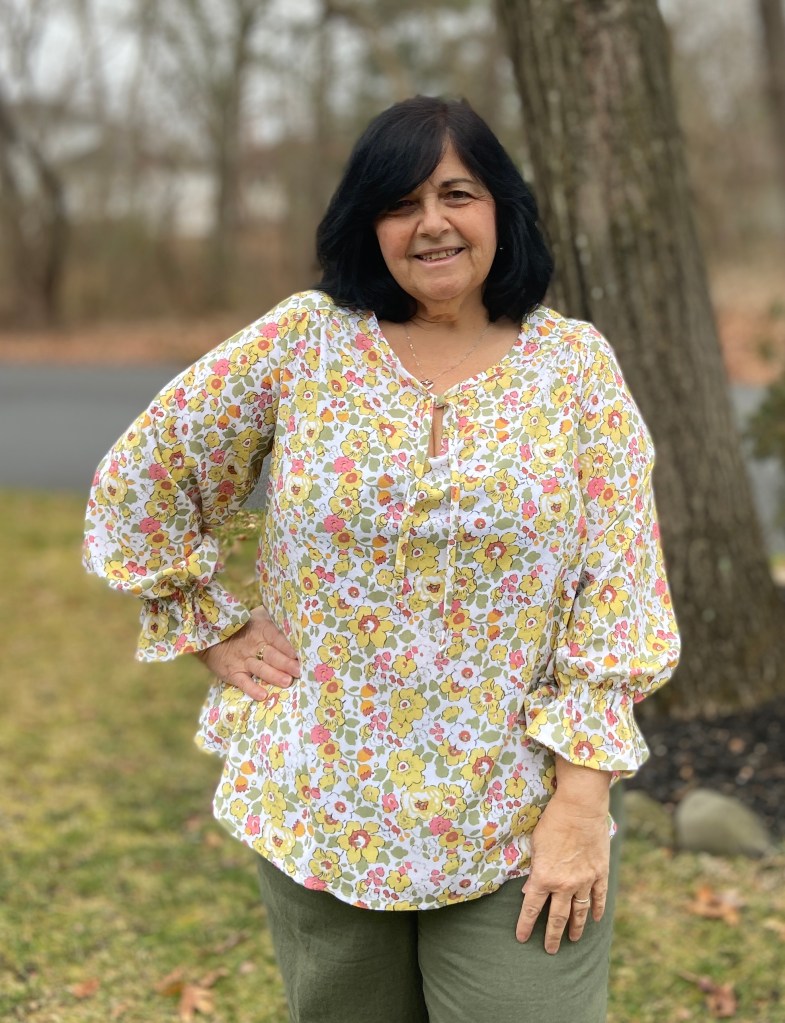
I made a ton of cap sleeve Rhapsody Blouses last summer as my everyday tops. They were perfect for hot and humid weather, and looked so much cuter than a basic t-Shirt. When Fall came around, and we still had a few get aways planned- I decided to add a long sleeved Rhapsody to my travel wardrobe. I wanted something romantic and soft with full arm coverage. So came up with what I’m calling a Bishop Ruffle cuff sleeve! It’s a really simple hack that you could use on any long sleeve Bishop sleeve.
I created this “Ruffle Cuff Bishop” sleeve simply by adding a bias tape casing to the inside of the sleeve, and then inserting 3/8″ wide elastic. Keep reading to learn how.
Bias Tape
Before we get to the step by step directions, let’s talk about the bias tape. I highly recommend making your own. Handmade bias tape truly elevates your Rhapsody Blouse. There are many tutorials online. You can even find one here in the Love Notions Blog.
- When cutting bias strips for your neckedge and ties, make 2 additional strips for the sleeves.
- I made 2 strips, 20″ X 1 1/4″ for my size XL sleeves.
- On both long edges, fold and press 1/4″.
Sleeves
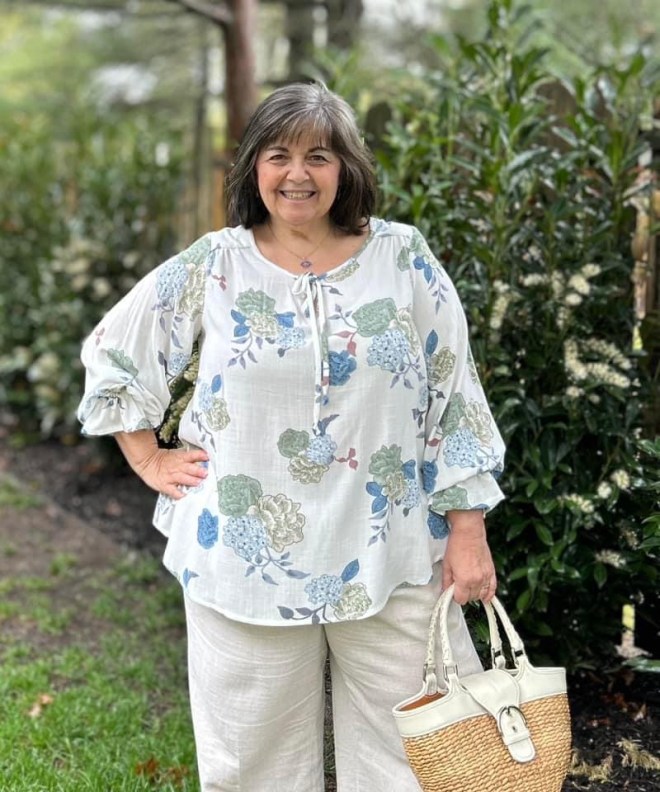
Start with the Bishop Sleeve pattern piece. I did NOT add any length to my yellow floral version. I typically need to shorten long sleeves for my shorter arms. You may want to add length to this sleeve if you want it to hit at your wrist and blouse over. I suggest cutting a sleeve from some muslin and sewing it up and trying it on your arm. My cream print version is a Bishop sleeve with my typical length adjustment(1-2″). As you can see, it ends higher up on my forearm.
I prefer to hem and create my elastic casing BEFORE I inserting the sleeve to my blouse. I find there is less fabric to work with and makes it easier to handle.

- Sew sleeve underarm seam as indicated in the pattern direction (1/4″ + 1/4″ French seam).
- Hem the bottom edge of the sleeve with a narrow hem.
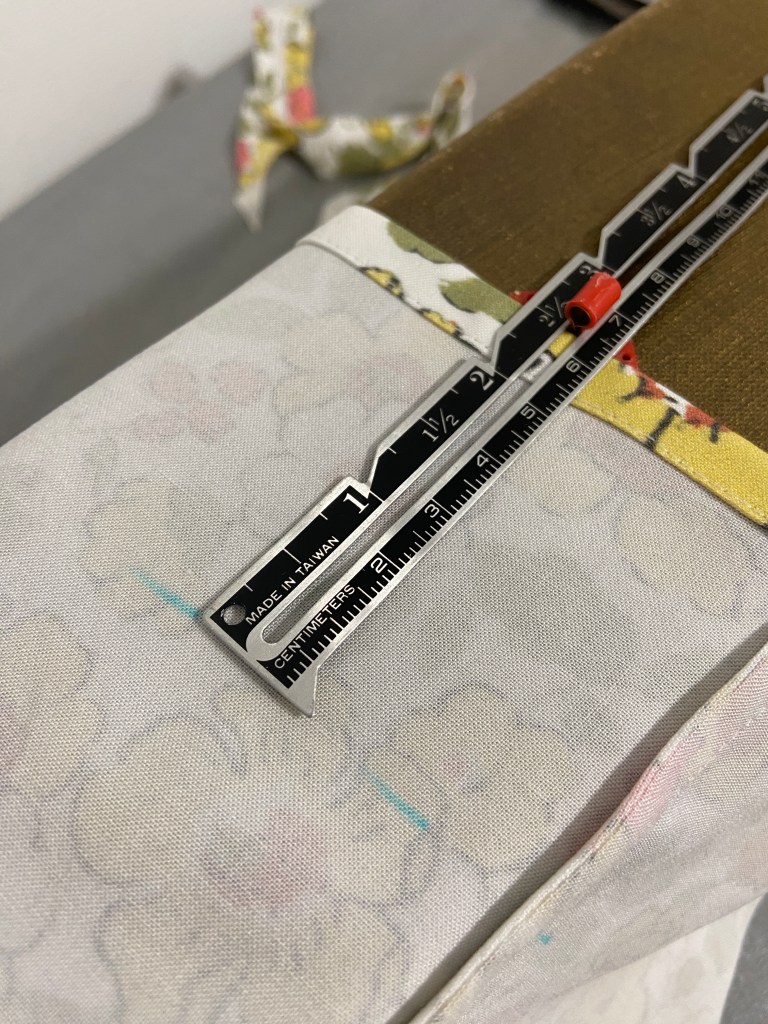
- Measure 2 1/2″ up from the sleeve hem and mark.
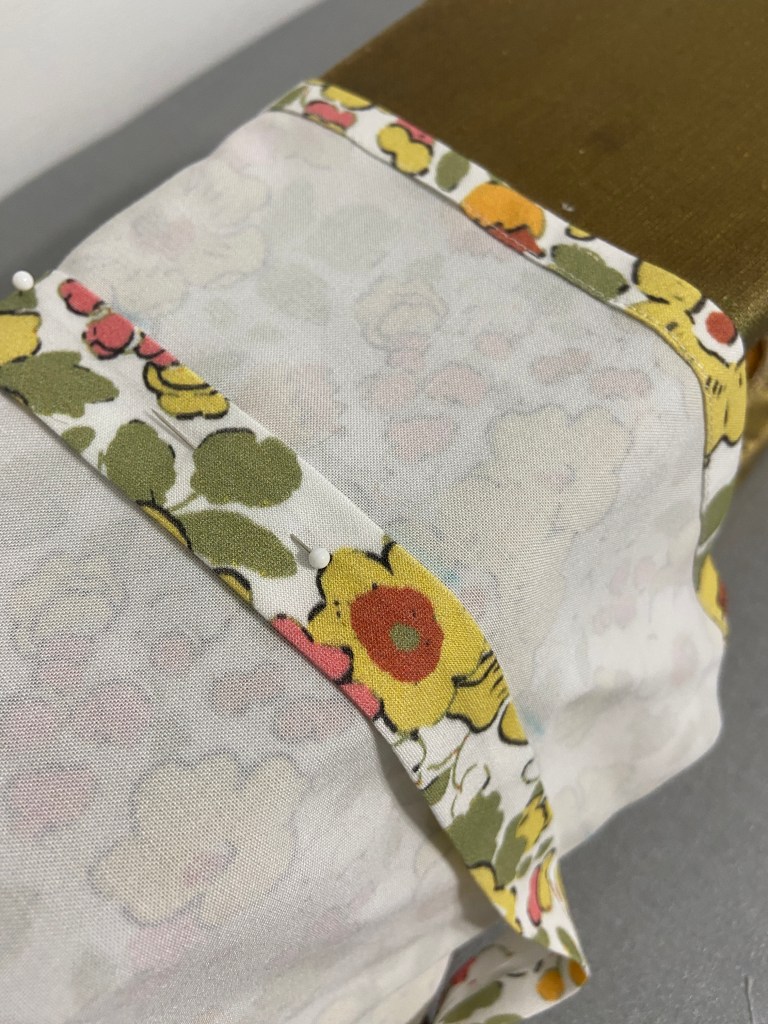
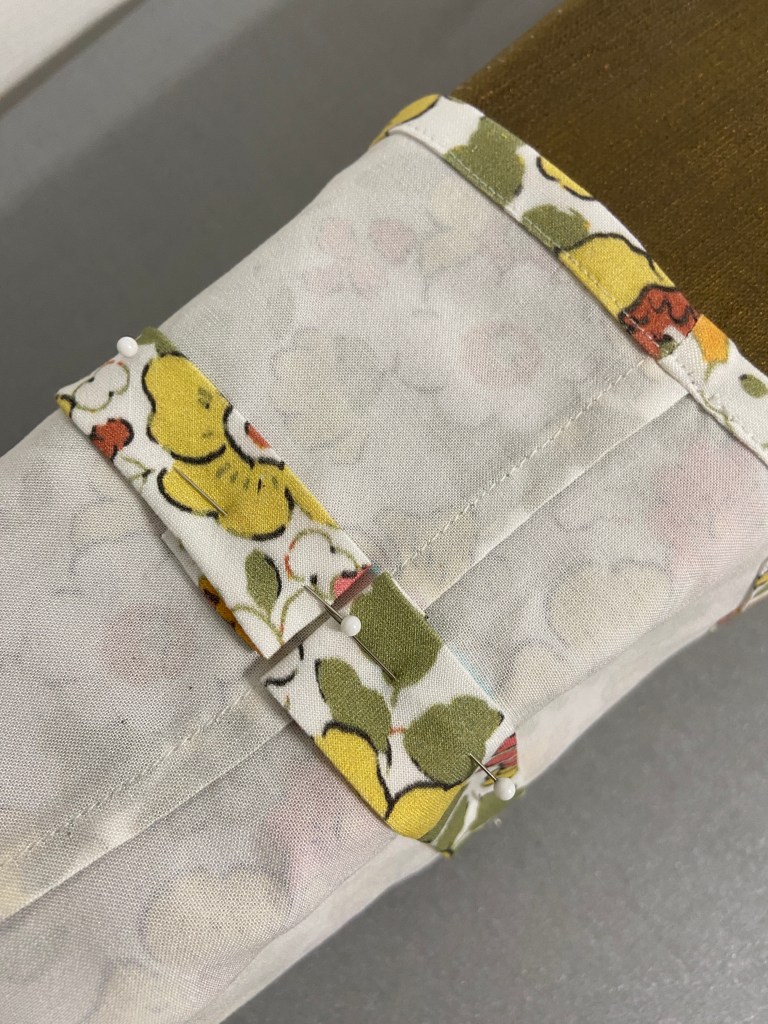
- Pin the wrong side of the bias tape to the wrong side of the sleeve, placing the bottom edge of the bias tape along your markings.
- Fold under the beginning and end 1/2″.
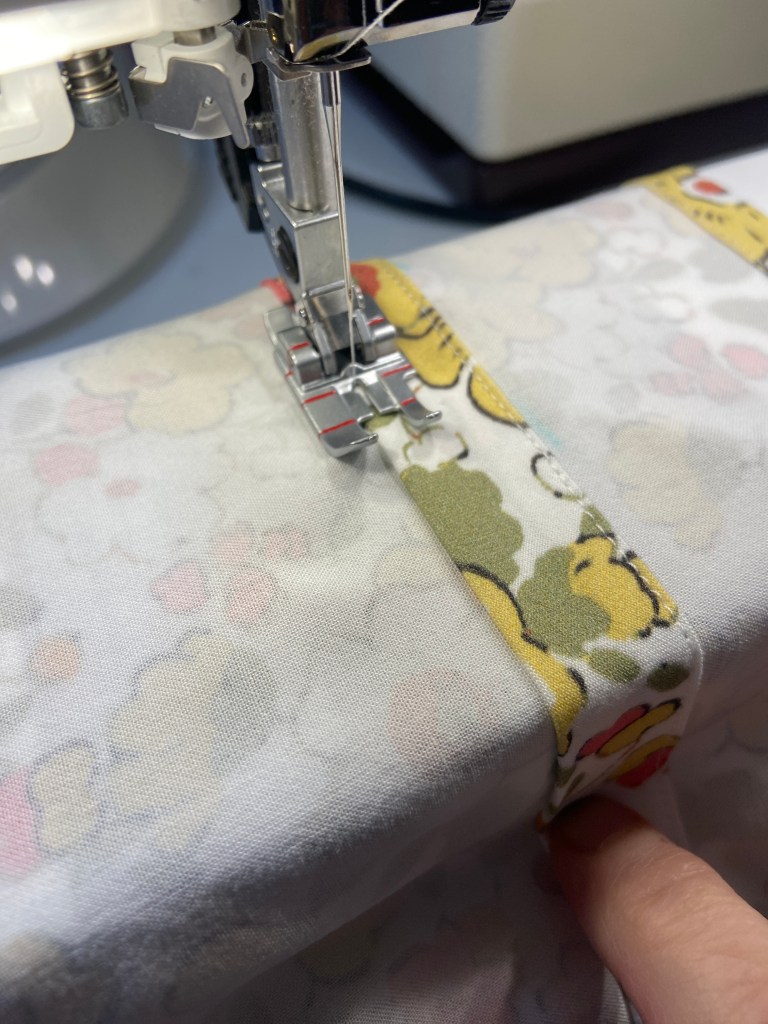
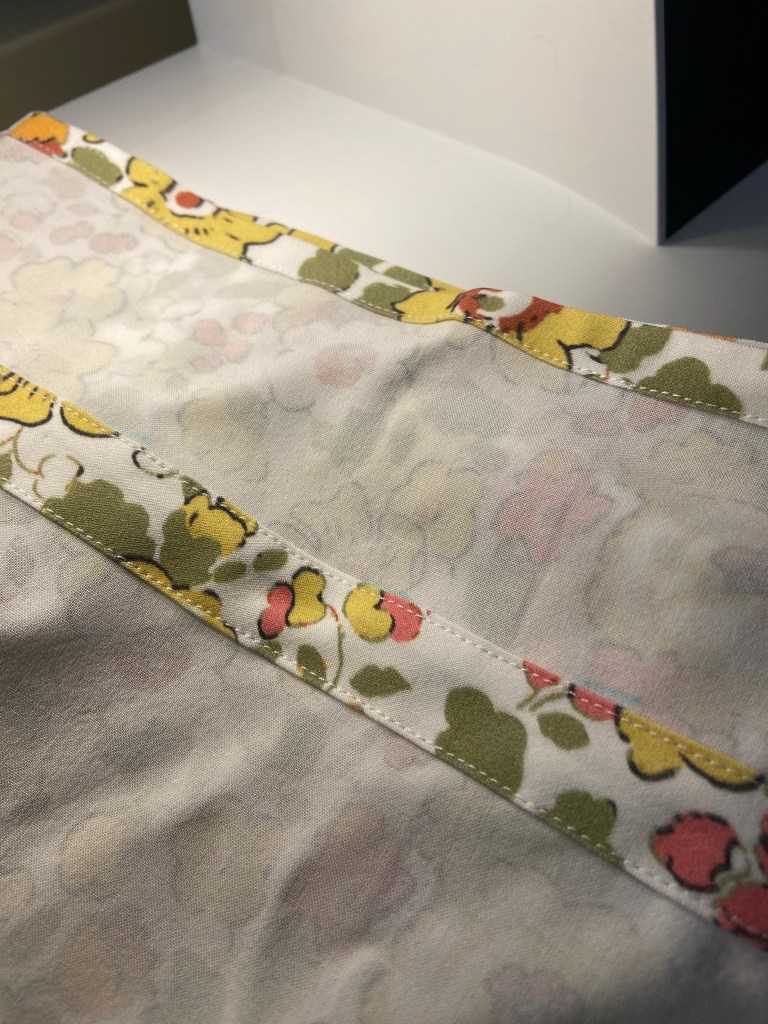
- Stitch along both long edges of the bias tape.
- Insert elastic, tighten as desired. I used 3/8″ wide elastic. Stitch ends of elastic together with a stretch or zig-zag stitch.
- Slip stitch the opening closed. (TIP: I typically do this AFTER I have worn the blouse, so I can double check the elastic tightness)
EXTRA TIP: I ALWAYS sew 2 Rhapsody Blouses at the same time. I choose 2 fabrics that I can use the same color thread for. It really does take less time to batch sew 2 than if I made them separately.
Edit 4/25: I STILL always make 2 Rhapsody Blouses at the same time (I also do this with the Aria button down)
For more information on the Rhapsody Blouse, such as sizing, fabrics and more sewing tips visit this Rhapsody Blouse Roundup post.
Fabric Resources
Both of these blouses are made from Raspberry Creek Fabrics rayon challis. It is by far my favorite rayon challis to work with. It isn’t as shifty as many others, making it easier to sew with. It washes so nicely and has a beautiful drape.
The Vintage green and yellow floral is from the Spring 2023 line and is available HERE. This fabric was provided to me as a member of the RCF promo team.
The Cream Boho Floral Garden print rayon challis I purchased and had custom printed from the Designer Studios at RCF. You can find this print here.
The new Pink Watercolor Floral is an amazing rayon challis from Style Maker Fabrics from their 2025 Spring release. I couldn’t resist the colors in this one. And it really does look like it was painted with watercolors!

Thanks for stopping by! I truly appreciate all of you that visit! If you enjoyed this blog post, consider subscribing to my blog to stay up to date with all my posts!
Mary Anne 🙂
Remember to follow me over on Instagram to see all my latest makes! @sewmarymac
You can also follow my Facebook Page~ Sew Mary Mac. On this page you will find information on my makes from all pattern companies. If I know of any good sales(pattern or fabric) I will also feature this information. I have had many of my loyal followers send me friend requests on Facebook. I do post in the Love Notions group under Mary Anne MacLean, however this Facebook account is private. There is no sewing content on that Facebook Account.
You can grab your Rhapsody Blouse pattern here.
This is an affiliate link. It costs you nothing to purchase from this link, it just helps fund my fabric addiction which allows me to test and review more patterns.
To receive an additional 10% off the pattern price, use this coupon code LOVEMARY10LN. This coupon code can be used at anytime on any pattern….even a $6 Feature Friday pattern. My code does change quarterly, so please always check the newest blog post for an update if you find a code isn’t working.

Thanks for the instructions and can’t wait to try this.
LikeLike
I can’t wait to see!
LikeLike
I love your makes! This one is especially beautiful and has me dreaming of Spring!!!
LikeLiked by 1 person
Thank you! It screamed Spring to me!
LikeLiked by 1 person
Did you use 1/4” elastic or 3/8”? I have been contemplating a Rhapsody with a bishop sleeve gathered with 3 rows of shirring. Now I have another option!
LikeLiked by 1 person
Oops I used 3/8”. I’ll have to add that!
LikeLike
Love this! Can’t wait to try it.
LikeLiked by 1 person
Pingback: Page not found |
Pingback: The Best Bang For Your Buck~ Love Notions Spring Sale |
Pingback: Create a Coastal Preppy Wardrobe with Me and Love Notions Patterns |
Just purchased the pattern, and I ADORE your sleeve adaption, thank you for sharing xx
LikeLike
Thank you so much!
LikeLike