
The Love Notions Cadence just got an update a couple years ago,~ and to my surprise my mindset got an update as well! I’m going to be totally honest here. I planned to make this a post simply about the updated Cadence, its options and how I made it to fit my pear shape. I made a top version and then a knee length dress. I was happy with them both. Then I went outside with my trusty tripod and took photos. And that’s when it hit me. Everything I thought before about fitting my body changed. Be sure to read down to the Sizing and Alterations section to learn what I discovered!
Oh yeah, and the Cadence is only $6 today, Friday 7/25/2025. Seriously go grab it~ you won’t be disappointed. This breezy shift style dress deserves a place in everyone’s closet! Remember to use my code 10MARYMAC for an additional 10% off.
Details
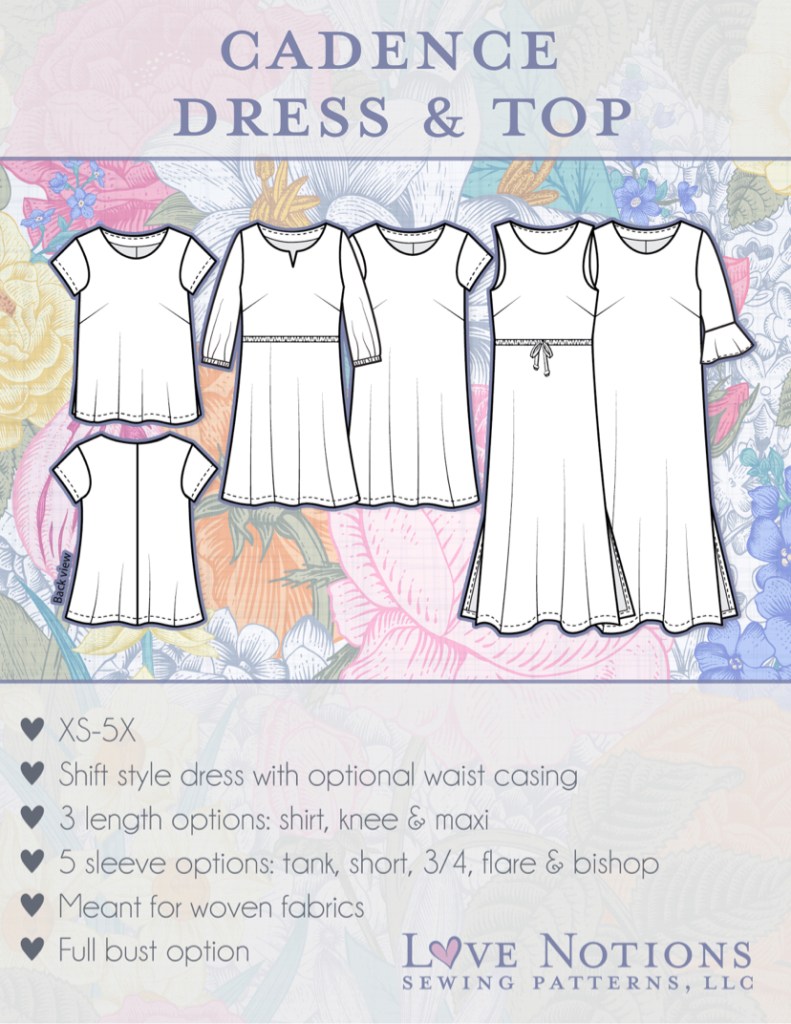
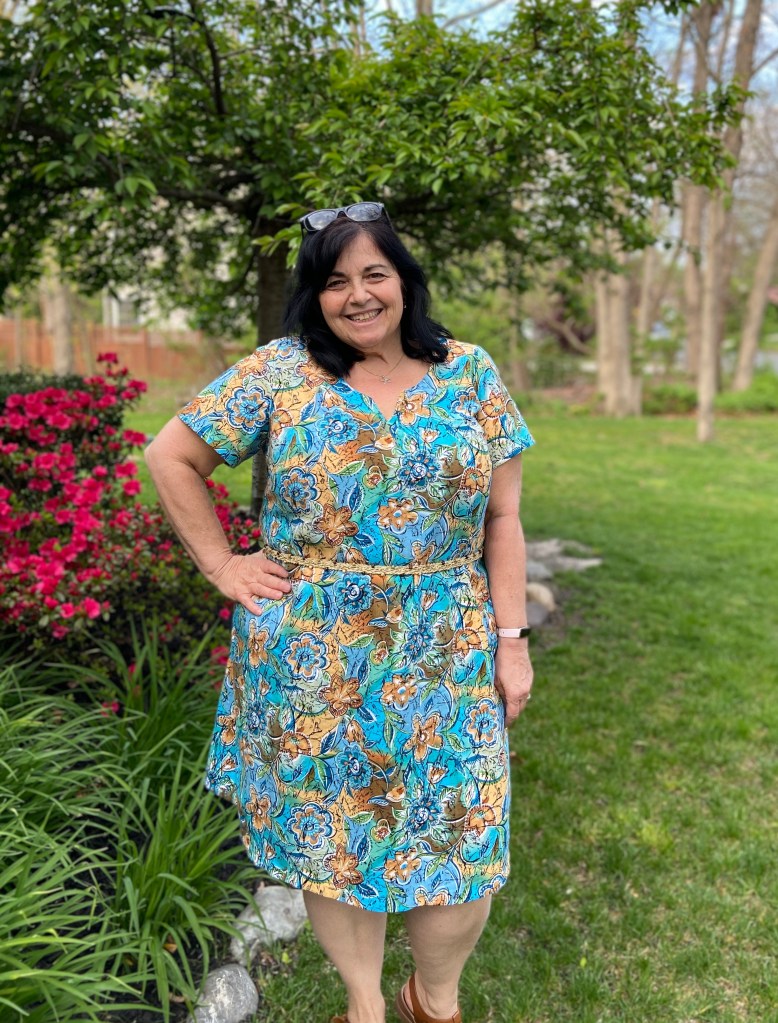
The Cadence is a simple shift style dress designed for wovens. Darts and a center back seam help to give the dress some simple shaping. With so many options available you can mix and match for many different combinations! Make it dressy, make it casual~ the choice is yours!
Cadence is THE perfect simple, clean dress for Spring and Summer. It’s a breeze to sew, making it a perfect pattern for beginners!
- 3 lengths: shirt, knee and maxi
- 5 sleeve options: tank, short, 3/4, flare and bishop
- Side Slits
- Optional drawstring/elastic casing waist
Sizing and Alterations
The Cadence sizing has been updated, so it is now available in sizes XS to 5X. As with all new and updated Love Notions patterns, a Full Bust option is included.
Like with all woven tops/dresses, I highly suggest making a muslin for your first Cadence. In this case I would just make a top version, checking the placement of the darts. If you wind up needing to adjust the placement of the darts, the directions are right in the tutorial.
You can use any woven you have on hand for this~ a sheet or actual muslin work fine. I typically grab something from my stash that I don’t “love” anymore.
I made my new to me(for 2022) size of an XL(with full bust) at the shoulders and bust graded out to a 2X for my hips. Remember to ALWAYS select your size by your high bust measurement! This is exactly where my measurements fall on the sizing chart. Remember that the full bust option gives you an additional 2″ at the waist and hips then indicated on the finished. measurements chart. My hips are actually just bigger than the 2X, but I did NOT grade out to the 3X since there is the additional 2″ from the Full Bust front. This makes my dress/top fit a tad closer to the hip, but this is the look I wanted for a more traditional shift dress look. Since my fabrics were not very drapey, I didn’t want them to “tent” out. If I was making this in a rayon crepe or challis, I would probably grade out to the 3X.


How my mindset changed towards fitting my body
Love Notions patterns are drafted for a height of 5’5″. The top is meant to hit below the high hip but above the full hip. The knee length dress is meant to hit right above the knee and the maxi length dress is meant to hit below the ankle. If you need a longer/shorter length this can be accomplished easily by using the lengthen/shorten lines. The tutorial provides simple instructions on how to do this.
I am only 5 feet tall. I don’t always shorten shirts/tops or knee length dresses. I generally prefer my tops shorter to cover my tummy, and knee length dresses to cover my knees. And THIS dress/top has now changed my mind.
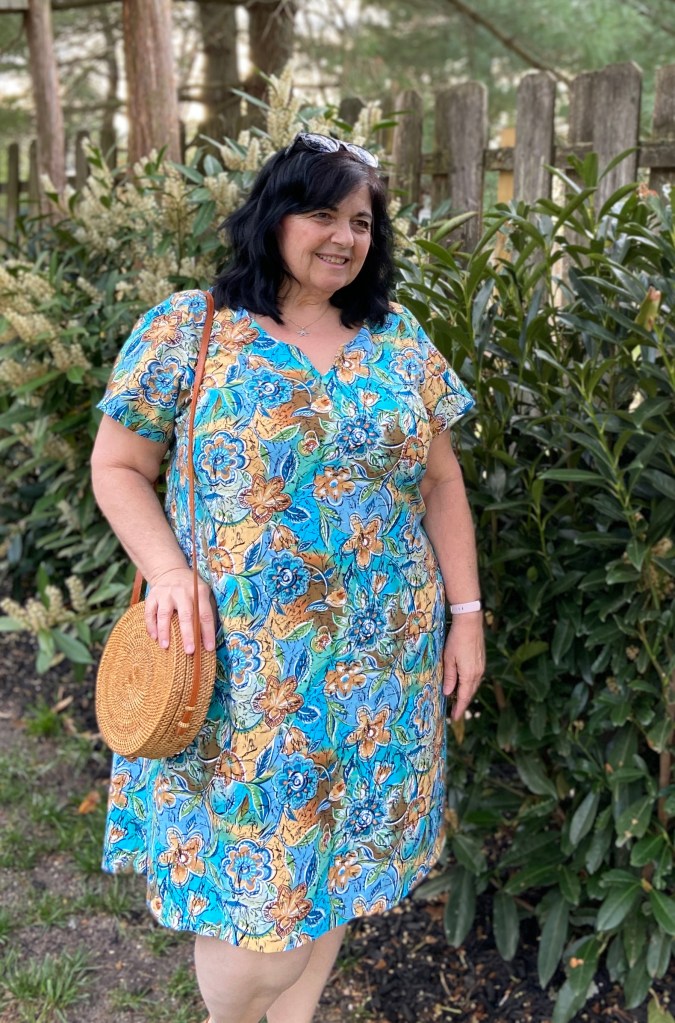
Sometimes taking photos of yourself is the best way to see how something really fits you and how you FEEL in the garment. Looking in the mirror, just doesn’t always give the same results. I will admit to being a bit self conscious about my heavier knees and legs~ so I cover them. I cover my tummy too. But, when I looked at pictures of myself in my Cadence dress, I thought “I love how this dress feels, and I LOVE the notched neckline~ but I look a tad frumpy”. Then I tied it with a jute belt, which in turn made it shorter. And suddenly I thought, I look BETTER with this dress shorter even though my knees are showing!
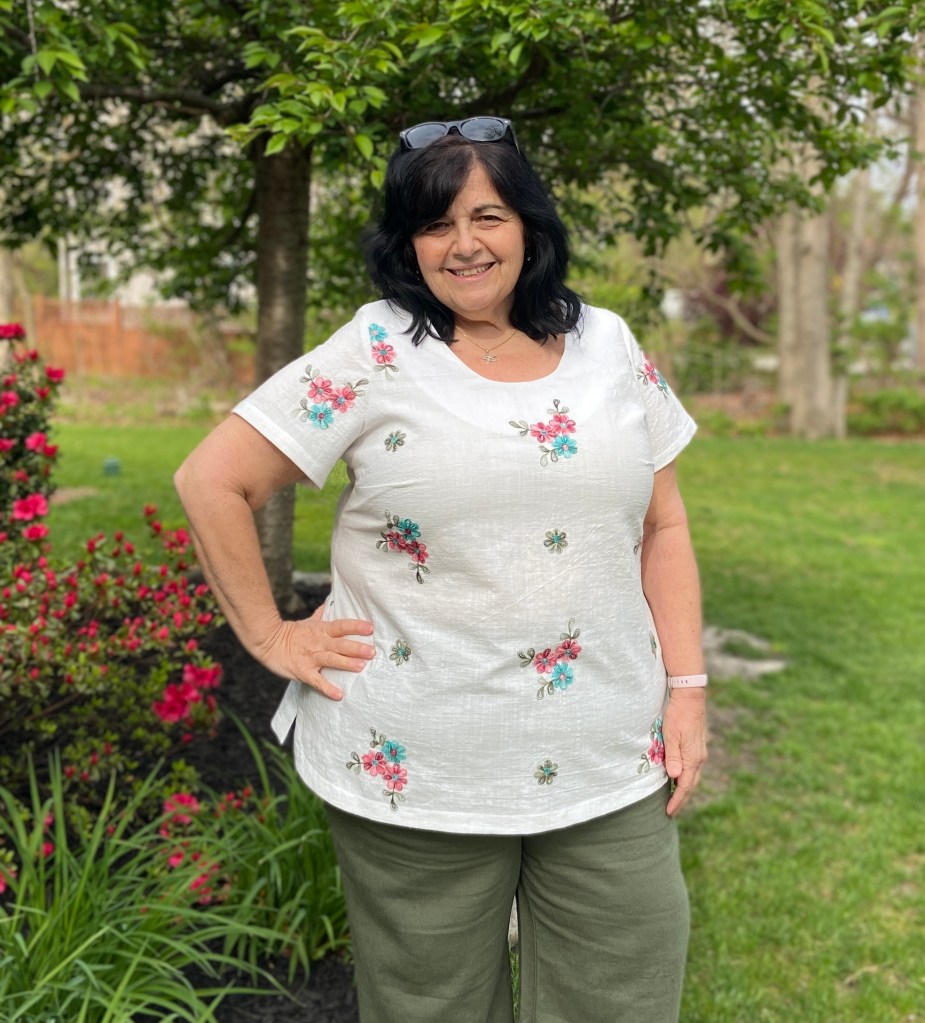
Then I put my top muslin on again~ and I tucked the middle up to take out 2″ of length~ and I thought “hey this looks better too!” And suddenly my mindset has changed. I’m going to STOP trying to cover up all my parts I’m unhappy with. Covering them up, doesn’t always make me look/feel better.

So for these 2 garments, expect to see them posted again soon~ with alternations! I’m going to put an outside casing on the dress with a drawstring. I will shorten it, and although I will loose the side vents in the process~ I will have a dress I will want to wear all summer! The top I am going to shorten, even though I will loose the side vents as well. But, I WILL be making another Cadence dress, shortened by 2″. And I WILL be showing off my chubby knees!
Fabrics and Notions
The Cadence is designed for light to medium weight apparel wovens. Fabrics such as linen, chambray, rayon and poplin will all work. Quilter’s cotton won’t work very well for this pattern (maybe try the Melody or Aria for that)~ but you could use it for a muslin if needed.
Knits can be used, but you might need to size down. In that case, making a muslin would be a good idea.
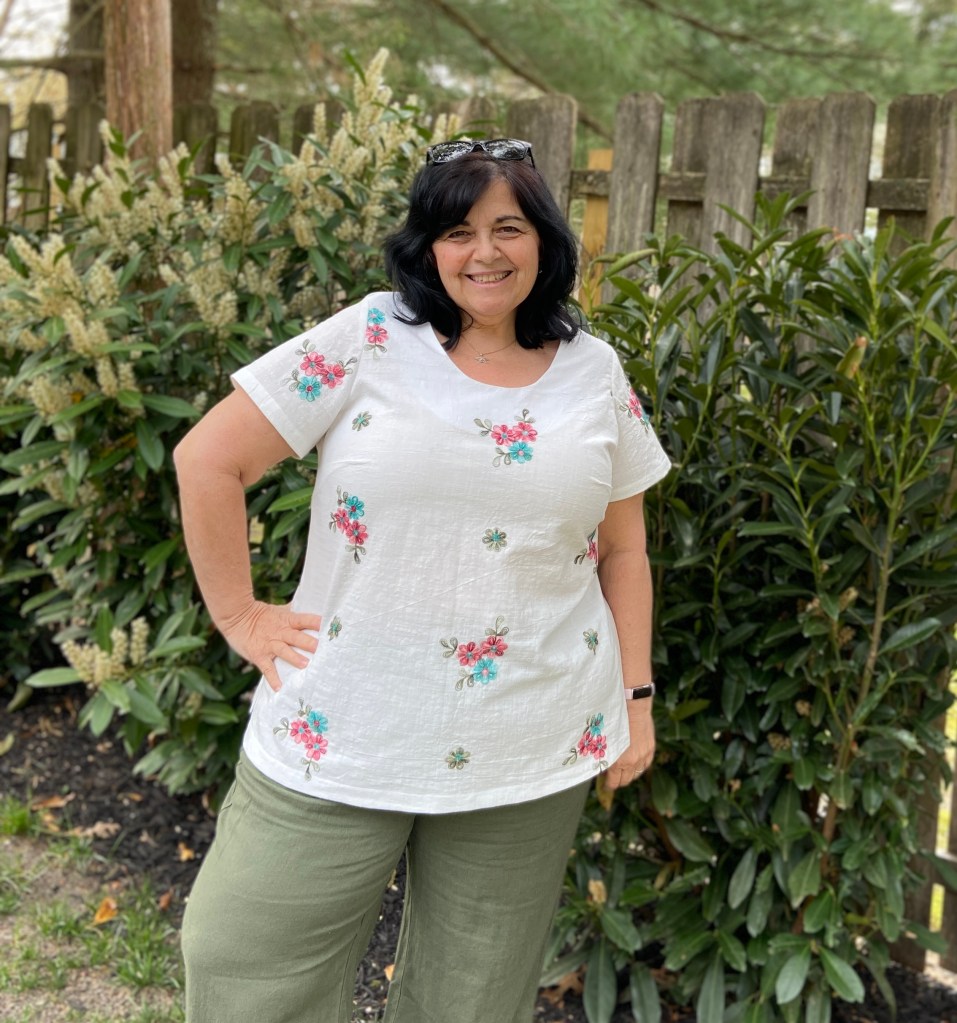
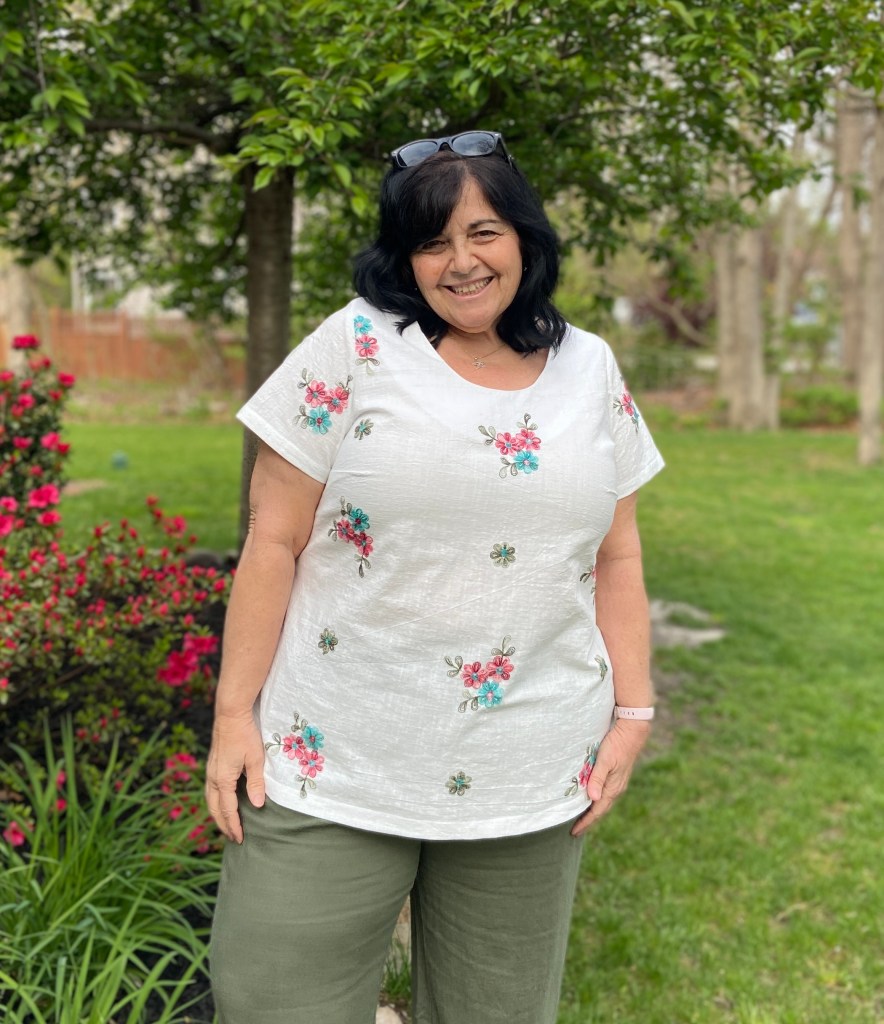
My top is made from a laundered cotton with embroidered flowers. I purchased this in at M & J Fabrics in Queens, NYC. It was $3 a yard~ and it was perfect for my wearable muslin. I chose to use the wrong side of the fabric as the right side. For the facings, I used a solid white cotton to prevent the embroidered flowers from showing through to the outside.

which is the side I used as the right side
My Cadence dress is a linen/rayon blend from Chic Fabrics, NYC Garment district. This is the perfect fabric for this pattern. If you can find any linen/rayon blends I highly recommend them for this dress. Not too stiff to “tent”, but not too drapey that it hugs your body.
Notions
- Fusible Interfacing
- Thread
- 1/2″ elastic for waist, optional
Sew Mary Mac’s Tips for Sewing A Cadence
- Make a Muslin!!!!
- Check the dart placement and the length!
- Be sure to stay stitch the neckline.
- Use solid white for facings if your fabric has a light colored background with a printed design. The printed design can show through. Always check this with any light colored printed fabric.
- Consider “Block Fusing” your interfacing for the facings. This helps to guarantee your facings and interfacing keep their shape.
- To help prevent your facings from flipping out~ stitch in the ditch across the shoulder seam through the top/dress and facing.
- Always press as you go!
- Lastly and most importantly~ take a photo of yourself. It can really open your eyes to how something fits you.
Thanks for stopping by my blog. If you enjoyed reading this post, consider subscribing! Remember to follow and visit me over on Instagram to see all my latest makes.
Mary Anne 🙂
You can purchase the Cadence pattern HERE.
This is an affiliate link. It costs you nothing to purchase from this link, it just helps fund my fabric addiction which allows me to test and review more patterns.
To receive an additional 10% off the pattern price, use this coupon code 10MARYMAC This coupon code can be used at anytime on any pattern….even a $6 Feature Friday pattern. Codes change quarterly, so if this code doesn’t work be sure to visit my most recent blog post for the newest code.
I am currently a Love Notions Patterns Ambassador. I was given this pattern in return for sewing it up and promoting it. As always all opinions are my own.
Fabric Resources
If you’re looking for some linen/rayon blends, these shops always have some in stock.

Thank you for the great advise. I have started shortening my tops patterns by 1″ because even though I am 5’4″, I am very short waisted. I’m working on a muslin of the Cadence right now.
LikeLike
Thank you for reading my little blog! Can’t wait to see your Cadence!
LikeLike
Pingback: Focus On Fabrics: Linen |
First, I love your makes and your helpful tips! I am new to sewing clothing and have a question about one of your notes on the Cadence. What does it mean to “block fuse” the interfacing?
LikeLike
So sorry I didn’t see your question earlier!!! Block Fusing is when you fuse interfacing to a larger piece of fabric first. Then you cut the pattern piece out of the fabric when it is already interfaced. This keeps the fabric from getting distorted in anyway.
LikeLike
Thank you for the explanation about block fusing. That makes so much sense! I wish I had a linen blend to make my first Cadence, but I’ll see what I may have in my stash that would work. I’m so disappointed that my local fabric shop closed in October and I either have to purchase online or plan a road trip to get any fabric these days. Thank you Mary. I really appreciate reading your blog posts. We are very similar in shape and size.
LikeLike
Thanks for reading! I’m so happy to hear that you enjoy my blog! My favorite for the Cadence would most likely be a linen blend, but so many other great fabrics would work well too! I feel for so many of my fellow sewists that have lost their local fabric shops (including Joanns). I have a huge stash and I always go through it and try to use it up. I often use it for wearable muslins. Road trips to buy fabric sounds like a lot of fun to me!! I used to always want to touch fabrics before I bought them, but I have embraced online fabric shopping. I have my go-to shops which I feel I can trust~ but even then sometimes what I get isn’t exactly envisioned. By best suggestion for online shopping is become familiar with types of fabrics and the weights (gsm or oz.). Shops that will send samples can help you learn these.
LikeLike