
(Updated 10/12/2023 with some new photos)

Baby French Terry

Rib Knit from Stylemaker Fabrics

Hack Sweater Knit- Mily Mae Fabrics
The Details
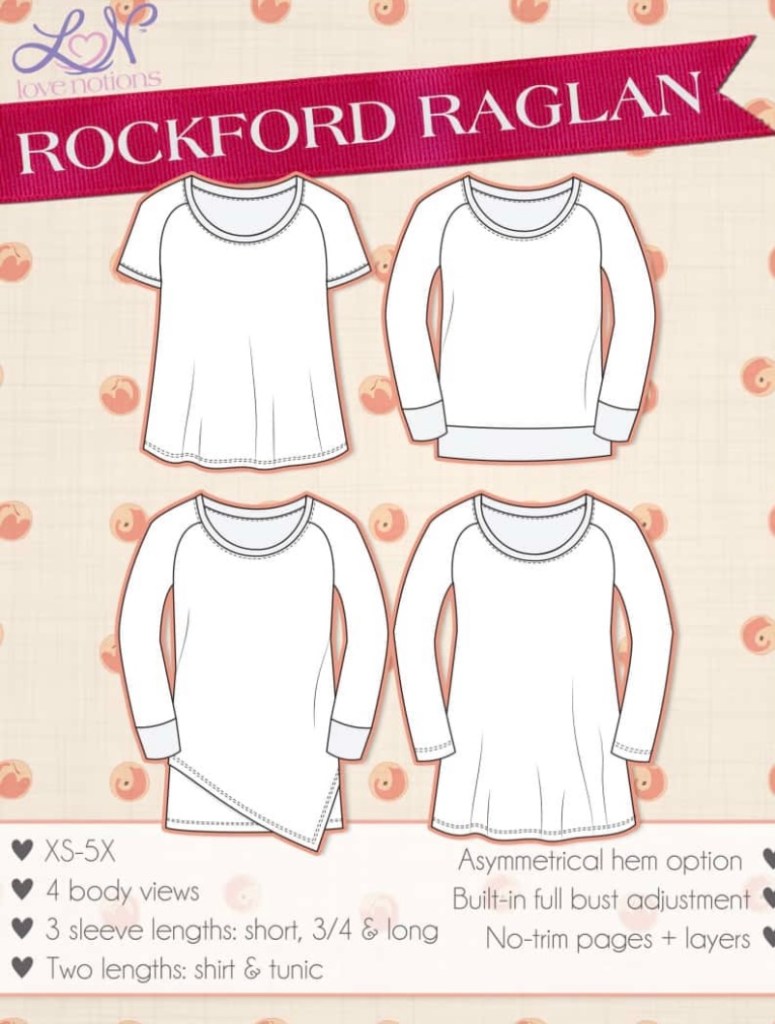
The Rockford Raglan is the perfect beginner pattern! It’s also a quick and satisfying sew for any sewist! It’s one of my most used patterns and I love how it can be so versatile!
The Rockford Raglan features 3 different versions. View A and B are fitted at the bust and flowy through the waist and hips. View C (which I have yet to make) has a slimmer fit and an asymmetrical hem. View D has a straighter boxier fit with a banded hem.
There are three sleeve options: short, 3/4 sleeve and long sleeves- with or without cuffs. There are two lengths included as well, top or tunic.
View B: Basic Short Sleeved
Last week I made my very first short sleeved version! Why did I wait so long to make one? As soon as I was finished taking photos for this blog post, I wore it the rest of the day! This version is made from a rib knit which is perfect fabric for this top!

Mily Mae Fabrics

Mily Mae Fabrics
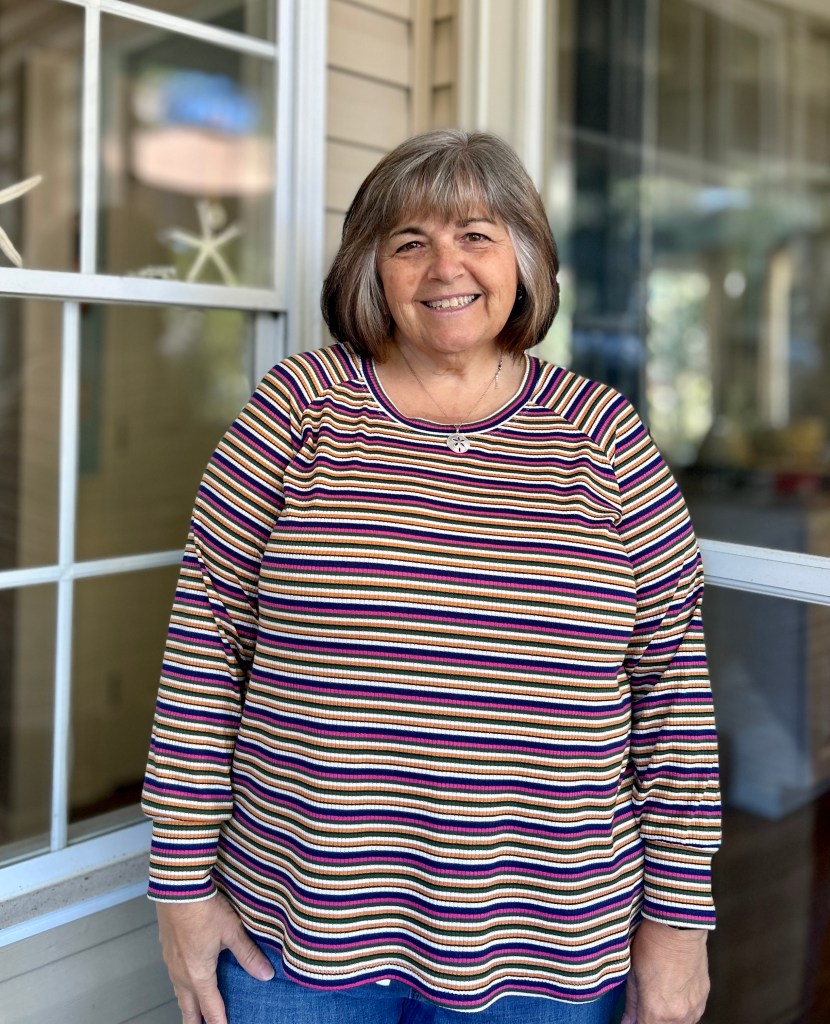
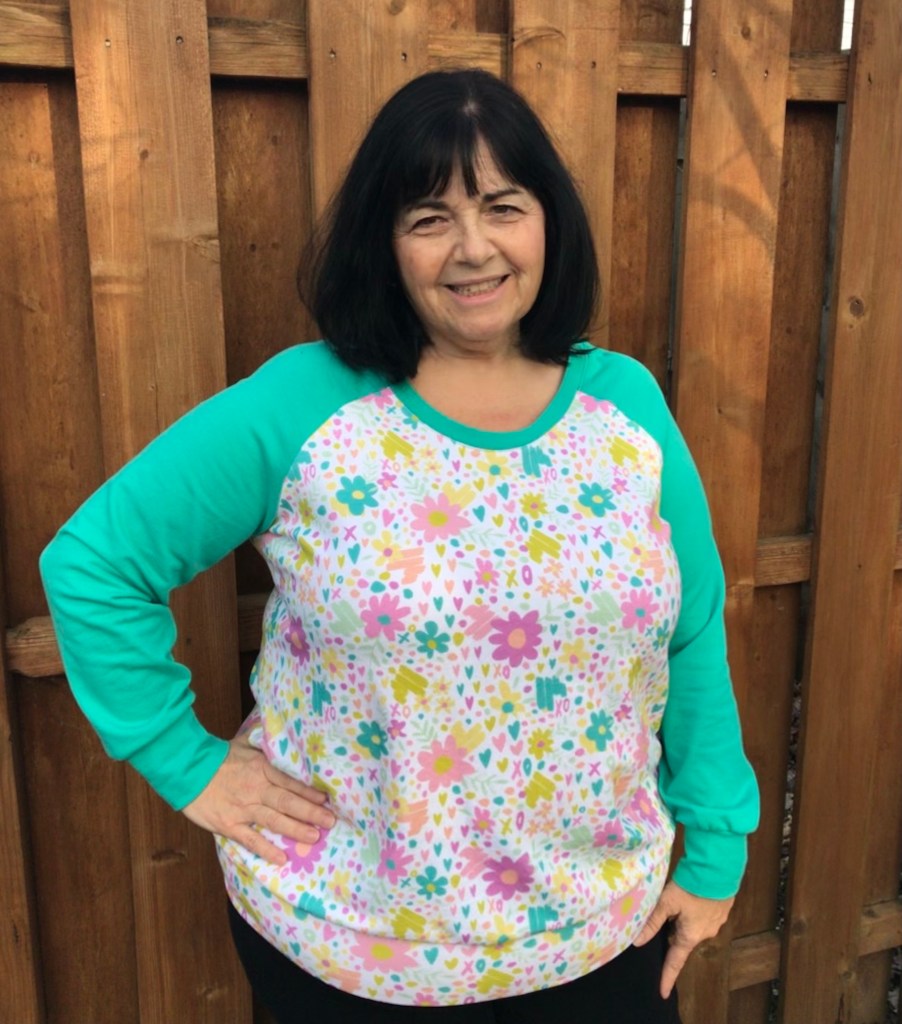
Basic View A- Long Sleeved
This is my most made version of this top! I make it in solids as a good wardrobe basic. I layer them all fall and winter with cardigans and vests. I color block it to use up scraps. The possibilities are endless with this pattern! The Rockfords below have been made with Baby French Terry, Ribbed Sweater knit, Hacci sweater knit and Rib knit. (Excuse some of the older poor quality photos that were taken long before I had this blog!)


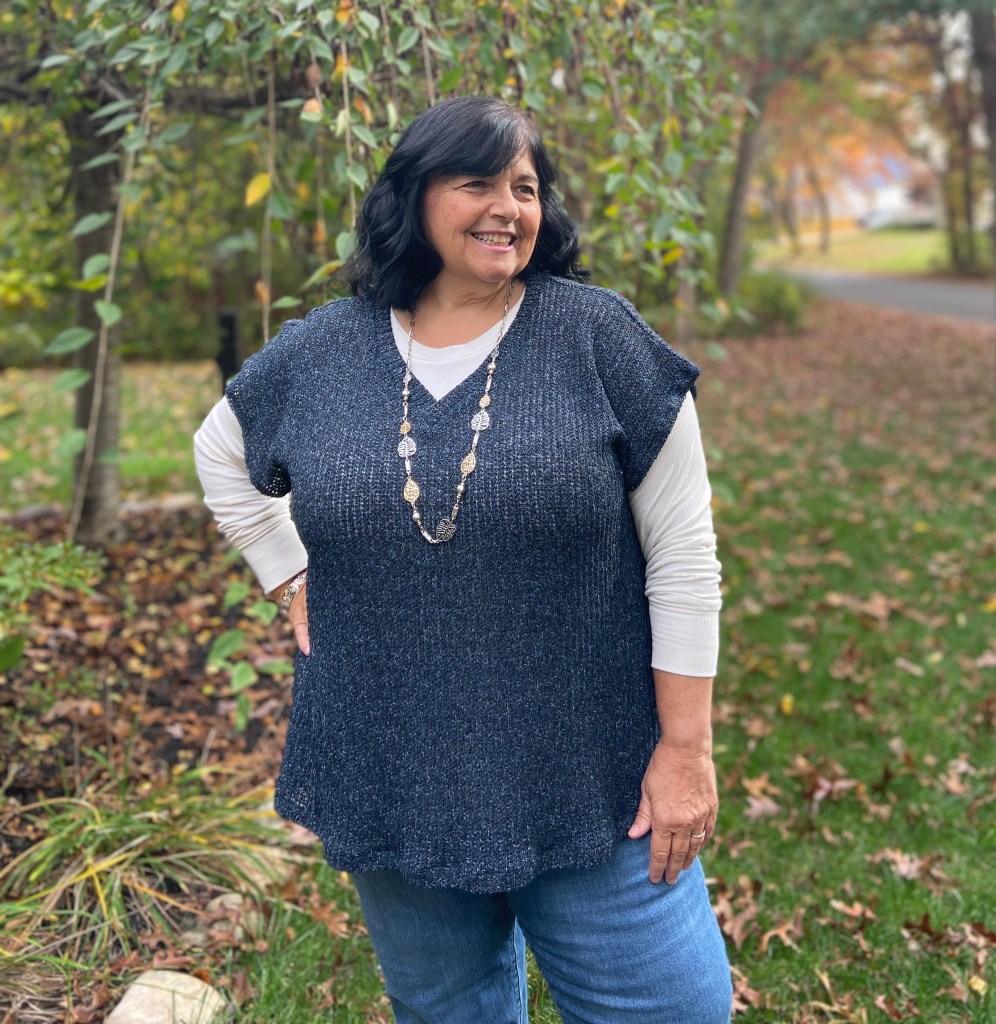
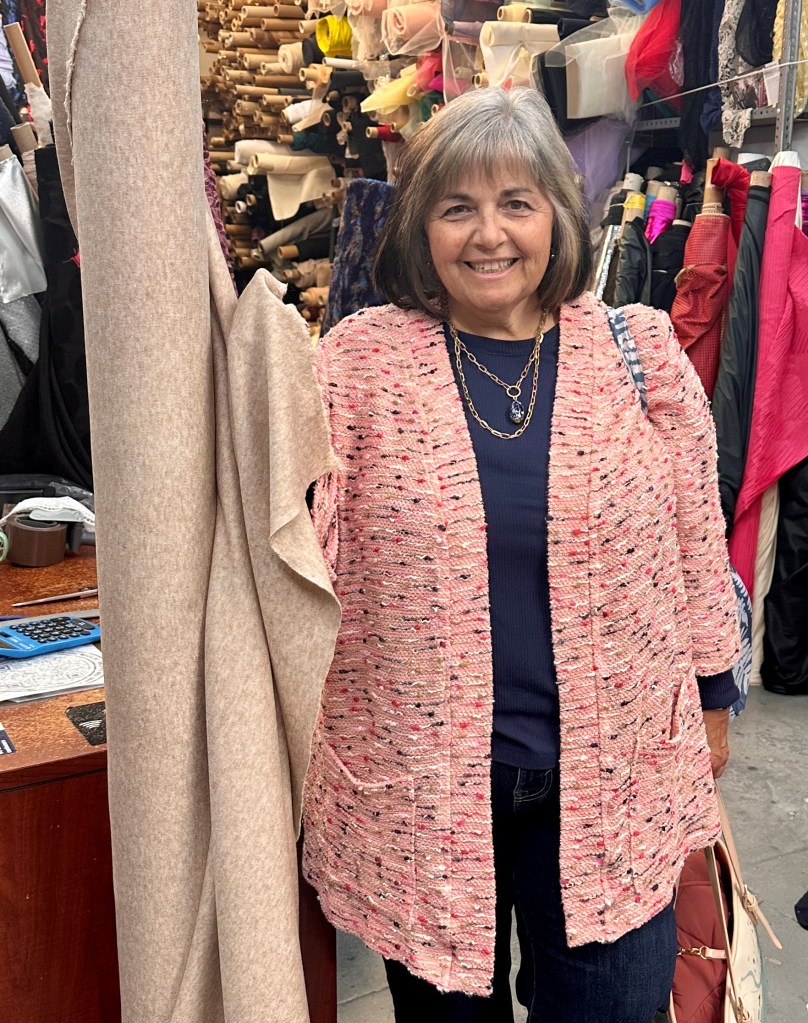
Layering with the Rockford
The Rockford is my go-to pattern for a long sleeved top for layering basics. I probably have 8-10 solid color Rockfords in my closet right now. I love wear them under vests and cardigan. In really cold weather I wear them as a base layer. I actually have 2 more on my cutting table right now. My favorite fabric for basics is rib knit. Here are some versions I’ve made that get worn constantly.

View D: Banded Hem
This is the fastest version to make! No hems, just bands! You will be surprised how fast you can whip up one of these! Last weekend I whipped up 2 new versions of this Rockford. I can’t wait for cooler weather so I can begin to wear them! The pink star version is made with a Hacci sweater knit. The color blocked version is made from a Triblend rib knit. Both fabrics are from Mily Mae Fabrics.
Hacci Sweater- Mily Mae Fabrics

Triblend Rib Knit- Mily Mae Fabrics
Rockford with the LDT Cowl
Did you know that the LDT cowl fits onto the Rockford Raglan!! It comes out sooo cute. It’s perfect for the cooler weather. This version is made from a Triblend baby French Terry that has a nice drape.

Triblend French Terry- Mily Mae Fabrics

Triblend French Terry- Mily Mae Fabrics
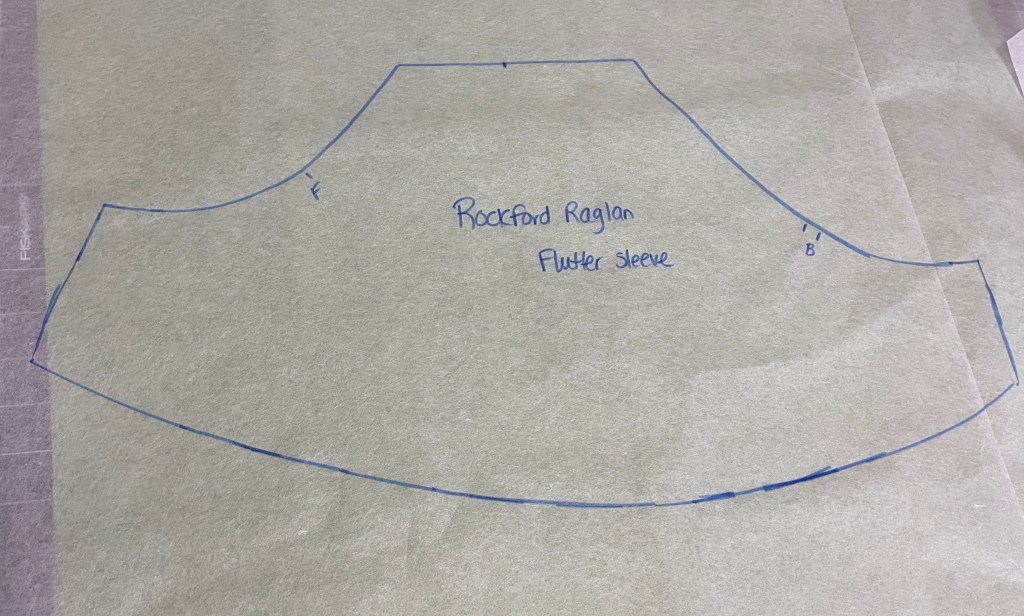
Rockford Hack: Flutter Sleeves
Sometimes, the hot weather calls for something nice and flowy. A raglan sleeve can easily be hacked into a flutter sleeve. The pink and blue color blocked version is made from the amazing Boyfriend Knit from The Fabric Snob. If you’ve never tried this fabric, you must! The sage floral is the new rib knit from Raspberry Creek Fabric. Their printed rib knit really is the perfect fabric for the Rockford. To me it is much cooler to wear than DBP.


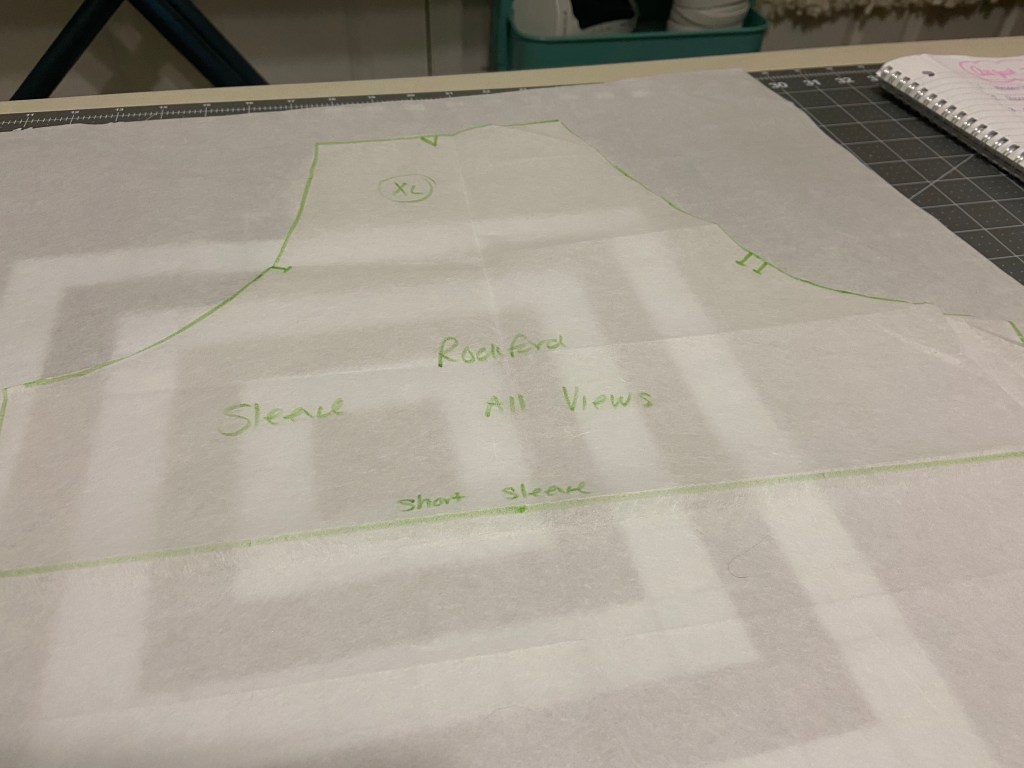
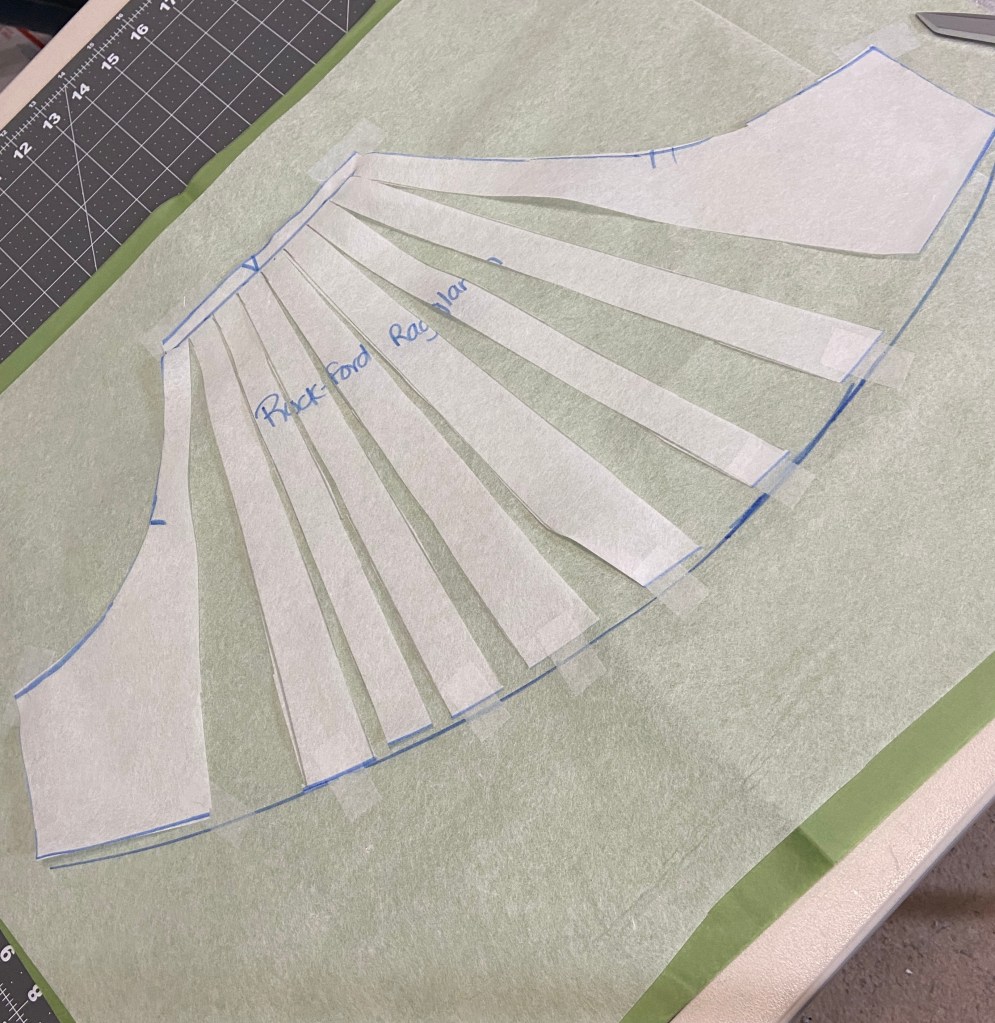
Quicks steps for the Flutter Sleeve Hack
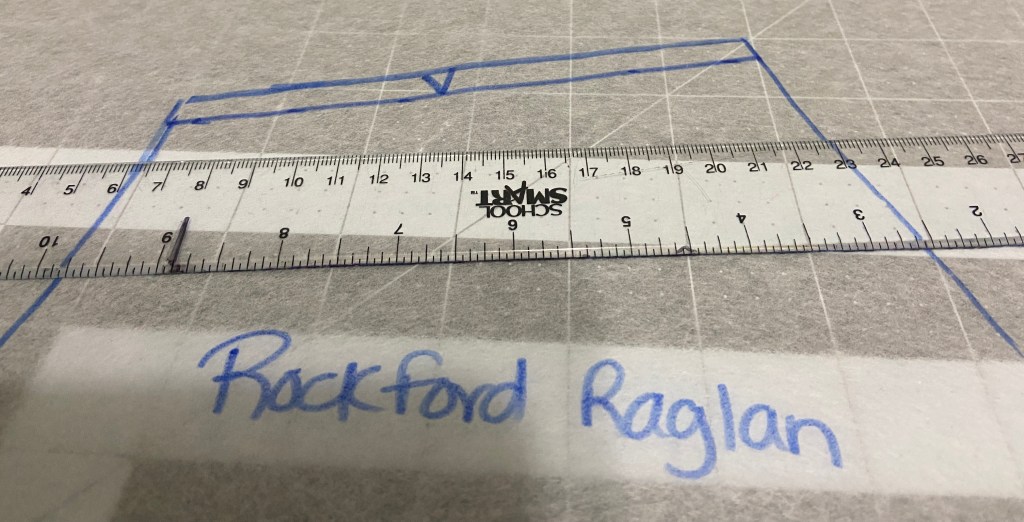
- Start with tracing your sleeve pattern piece on to paper, tissue or pattern tracing cloth.
- Mark the seam allowance at the top of the sleeve (3/8″)
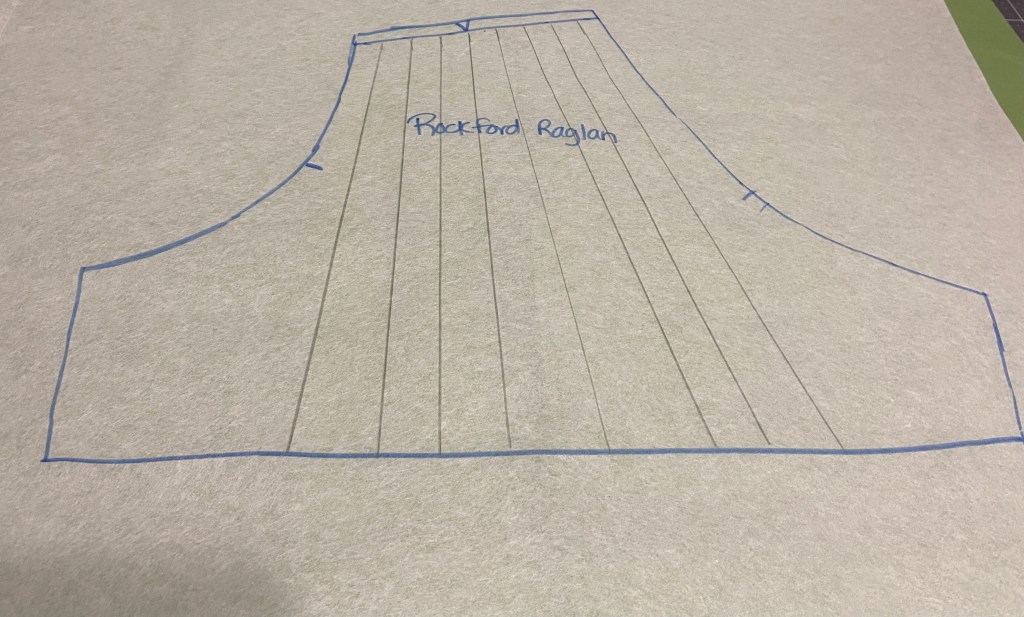
- Draw lines from the SA at the top to the sleeve bottom, space them as evenly as you can.
- Cut the lines, but stop at the SA line you drew at the top. This maintains the neckline shape.
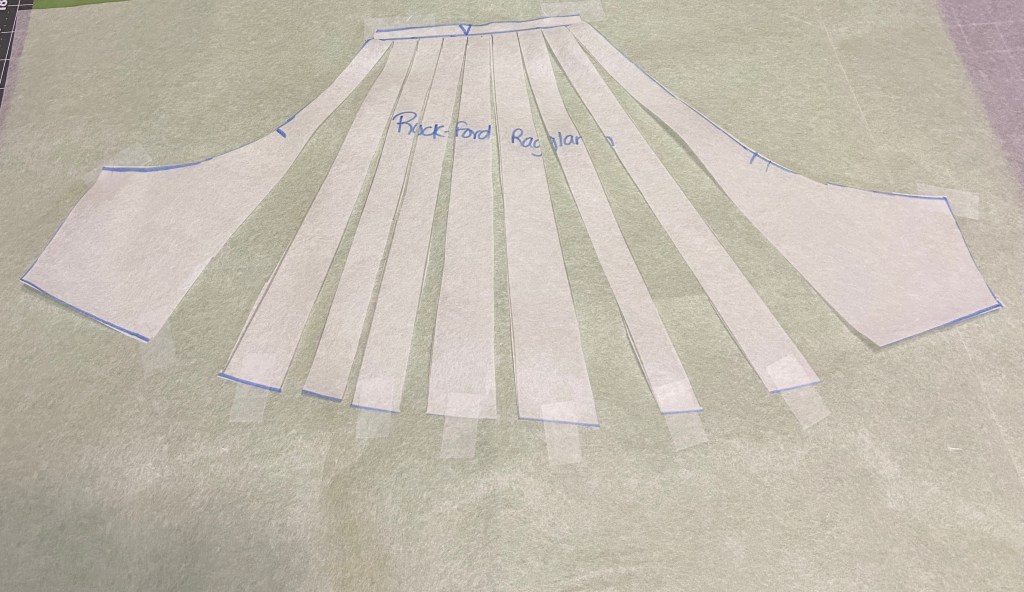
- Place this new cut sleeve piece onto tracing cloth (or tissue or paper). Tape the top in place.
- Spread the 2 outside sections as far a possible. Remember you are keeping the top curve the same!
- Spread the rest of the sections, tape in place.
- You will have created a rounded sleeve bottom.
- Draw a new sleeve hemline using a French curve(curved ruler) if you have one.
- Continue to trace all the cutting lines on your new pattern.
- Don’t forget to mark the front and back markings on your new sleeve piece!
- Remember when cutting, you must cut 2 mirror images 🙂

Rockford Hack: Rash Guard
If you follow me on Instagram or read my blog, you might know already that I kayak a lot! I used the Rockford to make 2 rash guards. I started with View D- straight version. I lengthened it, and left off the bottom band. I used the 3/4 sleeve, but tapered it in at the forearm for a tighter fit. Both of the Rockfords pictured below are made from swim knit from Raspberry Creek Fabrics.


Sizing
The Rockford is available in sizes XS-5X. There is a full bust adjustment front pattern piece included!
Remember to choose your size according to your high bust measurement. It’s important to get a good fit across your bust, so it doesn’t look too “tenty” – if that makes sense. For example, my high bust is 39″ and my full bust is 43″. This puts me in-between the L and XL. I found my best fit by using the Large with the Full Bust front piece. My hips measure into the XL. When making Views A and B- I stick with a Large because there is enough ease for my hips.(plus using the FBA piece does add about 2″ to the waist and hip finished garment measurements.). When making View D, I grade out to the XL for my hips.
Since I am only 5 feet tall, I have shortened the top 1 3/4″ and the sleeves by 1″
This is a great pattern for beginners, since it is so easy to fit.
Fabrics
Remember that different fabrics will make your Rockford fit differently. You can see this from all of my examples.
The Rockford is designed for light to medium weight knits. Fabric should have a least 40% stretch. The following would all be perfect for the Rockford: rayon jersey, ITY knits. Modal, French Terry/rayon blends and sweater knits. More stable knits such as cotton lycra are not recommended. Some sewists like the structured fit you can achieve with cotton lycra. Personally it isn’t my first choice.
These two versions below are both made from Cotton Spandex. The one on the left doesn’t get worn very often. I find the sleeves in Cotton spandex to be uncomfortable. As you can see, they look a tad tight. I suggest adjusting the sleeve if you want to use this fabric base. The version on the right is a Cotton Spandex French Terry. The banded version works well for this fabric.
All fabrics below are from Raspberry Creek fabrics and were gifted to me when I was a Strike-Off Seamstress in 2020.

Sew Mary Mac’s Tips For Perfect Neckbands
- First and foremost– achieving the perfect neckband takes practice! Take your time!
- For perfect neckbands make sure you mark the 1/4 points on the neckband and neckline. Match up the center fronts, center backs and 1/4 points.
- BASTE FIRST! I still baste my neckbands on first. It’s much easier to take out basting stitches.
- Press neckbands to remove any puckering. Remember pressing and ironing are not the same thing! Use steam and a press cloth.
- Remember that the pattern piece may not be the exact size you need for your fabric. Knits without good recovery may need to be made slightly shorter. I have found this the case with sweater knits and waffle knits.
- Even the most experienced sewists put a neckband on backwards from time to time. The raglan sleeves makes it harder to distinguish the front from the back. I always label the back with a small piece of tape to try to avoid this. Sometimes I’m in a hurry- and I skip this step- then I’m always glad that I basted my neckband on!
- For those of you who are more visual learners- check out this video on the Love Notions Blog on sewing neckbands.
Thanks for stopping by! I truly appreciate all of you that visit! If you enjoyed this blog post, consider subscribing to my blog to stay up to date with all my posts!
MaryAnne 🙂
Remember to follow me over on Instagram to see all my latest makes! @sewmarymac
You can also follow my Facebook Page~ Sew Mary Mac. On this page you will find information on my makes from all pattern companies. If I know of any good sales(pattern or fabric) I will also feature this information. I have had many of my loyal followers send me friend requests on Facebook. I do post in the Love Notions group under Mary Anne MacLean, however this Facebook account is private. There is no sewing content on that Facebook Account.
Purchase the pattern HERE. This is my affiliate link. It costs you nothing to purchase from this link, it just helps me add to my fabric stash!
To receive an additional 10% off the pattern price, use this coupon code LOVEMARY10. This coupon code can be used at anytime on any pattern….even a $5 Feature Friday pattern. My code does change quarterly, so please always check the newest blog post for an update if you find a code isn’t working.
I purchased this pattern a few years ago, long before I was a Love Notions Brand Ambassador. It is one of my TNT patterns! All opinions of this pattern are my own.
As stated earlier, please excuse some of the poor quality photos. I discovered this pattern when I first began using PDF patterns, long before this blog existed and before I put much effort into my photos. But, I wanted to show you as many versions of the Rockford as I could 🙂
The fabrics used for these tops were mostly purchased by me, except the Blue Ditsy Triblend French Terry which was was given to me by Mily May Fabrics as a member of their Promo team. As stated above, a few were given to me from Raspberry Creek Fabrics as well.
Here are some of my favorite online shops for knits perfect for the Rockford Raglan:


Pingback: Sloane Season Is Here! |
Pingback: My Top 5 Love Notions Patterns |
I love all the information you have on the different options for the ragland. I am learning so much. I’m starting to make tops for a lot of friends.
LikeLike
I love the Rockford Raglan, and love your hack with the cowl neck from the LDT. I think I will try it!
LikeLike
I love that I can combine/hack so many LN patterns! I look forward to seeing who you make!
LikeLike
Pingback: Sewing For My Post-Holiday “Fluffiness” |
Any thoughts on adjustments for rounded back and forward shoulders?
LikeLike
If you go to the Love Notions website and search their blog you will find help on many common alternations.
LikeLike