
……A New Pattern Release From Love Notions!
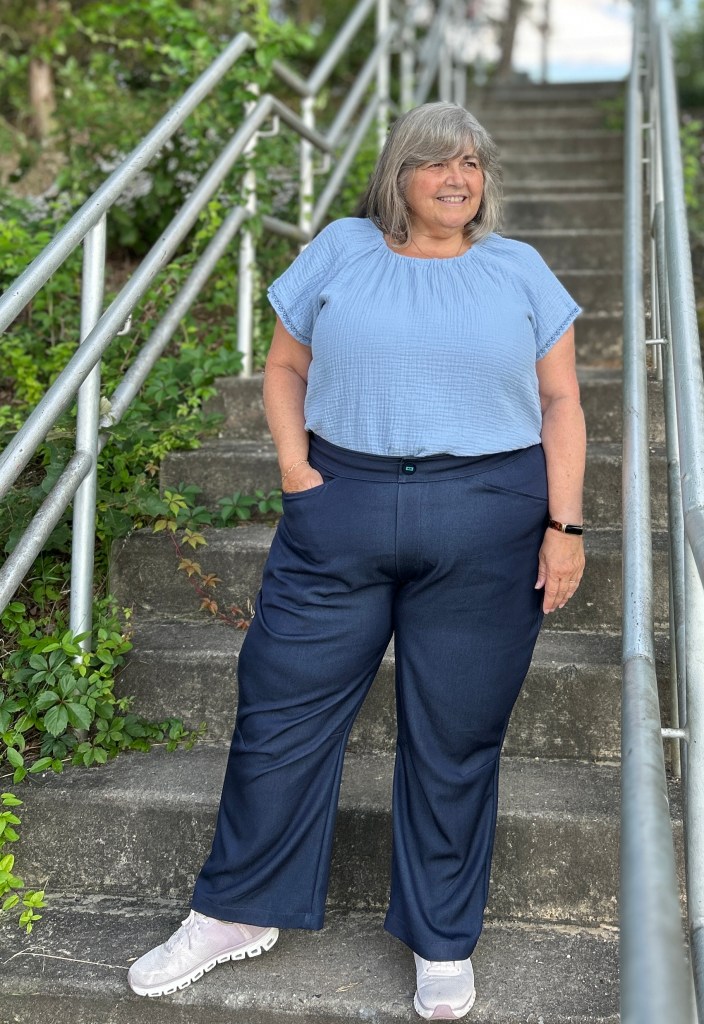
I am so excited for this new pattern release! I jumped at the chance to test this new pattern, even though I NEVER sew pants for myself! I admit, I have a hard time finding pants that fit my full hipped and short body~ and I am amazed at how these fit me~ read more on that below.
The Meadowlark Hiking Pants are here! Hiking not your thing? No worries, I think you’re still gonna love them! They are on sale today, 7/29/25 through 8/4/25 for $9.50. You can use my code 10MARYMAC for an additional 10% off. You can grab the Meadowlark Pants pattern HERE.
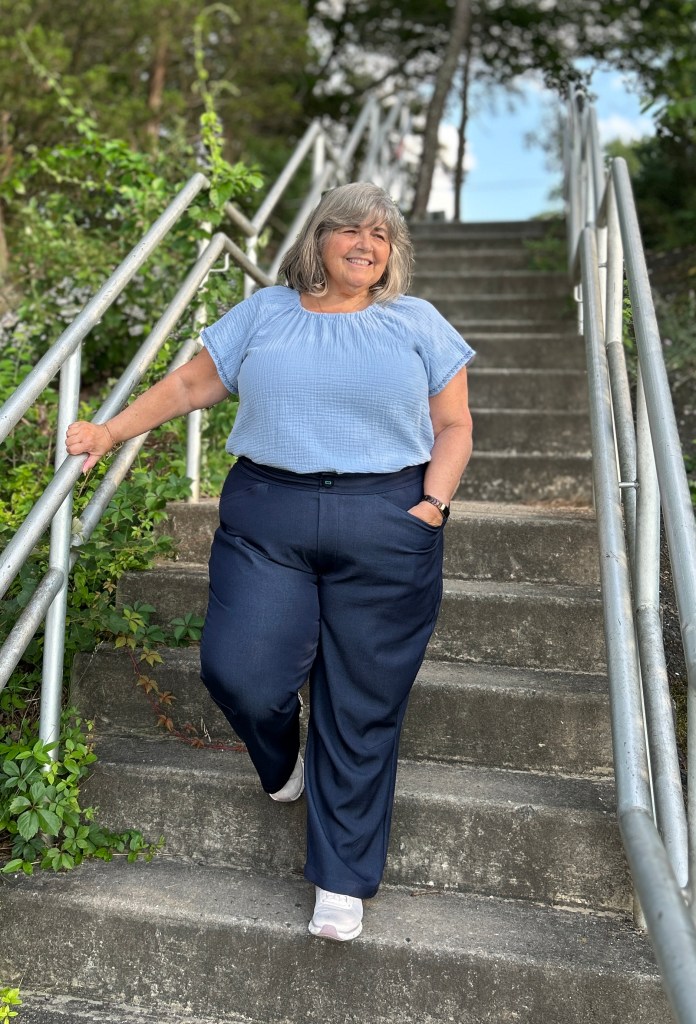
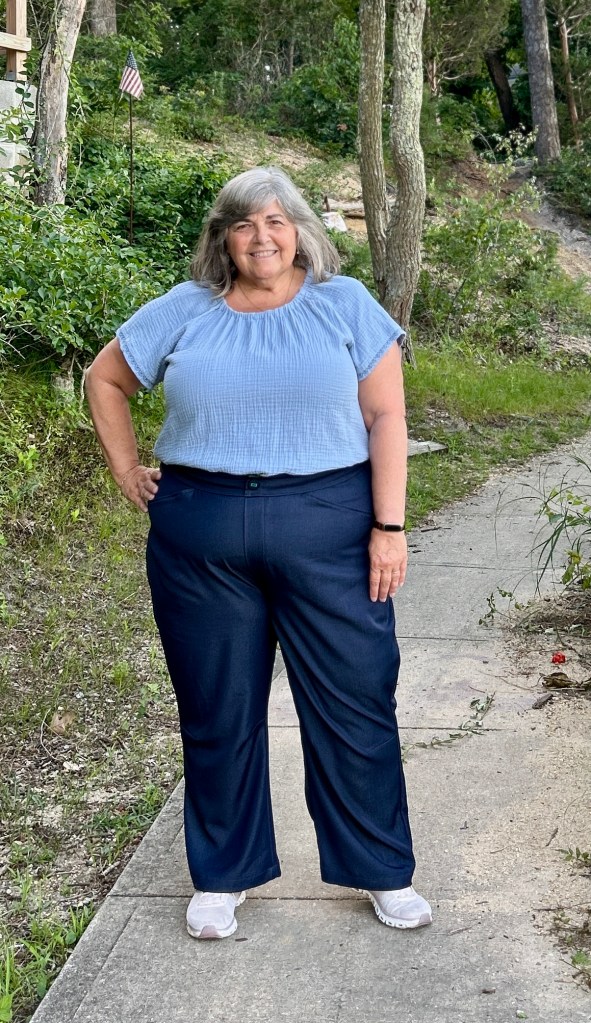
Personally, I made these pants for bike riding. These will be great for when the weather cools down and I no longer want to wear my Tinley Skorts. But, these pants are great for just about any activity~ not just hiking! The Meadowlarks also sew up into the cutest pull on casual pant! I’ve somehow managed to take this hiking pants pattern to coastal preppy! See pics below!
The Details
The new Meadowlark pants combines practicality, comfort AND style all into ONE pants pattern! Depending on what options you choose and your fabric choice, these pants can be sporty, casual or even work appropriate! There are so many pocket options to choose from~ add them all or leave them all off for a dressier look. A usual I
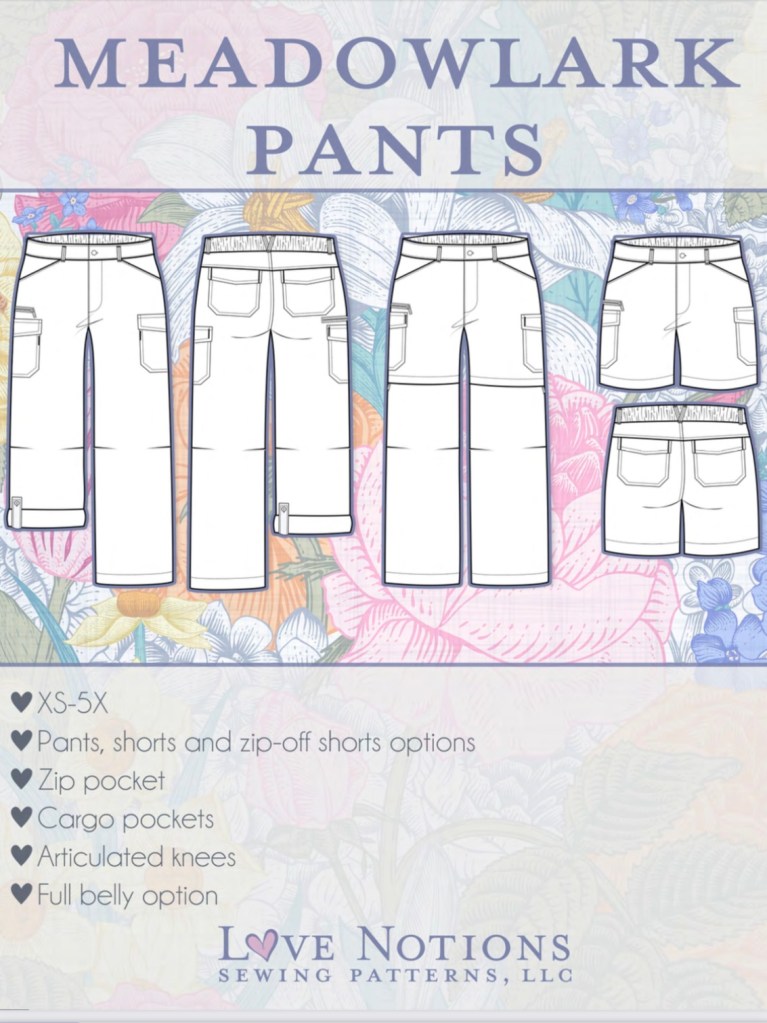
- Sizes XS-5X
- Pants, Shorts and Zip-Off Shorts
- Pull-On Pants with Elastic Back Waist
- Full Belly Option
- Large front pockets, perfect for any phone!
- Zip Pocket
- Cargo Pockets
- Back Pockets
- Articulated Knees
- Faux Fly
- Tabs for Rolled Up Hem
- Designed for Wovens
- Skill Level: Intermediate or Confident Beginner(if leaving off some of the pocket options)
“Articulated knees” simply means that there are darts on the front leg at the knee area. This gives you enhanced. mobility~ which can be extremely helpful when hiking, bike riding or gardening!
Making My Meadowlark Pants My Own…….
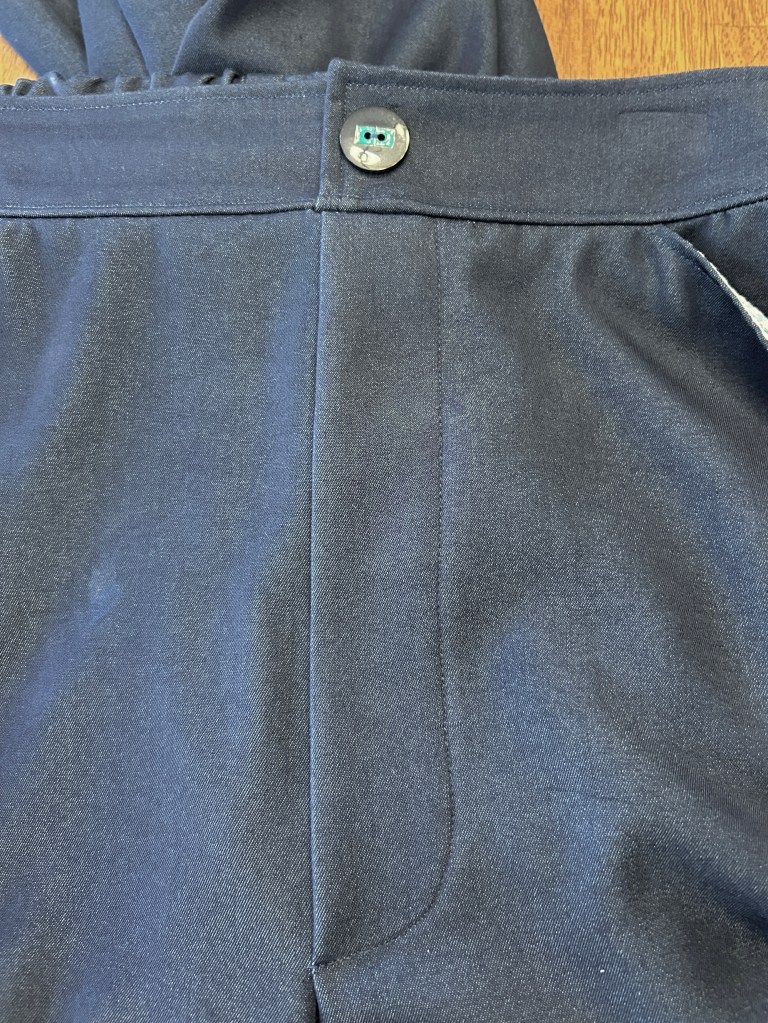
I lined my front pockets with seersucker and added a vintage navy blue and green button to achieve just the vibe I was going for! FYI the front pockets on these pants are awesome!


Meadowlarks VS Other Love Notions Pants
Curious to see what they difference is between all the Love Notions pants patterns? Here’s a reference chart to help you see the differences between them.

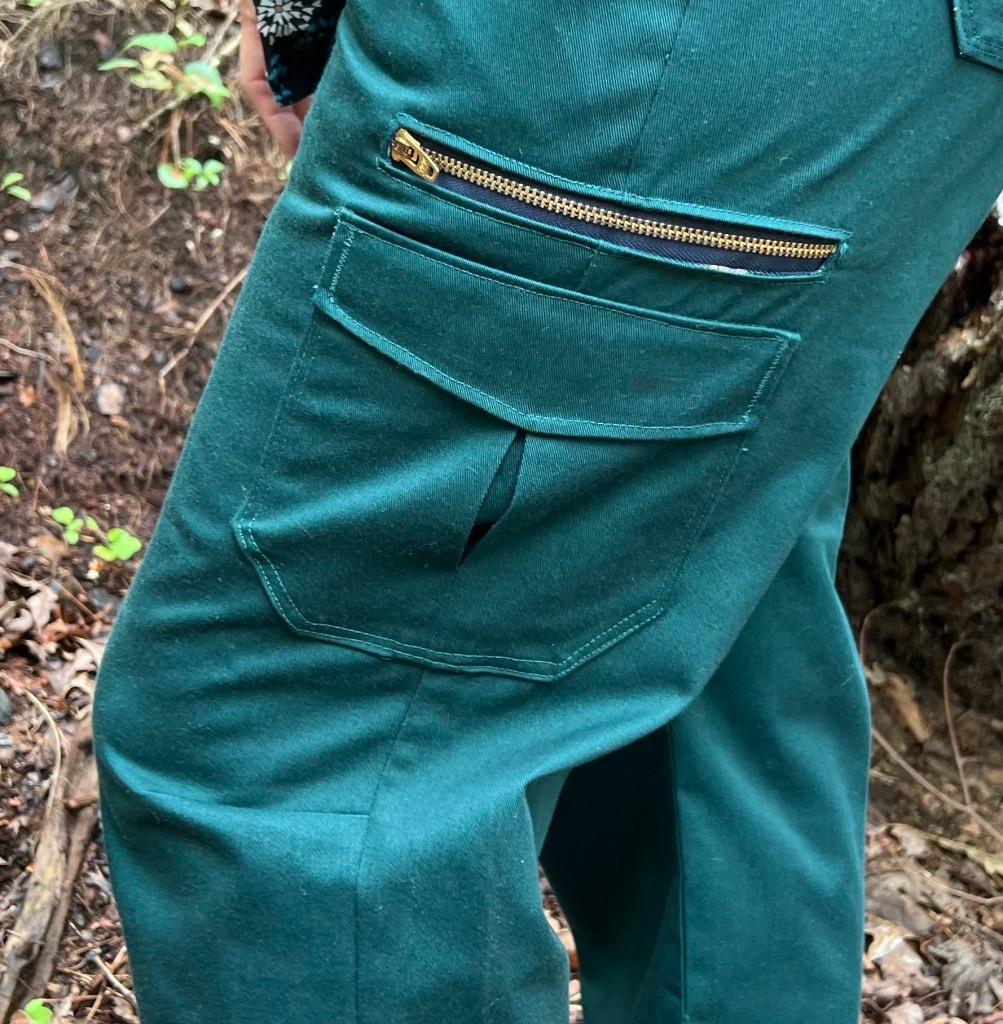
Is hiking your thing? Then check out these Meadowlarks that tester Pamela Holmes made. She selected ALL the pockets~ even the zipper pocket on the leg! I wanted to show you how different my pants look from hers. Aren’t hers gorgeous!?!? You can follow Pam over on Instagram @the.clever.hen

Sizing And Fit
The Meadowlark Pants are available in sizes XS-5X. Choose your size based on your hip measurement. (grade for waist or thighs as needed). If in-between sizes choose the smaller size. A Full Belly Adjustment is included if needed/wanted. A Fully Belly Adjustment is a great option to choose when:
- Your waist is much larger than your hips.
- Your hip measurement puts you into a smaller size than your waist does
- If you need a longer rise.
By using the FBA~ you are keeping the correct size for your hips while giving you more room in the waist and rise.
All Love Notions patterns are drafted for the average 5’5″ woman. When adjusting for length, you will want to do so above the knee and below the knee as needed. You want the knee darts to hit at the middle of your knee. Remember to check the placement of your tabs(for roll up option) if you lengthen or shorten your pants.

My Sizing, Alterations and Fit
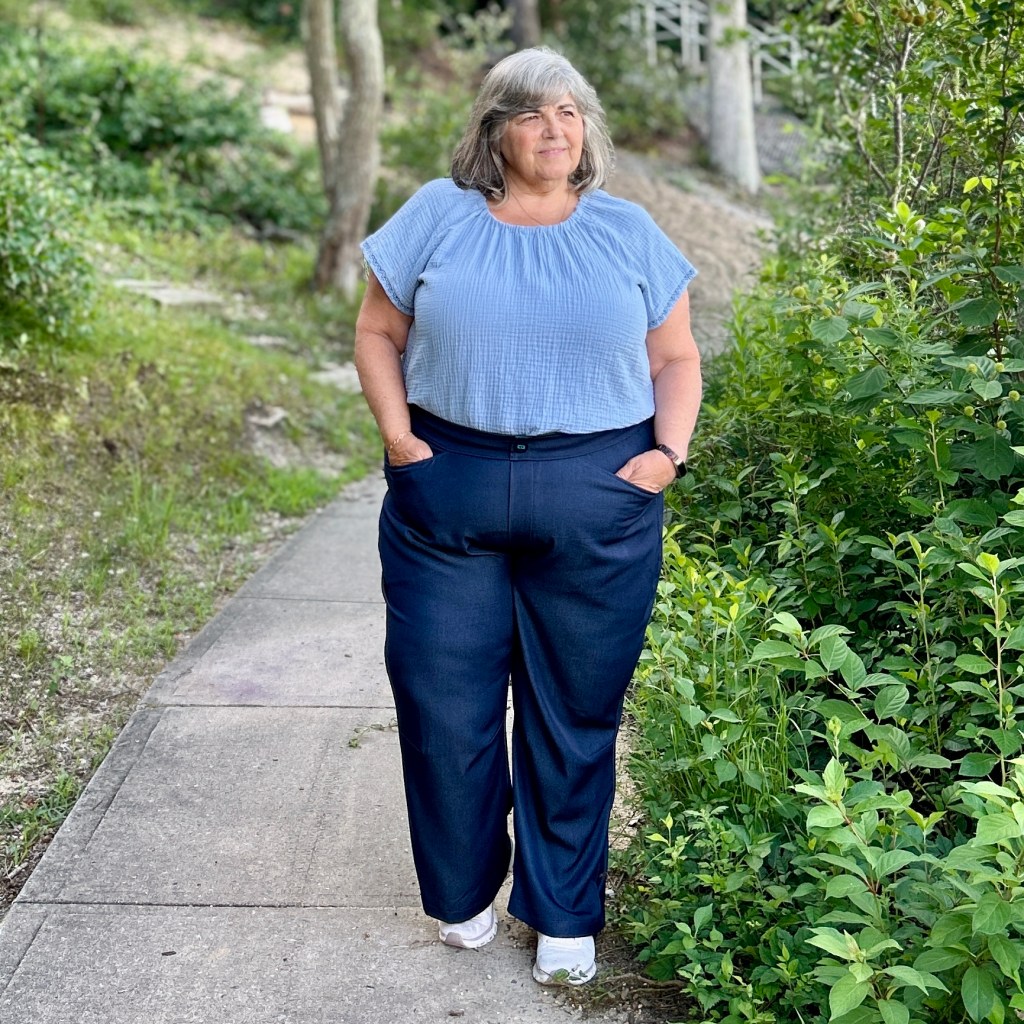
For my version of the Meadowlarks, I made a straight size 3X. My hip measurements put me in between the 3X and 4X. I went with the smaller size as directed in the pattern directions. I made no alterations other than length. This was absolutely the right size for me.
Although I feel like I have a full belly, the FBA is NOT a good adjustment for me to make. My waist is significantly smaller than my hips. I have a very full HIGH hip~ which makes elastic waists (full or partial) most suitable for me.
Length Adjustments
I am just 5 feet tall. I took out 1.5″ above the knee and 3.5″ below the knee. This adjustment still didn’t bring up the knee darts to the middle of my knee, so next time I will take up 2.5″ about the knee and 2.5″ below the knee. I did make a larger hem than the pattern called for. Since my fabric was drapey I wanted to have a deeper hem so the hung nicely. Keep that in mind if you shorten or lengthen your pants.
I have stated before, I NEVER sew pants for myself for many reasons. I was SO pleased with the fit of these pants without any special alterations! I am sure I can perfect the fit of these. (The wrinkles in the back crotch area particularly.). I look forward to finding the right fabric and doing so!
Fabrics and Notions
The Meadowlark Pants are designed for woven fabrics. Stretch woven can be used but are not necessary. Fabrics such as ripstop, twill, linen, chambray and denim(light-mid weight) will work nicely. Again, a stretch woven is not required~ but you may find that it may increase your mobility when wearing for certain activities such a hiking and gardening. I think a stretch linen would be perfect for this pattern~ it just might be what I sew up next!


For my Meadowlarks, I used a Stretch Cotton, Tencel and Spandex lightweight denim. It was more like a heavy chambray than a denim. There was only 5% horizontal stretch and no vertical stretch. I LOVE this fabric, however I felt it had a bit too much drape for the look I was going for. I love the fit through the waist, hip and thigh area, however I feel the legs are a bit more drapey than I prefer. This is something to think about when selecting your fabric.
It was purchased from Cali Fabrics and is listed as a “midweight” at 220 gsm, which is approximately 6.49 oz. The fabric is 58″ wide. You can find this fabric HERE.
Notions
- Thread
- Fusible Interfacing
- One 1/2″ or larger button for front waistband(not functional)
- 2″ wide elastic (see chart in pattern for amount needed)
- Optional notions include~
- One 7″ zipper for the zipper pocket
- 2 1/2″ buttons for the tabs (for rolling up pants)
- 2 separating zippers for the zip off leg option (see chart in pattern for lengths)
Sewing Mary Mac’s Tips For Sewing The Meadowlarks
- If using a thicker fabric, consider using something lighter weight for the pocket bag. Or just use a fun fabric just because like I did.
- Be sure to transfer ALL markings, especially if your fabric doesn’t have a right or wrong side. Clearly mark all the wrong sides with chalk (or tape)
- For front waistband pieces, I clearly marked them as left and right to avoid confusion later.
- Don’t skip marking the center back of the back waistband~ it’s important!
- Page 9, Step 1~ Stitch 3/8″ around pocket edges to give yourself a pressing guide. Also finish all the pocket edges before pressing in the sides~ this will give a more professional finish and is important if your fabric frays.
- Page 9, Step 2~ Check your back pocket placement before you stitch in place. I moved my pocket 1/2″ in towards the center back seam.
- Page 10, Step 2~ When folding the fabric to create the faux fly, use the pocket lining piece as a guide to guarantee you folded it correctly. (This is what I did)
- Page 16, Step 2~ I changed the back waistband construction to make it easier to sew. After stitching the top edge of the of the back waistbands RST, turn WST and press. I then basted the lower edges together 1/4″ from the lower edge. I then proceeded to insert the elastic as directed.
- Page 16, Step2~ I did NOT do two rows of stitching through my elastic as instructed here. (This was added to the tutorial after my final was completed). Be aware that if your elastic does not have good recovery this can stretch out the elastic making the back waistband too large. If you want these rows of stitching, make sure you test your elastic by stitching through a sample piece, measuring it before and after the stitching to see if it stretched. I stitched through my elastic at the center back to keep it from twisting or folding over.
- Page 17, Step 5~ After attaching the front waistband to the back waistband topstitch along the top edge of the front waistband and down the edge BEFORE attaching your button.
- Page 17, Step 7~ If your fabric is thicker, you may want to press your waistband seam allowance DOWN when topstitching along the bottom of the waistband. I know this stitching won’t catch the seam allowance but this is really for looks only. The seam allowance will naturally stay down.
Thanks for stopping by! I truly appreciate all of you that visit! If you enjoyed this blog post, consider subscribing to my blog to stay up to date with all my posts!
Mary Anne 🙂
Remember to follow me over on Instagram to see all my latest makes! @sewmarymac
You can also follow my Facebook Page~ Sew Mary Mac. On this page you will find information on my makes from all pattern companies. If I know of any good sales(pattern or fabric) I will also feature this information. I have had many of my loyal followers send me friend requests on Facebook. I do post in the Love Notions group under Mary Anne MacLean, however this Facebook account is private. There is no sewing content on that Facebook Account.
You can grab the Meadowlark Pants pattern HERE.
This is an affiliate link. It costs you nothing to purchase from this link, it just helps fund my fabric addiction which allows me to test and review more patterns.
These are affiliate links. It costs you nothing to purchase from these links, it just helps fund my fabric addiction which allows me to test and review more patterns.
To receive an additional 10% off the pattern price, use this coupon code 10MARYMAC. This coupon code can be used at anytime on any pattern….even a $6 Feature Friday pattern. My code does change quarterly, so please always check the newest blog post for an update if you find a code isn’t working.
Fabric Resources
For my Meadowlarks, I used a Stretch Cotton, Tencel and Spandex denim, with a 5% horizontal stretch and no vertical stretch. To me is it was more like a heavy chambray than a denim. Because of the Tencel content, it is not super structured like denim and has a nice drape to it.
It was purchased from Cali Fabrics and is listed as a “midweight” at 220 gsm, which is approximately 6.49 oz. The fabric is 58″ wide. You can find this fabric HERE. (I think this fabric would make a great dress!)

Love all your outfits!
LikeLike